
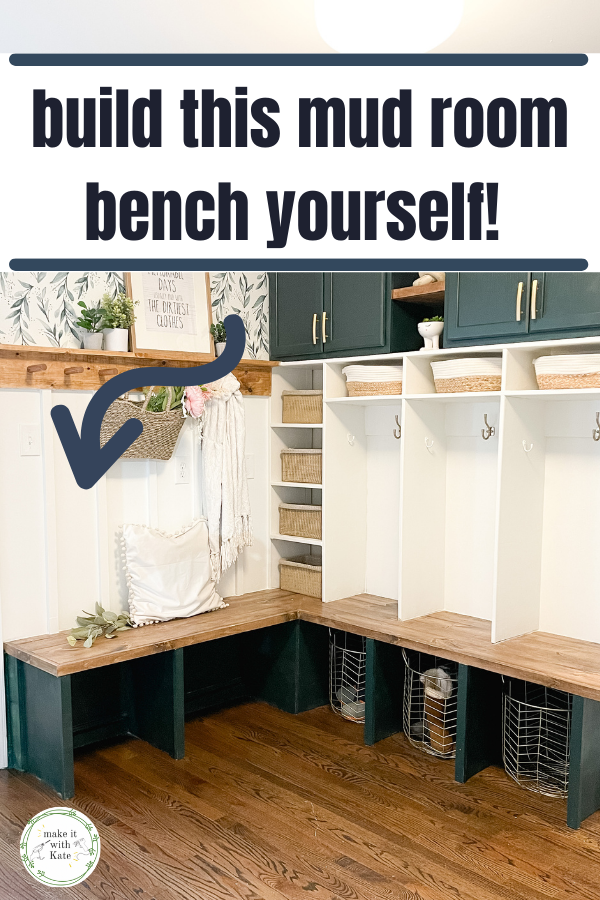
This post is the first of a 5 part series learning how to build a complete mud room. The DIY mudroom bench is the base of a built in open locker and cabinet top build for storage. However, this bench has cubby holes underneath and can be used as a standalone item as well.
It’s a fun and functional DIY building project that is great for any home.

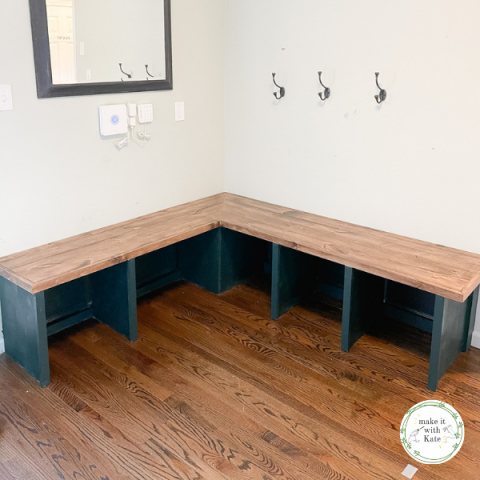
DIY Mudroom Bench with Open Cubbies Underneath
This DIY mudroom bench is a corner bench used to support more storage above.
It contains open cubbies underneath where a basket or storage bin can be placed. It does not have a riser or a base built underneath for easy access to the storage below.
This bench is constructed out of plywood and common boards, and is a pretty simple design!
Supplies needed for the corner mudroom bench
- 3/4″ sanded plywood (make sure to get the finished sanded plywood it has a much nicer finish!)
- 1″x6″ common board
- 1″x2″ common board
- circular saw (or table saw)
- miter saw
- drill with drill bit to match the screw head
- nail gun
- level
- orbital sander with 80 grit, 120 grit and 220 grit sandpaper
- Kreg Jig pocket hole tool
- 1 1/4″ pocket hole screws
- 1 1/4″ wood screws
- 1 1/4″ finishing nails
- stud finder
- wood glue
- wood filler
- caulk
- wood stain (I used Varathane Early American)
- paint (optional: the base of this is painted with Benjamin Moore Salamander)
- polyurethane sealer
Building a mudroom bench
I’ll be laying out the steps below in the order that I assembled the bench. I won’t provide exact measurements for you to replicate because this is a custom build, and the dimensions will likely be different than what you would need, but I will explain how I spaced and measures certain pieces.
Step 1
Step 1: Measure your space and draw out your design on graph paper. This will help you draw to scale and get an idea of how this bench will fit in your space. Then decide if you want to just to a straight bench or a corner bench like the one made here.
Step 2
Step 2: Purchase your lumber and make a cut list. Refer to the supply list above to see they type of lumber used here. This bench is made of plywood and common board.
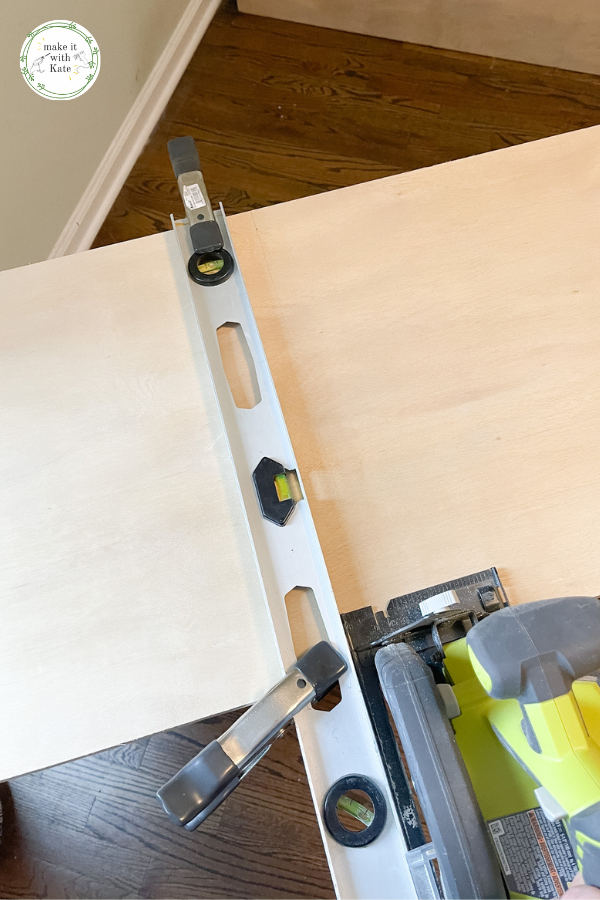
Step 3
Step 3: Cut the bench top out of the 3/4″ plywood. My bench tops were 69″ long and 46″ long, and 18″ deep and 15″ deep respectively. I cut these in straight cuts with the circular saw and didn’t worry about the corner coming together, as there will be another layer of bench top that will show.
I made the bench tops different depths because of the way this bench was fitting into our room. One side of the bench was going to have lockers built above and I wanted to make sure there was still space to sit.
For this design, I built the two benches separately and detached from the wall, then placed the two pieces together in the corner to create the corner bench.
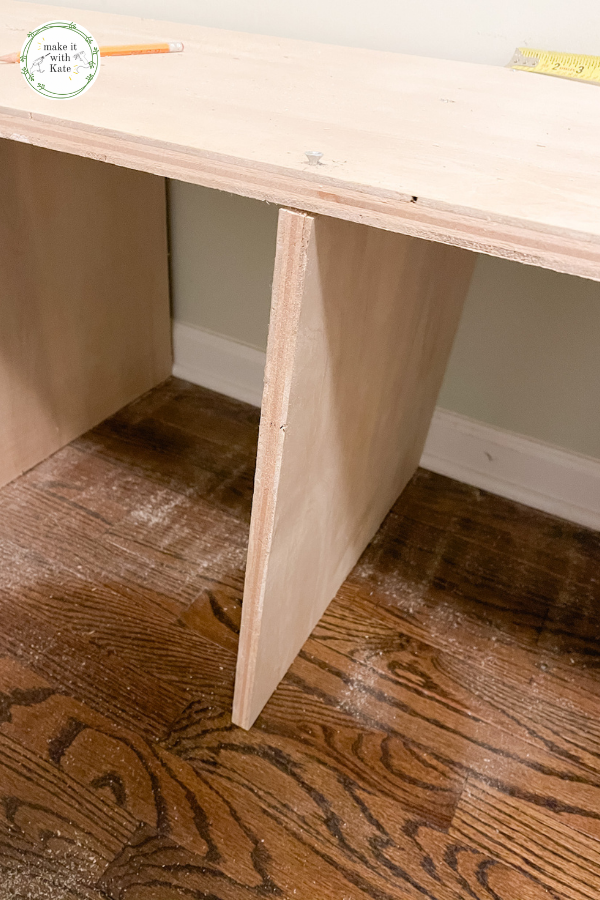
Step 4
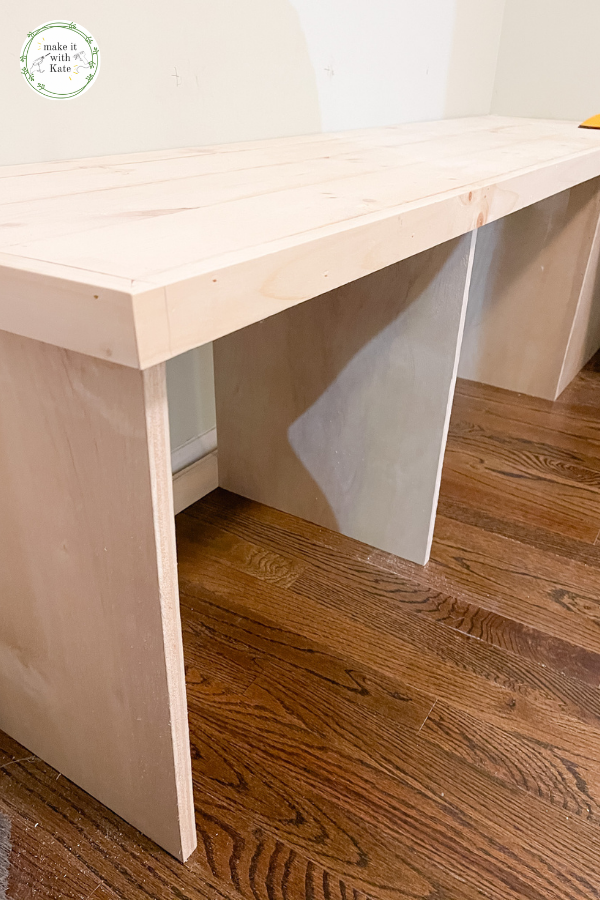
Step 4: Measure and cut the cubby walls out of the remaining 3’4″ plywood which will also help support the bench weight. These can be attached with pocket holes, but because this bench top would be covered, I drilled straight through the bench top into the cubby walls with 1 1/4″ wood screws.
Attach all of the cubby walls so that your bench looks like the image below. If you are making a corner bench, think about where the two benches will come together and make that your last cubby space on the longer bench.
Tip: Pre-drill the holes for the wood screws to avoid the plywood splitting.


Step 5
Step 5: Add back supports to the bench. Cut the 3/4″ plywood into 3″ wide pieces and to the length of the space in between each cubby.
Drill two pocket holes into each end of the 3″ support pieces and attach them to the inside of the cubbies with the pocket hole screws.
Attach support pieces to the top and bottom of the back of each cubby. (This is what you will use to attach the bench to the wall once completed.)
Step 6
Step 6: Attach the two benches together. Place the benches together and screw together by going through the short bench side into the long bench last cubby and end piece.
At this point you should have a completed corner bench with cubbies and support braces! Now it’s time to add another layer to the bench top and and front trim.
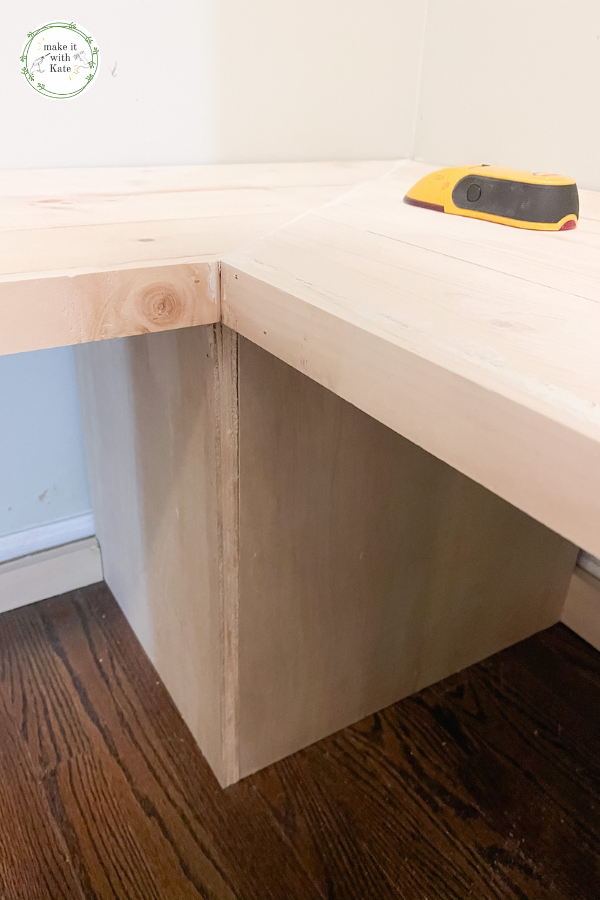
Step 7
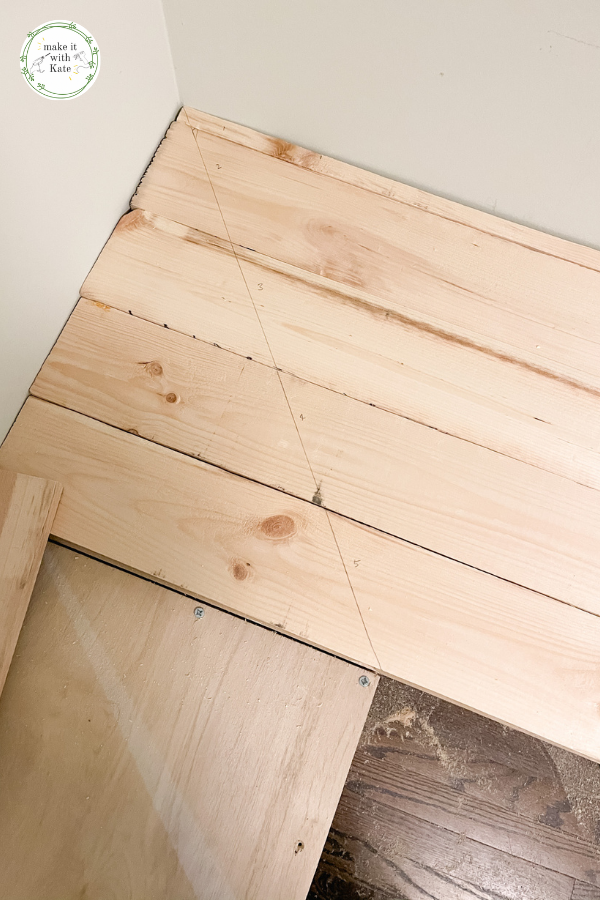
Step 7: Create the second layer of bench top. Lay the 1″x6″ common board across the bench tops to figure out your spacing. If you are making the corner com together at an angle, cut these angles first before cutting the length of the board. It gives you more room for error, which is easy to do when cutting angles!
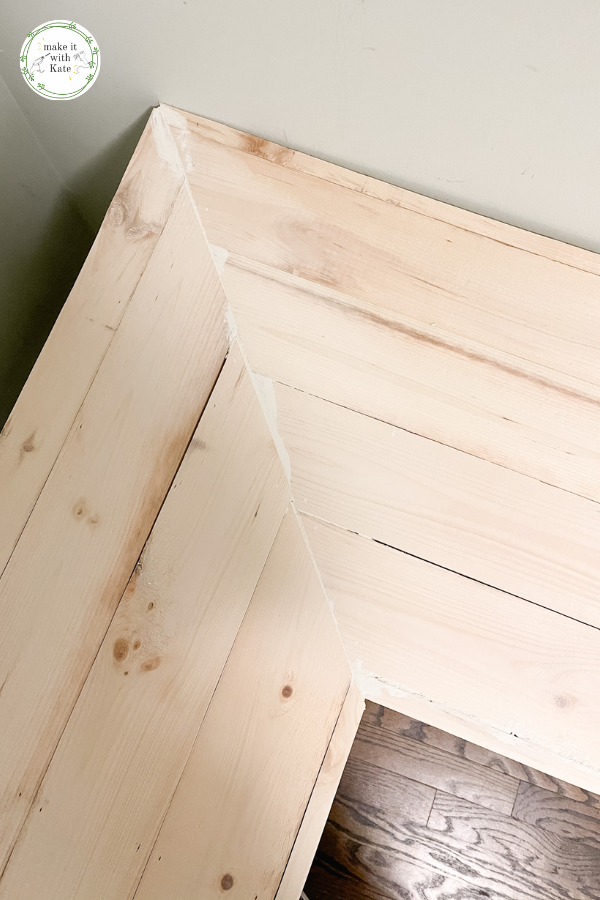
To make the corner of the bench, use the miter saw to cut the angles on the common board for two pieces to come together on either side of the bench.
*If both of your benches are the same depth, these should be 45° cuts to come together at the corner to form the 90° angle. My benches however had different depths, so I needed to cut 40° and 50° angles to form my angles.
The tricky part of this is that my miter saw only goes to 48° so I used that and added wood filler where my angles were slightly off, it was unnoticeable in the end.
Once the corner is angled, cut the boards to the length of the benches and attach with a nail gun and finishing nails.


Step 8
Step 8: The bench is complete! It’s time to trim. Use the 1″x2″ to add trim to the front of the bench and the sides. Use the miter saw to create corners by cutting the trim at 45° angles then attach with the nail gun and finishing nails.
Additionally, add 1″x2″ trim to the cubby fronts as trim.
Step 9
Step 9: Fill all of the nail holes, and any pocket holes with wood filler. Fill places where wood meets wood in joints on trim with wood filler.
Let the wood filler dry and sand down flat. Make sure the wood filler you are using is stainable and paintable. I like to use a sanding block on the wood filler over nail holes etc.
Continue sanding the bench top with the orbital sander starting with the 80 grit paper, then the 120 grit and finally the 220 grit to get a nice smooth finish on the bench top.
Step 10
Step 10: Stain and paint! I used Varathane Early American Stain on the bench top. Apply the stain with a rag or an old t shirt and wipe off. I did two coats by applying stain, sanding with the orbital sander and applying a second coat.
Once you are finished applying the stain, apply polyurethane in a few coats to seal the bench and make it easy to wipe clean. I used a polyurethane with a matte finish.
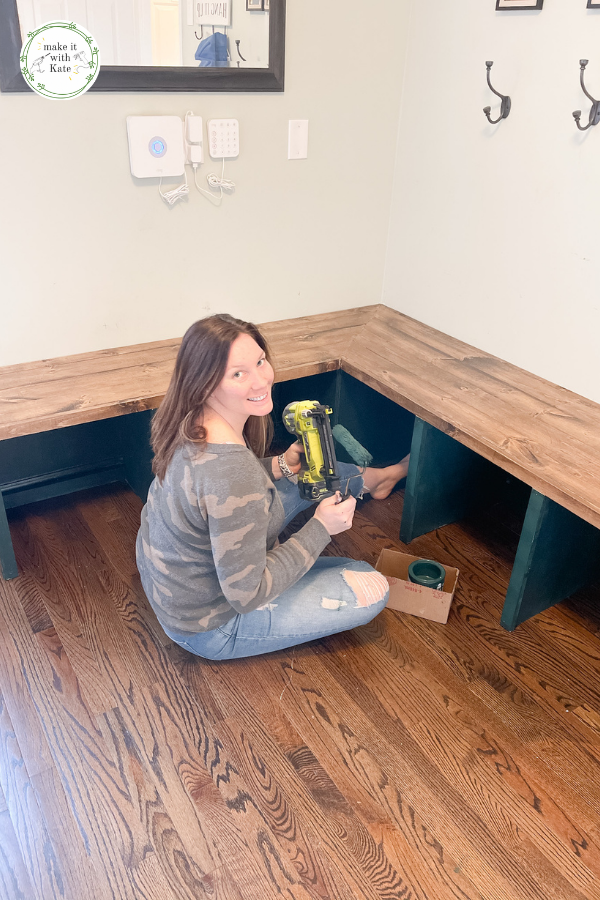
I painted the bench base and cubbies with Benjamin Moore Salamander, it’s a beautiful shade of green!
Step 11
Step 11: Attach the bench to the wall. Place the bench in the corner and use a stud finder to locate the studs in the wall. Drill long screws through the support pieces on the back of the bench and into the wall, drilling into the studs.
You’ve built a DIY mudroom bench! I know it’s a lot of steps but it’s a straightforward process, and one that you can accomplish with the help of the right tools.

I have videos walking you through my process on my Instagram page in my story highlight labeled Mud Room Bench as well.
DIY Mudroom Build Series
- DIY Mud Room Part 1: DIY Mudroom Bench (currently reading)
- DIY Mud Room Part 2: Adding Mudroom Locker Cabinets
- DIY Mud Room Part 3: DIY Mudroom Lockers
- DIY Mud Room Part 4: DIY Peg Rail with Board and Batten (coming soon)
- DIY Mud Room: A Corner Bench with Lockers and Cabinets (coming soon)
DIY Mudroom Bench
Build a corner mudroom bench with functional cubby space below.
Materials
- 3/4" sanded plywood
- 1"x6" common board
- 1"x2" common board
- wood glue
- wood filler
- wood stain
- paint
- polyurethane sealer
Tools
- circular saw (or table saw)
- miter saw
- drill and drill bit to match screw heads
- nail gun
- level
- orbital sander with 80 grit, 120 grit and 220 grit sandpaper
- Kreg Jig pocket hole tool
- 1 1/4" pocket hole screws
- 1 1/4" wood screws
- 1 1/4" finishing nails
- stud finder
Instructions
- Cut the bench top out of 3/4" plywood to the length and width of the bench needed.
- Cut the cubby walls out of plywood to the depth of the bench top and attach to the bench top with 1 1/4" wood screws.
- Cut 3" support pieces out of the plywood to the lengh of each cubby and attach to the bottom and top of the back of each cubby with pocket holes.
- Create the bench top out of 1"x6" common board and add another layer to the bench top. Miter the bench corner by using angled cuts on the common boards where they come together in the corner.
- Trim the bench top front and cubby fronts with 1x2" common board, using the miter saw at 45 ° where the bench corner comes together and at the bench ends.
- Add wood filler where trim comes together and in nail and pocket holes.
- Sand the wood filler once dry, and the bench top. Use the orbital sander on the bench top working from 80 grit, to 120 grit to 220 grit sandpaper.
- Stain the bench top, then paint the bench base.
- Attach the bench to the wall by drilling through the back bench supports into studs in the wall.
Notes
*Remove baseboards to attach this bench to the wall cleanly.
*When purchasing lumber, check the measurements of common boards. Typically a 1x2 is really 3/4"x1.5" and a 1x6 is 3/4"x 5.5" - so take that into consideration when planning your list of lumber to purchase!

")


 Skip to Instructions
What is the height of your bench?