• Skip to primary navigation
  • Skip to main content
  • Skip to primary sidebar
  • Skip to footer
  • Home
  • About
  • Work with Me

Make it with Kate

  • Home
  • DIY Woodworking
    • Building Projects
      • DIY Mudroom Build
      • DIY Corner Coffee Bar Build: Wine Storage, Floating Shelves, Cabinets and more!
      • Staircase Makeover: Carpet to Wood Stairs
      • Fall One Room Challenge 2021: Game Room Makeover
  • DIY Home Decor
    • Furniture Flips
    • Dollar Tree Crafts
    • Small Wooden DIYs
      • 3 DIY Farmhouse Trays to Make
    • Wall Decor
  • Fall One Room Challenge
  • Seasonal
  • Holiday
  • Instagram

DIY Stair Risers on a Budget

February 10, 2023DIY Woodworking

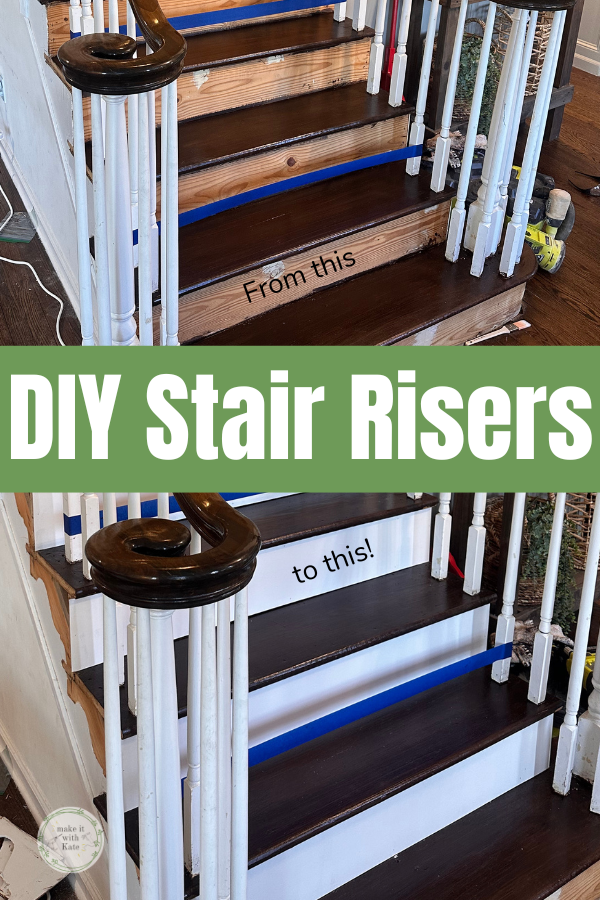
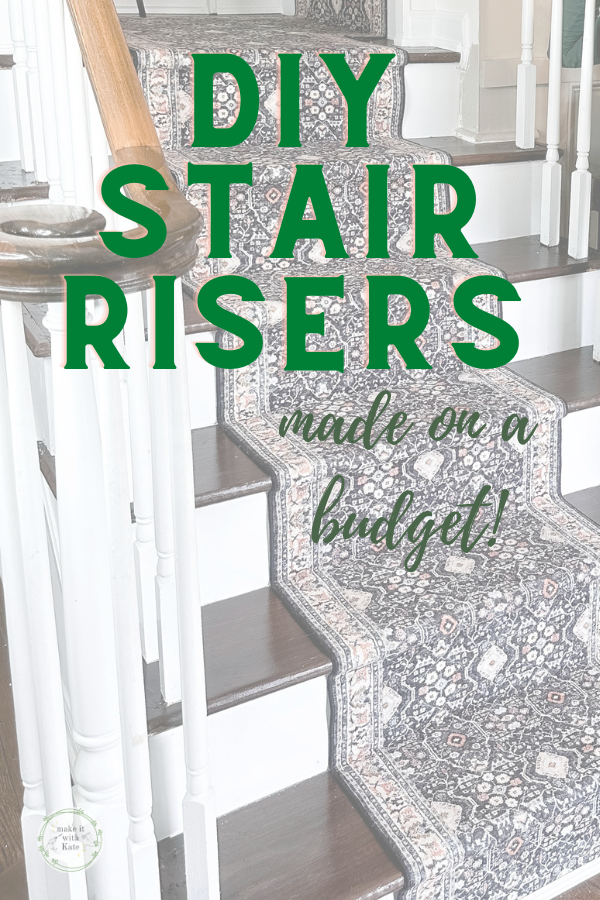
These DIY stair risers made out of 1/8″ hardboard are a great budget-friendly option for a staircase makeover going from carpet to wood.

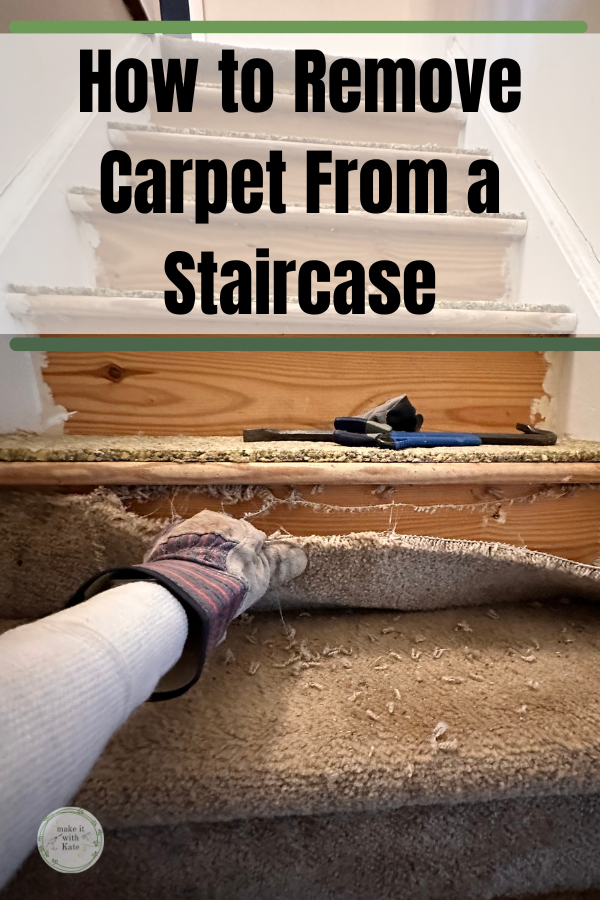
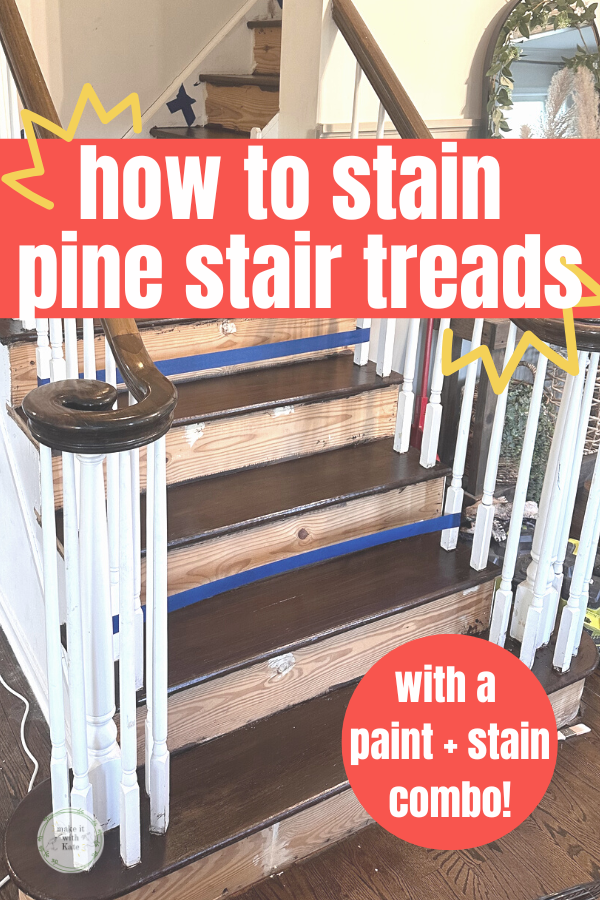
DIY stair risers is the third major step of this staircase makeover. I have removed the carpet from the stairs, stained the stair treads and am now making new risers to attach to the current pine staircase. While painting the existing risers white is an option, I wanted a clean non-wood grain look for the risers.

These DIY stair risers made out of 1/8" hardboard are a great budget-friendly option for a staircase makeover going from carpet to wood.

How to Make DIY Stair Risers

This entire staircase redesign has been a budget-friendly project so I wanted to keep these risers basic. If I was re-doing the entire staircase with new wood I would choose oak for the treads and the risers.

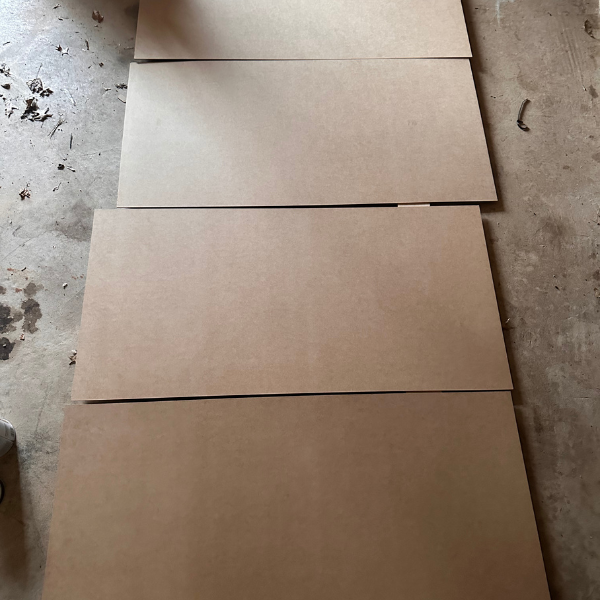
But, in keeping with the low budget, I made these risers out of hardboard. Hardboard is made of high density fiberboard and is an engineered wood project. I purchased these 2’x4′ hardboard panels for around $6 each making this a much cheaper alternative to oak.

The risers in this case are primarily decorative and won’t be walked on, and are covering a real wood so the hardboard is a fine choice here.

What you need to make the hardboard stair risers:

  • 1/8″ hardboard
  • primer
  • white paint (advanced or scuff proof)
  • paint rollers or brushes
  • circular saw or table saw
  • liquid nails or nail gun
  • caulk

Make the Stair Risers

Once your existing risers have been measured you will know how many hardboard panels to purchase, this amount will depend on the width of your stairs and the number of risers. I used (4) 2’x4′ panels for this project to make 11 stair risers.

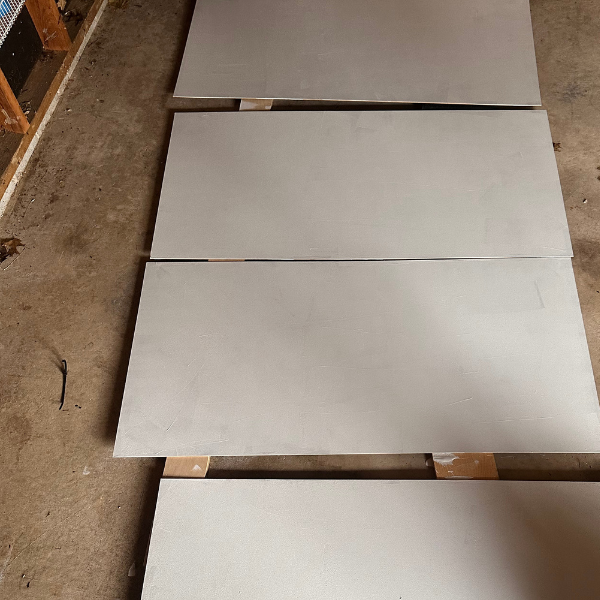
Because hardboard is a dark color, this needs to be primed prior to paint. I find it easier to prime them before cutting the wood to size.

Once primed, cut your hardboard to the riser dimensions needed. I used a circular saw for this step however a table saw would be a great choice as well.

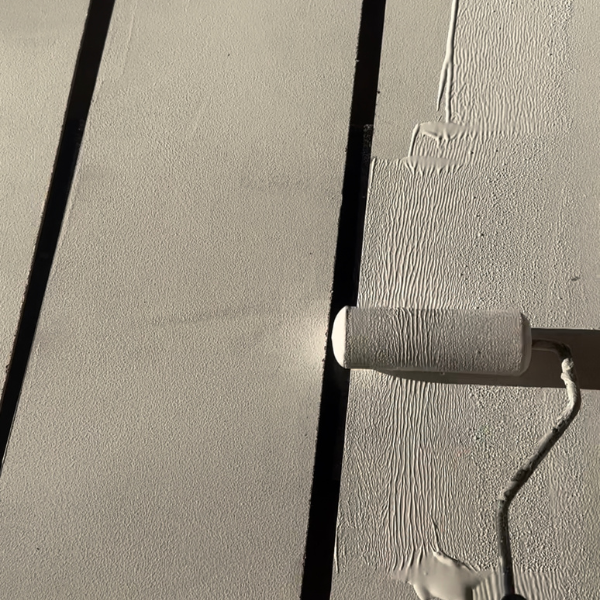
Once the pieces are primed and cut, you can paint them white. I like to use a foam roller for this and did two coats of white paint.

Attach the DIY Stair Risers

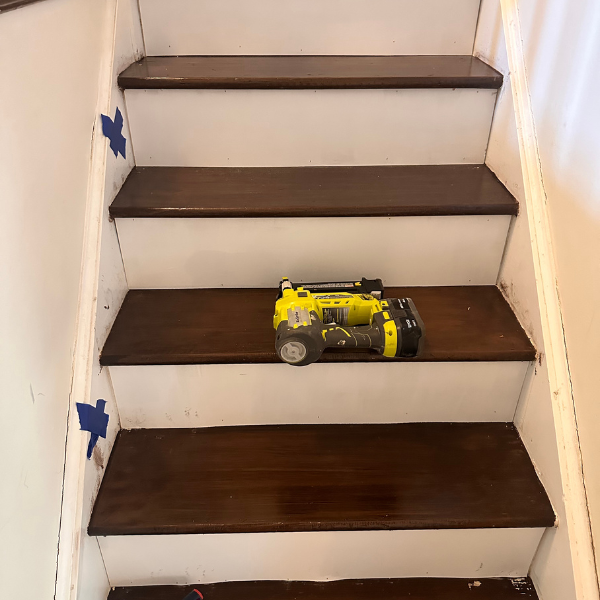
Your stair risers are made and now it’s time to attach them to the existing staircase. My stair treads have a bullnose overhang so the 1/8″ thickness didn’t take away from the overhang at all and fit nicely.

Ideally, the stair risers would be attached with liquid nails. My long term plan for this staircase is to add oak hardwood to the treads and risers when my budget allows. Removing these DIY stair risers after being glued on would be incredibly difficult and I didn’t want to create that challenge for myself.

To avoid this issue, I used a nail gun to attach the risers to the staircase and this option worked just fine. At this point you will just have nail holes that can be filled with wood filler and touched up with paint.

Once all of the stair risers are attached, caulk along all of the edges of the risers where they meet wood. Touch up any spots with paint and they should look great!

The cost of these risers (minus paint) was $24 for me. This was a worthwhile expense to get a nice clean look on the risers and I didn’t have to worry about any imperfections in the pine staircase risers that were existing.

These DIY stair risers made out of 1/8" hardboard are a great budget-friendly option for a staircase makeover going from carpet to wood.

Related Posts:

Check out the other posts in this series of a staircase makeover, going from carpet to wood.

How to remove carpet from stairs

Painting and Staining Pine Stair Treads

Related Posts:

  • DIY Closet Shelves: Hall Closet Organization on a Budget
    DIY Closet Shelves: Hall Closet Organization on a Budget
  • DIY Stair Runner with Corner Turn
    DIY Stair Runner with Corner Turn
  • Painting and Staining Pine Stair Treads
    Painting and Staining Pine Stair Treads
Previous Post: « Painting and Staining Pine Stair Treads
Next Post: DIY Stair Runner with Corner Turn »

Reader Interactions

Leave a Reply Cancel reply

Your email address will not be published. Required fields are marked *

Primary Sidebar

Search for what you need

Welcome!

Find inspiration for DIY home projects and crafts on a budget! You can usually find me with either a hot glue gun or a can of spray paint in hand 🙂

Get social:

  • Instagram

Recent Posts

  • DIY Stair Runner with Corner Turn
  • DIY Stair Risers on a Budget
  • Painting and Staining Pine Stair Treads
  • DIY Coffee Bar Ideas for Home Kitchens
  • How to remove carpet from stairs

makeitwithkate

Sometimes, you just have to go for it. 🔨 🪚🪛
The number one question I got asked about this pro The number one question I got asked about this project was where this runner was from so I thought it deserved it’s own post: ✔️RUNNER DETAILS
.
.

❇️ it’s from Amazon…and it’s washable 🤯 you can find the link in my bio > shop my pictures OR by checking out my ‘stair runner’ highlight for the direct link
❇️ I bought two 2x12 runners and then cut the ends at a 45° angle and joined the seams with carpet joining tape for the turn (step by step in ‘stair runner’ highlight)
❇️ I have a rug pad cut into strips and attached with carpet tape to each tread under the runner, and the runner is attached with a staple gun- all of these also linked in my @liketoknow.it which can be found in my bio under shop my pictures
.
.
.
Any other questions I can answer??
Before >>>> After! Are you team carpet or team woo Before >>>> After! Are you team carpet or team wood?? This staircase makeover took a few days but it was quite the budget friendly makeover and I’m happy with the outcome! #diyhomedecor #diyprojects #staircasedesign #staircasemakeover
So tell me…are you team carpet or wood stairs?? So tell me…are you team carpet or wood stairs?? #staircasedesign #staircaserenovation #woodstairs
Adding this runner to the staircase really gave it Adding this runner to the staircase really gave it a nice finishing touch. See how I tackled the right turn in the staircase by cutting and joining the two runners. Find this runner linked in my @liketoknow.it
Here’s what the middle of this #staircasemakeove Here’s what the middle of this #staircasemakeover looks like! The treads are stained and we are making some DIY risers to give it a clean look. Lastly, they need trim and some final touches and they’ll be done! #staircasedesign #diyhomedecor #diyprojects
I really wanted to try to stain these pine treads I really wanted to try to stain these pine treads before just painting them black but my stain just wasn’t coming out right. I tried an idea and ran with it and I’m loving the look of this paint/gel stain combo! This is a progress reel…so let’s see if this plan sticks! Stay tuned :) #staircasedesign #gelstainstairs
I’ve been wanting to rip this carpet up for a wh I’ve been wanting to rip this carpet up for a while now….today is the day I decided I can’t wait any longer. I have more involved plans for this staircase so for now I’ll be doing a budget-friendly update here! Stay tuned to see how it turns out 🙃 #staircasedesign #diyhomedecor #diyprojects #staircaserenovation
I love the look of garland on a mirror, I think it I love the look of garland on a mirror, I think it adds a nice touch to my holiday decor! These @command hooks and clips are perfect for making this a nice easy project that packs a punch! #holidaydecor #christmasdecor #diyhomedecor
I thought I would try something new on my front po I thought I would try something new on my front porch this year because there are just too many holidays to decorate for in a row here. I got this prelit garland from #zulily to use as a base for my porch decor for these next few holidays. I kinda like how it turned out! Plus, I can light it up at night :) #ad #frontporchdecor #falloween #holidaydecor
The board and batten entryway is done! Well…stil The board and batten entryway is done! Well…still the last 5% to do but that’s how my projects go ;) What do you think about the color?? It’s Pashmina by @benjaminmoore #diyhomedecor #boardandbatten #diyblogger
This board and batten entryway is almost done! Che This board and batten entryway is almost done! Check out some tips and tool for paint prep, and painting! #boardandbatten #moderntraditional #modernfarmhouse
Load More... Follow on Instagram
Copyright © 2023 · Make it with Kate · Hearten Made ⟡