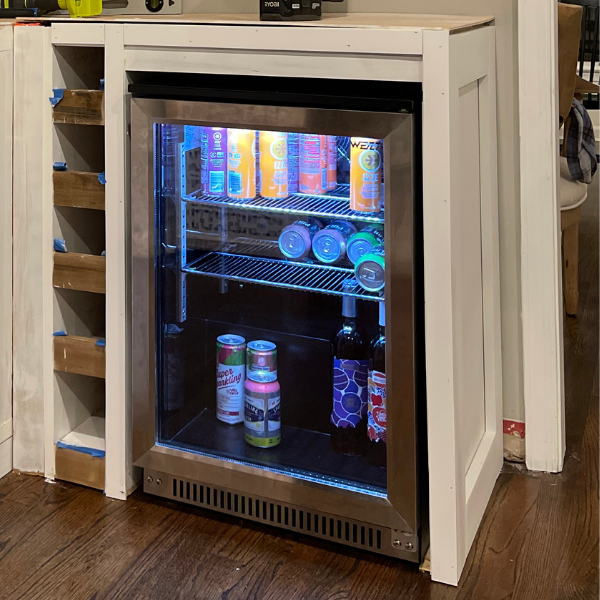
• Skip to primary navigation
  • Skip to main content
  • Skip to primary sidebar
  • Skip to footer
  • Home
  • About
  • Work with Me

Make it with Kate

  • Home
  • DIY Woodworking
    • Building Projects
      • DIY Mudroom Build
      • DIY Corner Coffee Bar Build: Wine Storage, Floating Shelves, Cabinets and more!
      • DIY Living Room Projects: Built-ins, Wall Treatment, Beams, and More!
      • Staircase Makeover: Carpet to Wood Stairs
      • Fall One Room Challenge 2021: Game Room Makeover
  • DIY Home Decor
    • Furniture Flips
    • Dollar Tree Crafts
    • Small Wooden DIYs
      • 3 DIY Farmhouse Trays to Make
    • Wall Decor
  • Fall One Room Challenge
  • Seasonal
  • Holiday
  • Instagram

DIY Woodworking

Double Picture Frame Moulding DIY

January 31, 2024Building Projects, DIY Woodworking

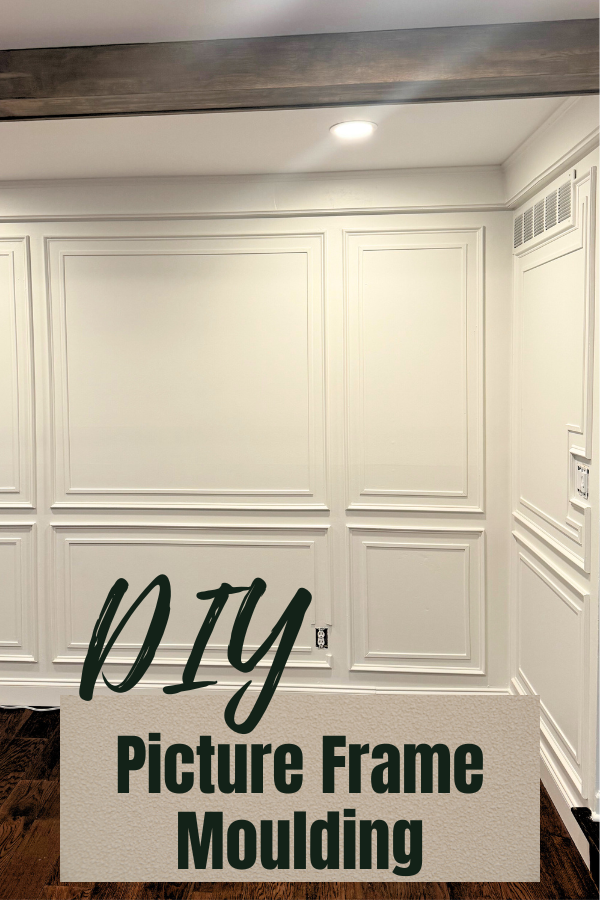
This DIY double picture frame moulding is great in any empty walls of your house. Follow this simple method do to it yourself!

I’ve been working in this living room for 3 years now, one DIY project after another. The living room is almost where I want it! After adding my own built ins using stock cabinets and replacing the flooring, I’m ready to move on to the walls. I’m a sucker for wall treatments. I love accent walls, board and batten, moulding and trim, I love it all. This is an easy double picture frame moulding that makes a big impact.
This DIY double picture frame moulding is great in any empty walls of your house. Follow this simple method do to it yourself!

Double Picture Frame Moulding

Picture frame moulding looks complicated, but it’s a great beginner friendly DIY project. Having the right tools makes it a breeze. And after the first few boxes, the rest seem to go up pretty easily.

The most important things to pay attention to are keeping the first piece of your box level, and keeping everything evenly spaced to be pleasing to the eye.

I’ve done picture frame moulding in my dining room, so followed a similar process, just chose to double up on my boxes to give it a grander appearance.

What you need for double picture frame moulding

I’m adding a miter saw to this list because depending on the size of your trim, it’s the easiest way to make a lot of cuts quickly. But, if you don’t have a miter saw and aren’t ready to invest in one yet, miter snips will get the job done at a fraction of the cost. If you have a miter saw and want to add one more tool to your inventory, grab a pair of miter snips. At around $20 they will definitely come in handy for when you don’t want to haul everything back and forth to the miter saw!

  • Miter saw/miter snips
  • level
  • tape measurer
  • nail gun
  • wood filler
  • caulk
  • base cap trim (outer box)
  • screen moulding (inner box)

*I use PVC trim because it’s typically cheaper than wood trim and looks fine once it’s all painted
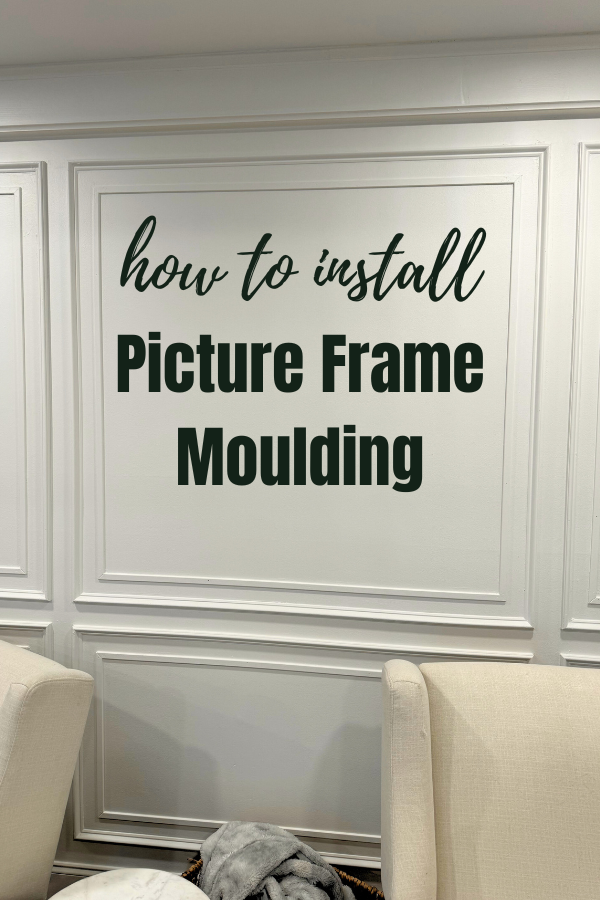
This DIY double picture frame moulding is great in any empty walls of your house. Follow this simple method do to it yourself!

How to install double picture frame moulding

I like to start with a few rules for myself to keep everything uniform and then base all of the dimensions off of the size of the room and what each wall looks like. For this project I made a rule of 3″ spacing for the outer boxes. So 3″ from ceiling and floor, and 3″ between each box.

Then I take each wall and look at the spacing and scale of the boxes to start my planning. I also think about where artwork, and lighting etc will go. I wanted my biggest open wall here to have a larger box in the middle for artwork, and two smaller boxes on the sides for sconces.
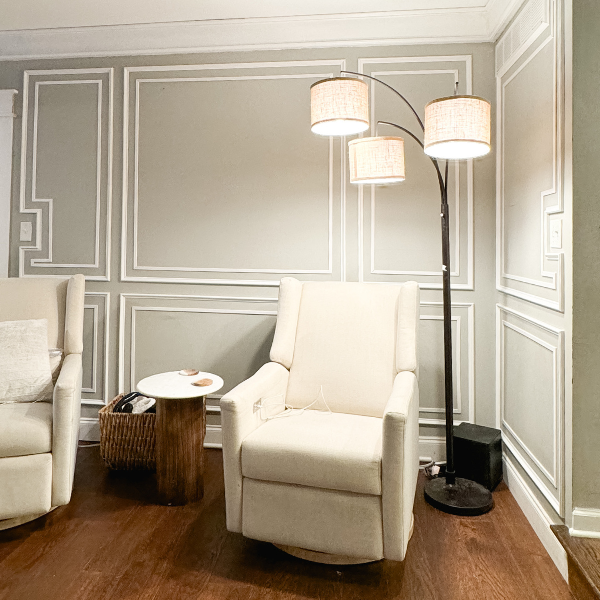
My best advice when planning is to put pencil to paper, write out the dimensions of the room, and then just start drawing different layouts. I also like to mark out boxes with painters tape on the wall so that I can really get a good visual of spacing.

Making upper and lower boxes also helps draw the eye upward and make the room feel bigger. I like to do the upper boxes on the top 2/3 of the room, and lower boxes on the bottom 1/3.

Planning my spacing

For this room, I measured the height of the room. I had 90″ from the top of my baseboard to the bottom of my crown moulding. So, the upper boxes would go in the top 60″ and the lower boxes in the bottom 30″. So to determine the height of my boxes, I took 60″-6″(for 3″ spacing) and got 54″ boxes in height. Then for the lowers I did 30″-3″ (for the spacing to the baseboard) and have 27″ boxes. This was my spacing all around the room. The the width I based on how many boxes I wanted, each wall was different based on the wall space but I followed the same calculations.

Cutting the trim

Planning everything out is one of the harder parts, now comes the fun! Basically, you are going to cut 4 pieces of base cap trim with 45° angles on each side.

I like to cut a template piece and then just use that to make all my cuts of the same size. So, for vertical pieces I needed 54″ for all vertical upper boxes. I cut one, then used that to measure and mark all of the rest of the 54″ pieces I needed and bulk cut them on the miter saw. I did the same for horizontal pieces. Measuring this way by templating a piece helps small discrepancies from occurring with transferring measuring tape to trim.

Once all of your pieces are cut, it’s time to attach them to the wall. I like to to this with a nail gun in case I need to remove pieces, but you could use liquid nails (glue) instead. That just feels too permanent to me, I really hate drywall repair.
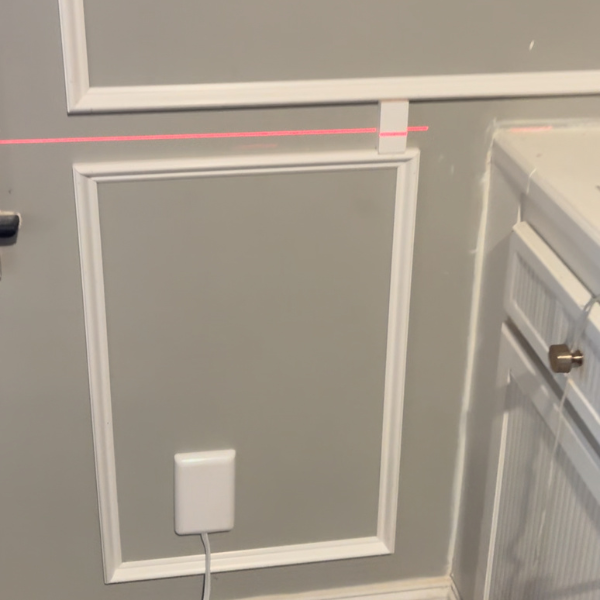
Make a 3″ spacer block out of scrap wood to easily measure all of your spacing. I like to work top down, so place my first piece 3″ from the edge of the wall and 3″ from the top of the wall and nail it into place, checking that it’s level. Once the top piece is in, I can place the side pieces of the box, ensuring they are level, and finish it off with the bottom.

Use the spacer block to place the next box 3″ over and repeat. Then keep going until all of your boxes are installed!
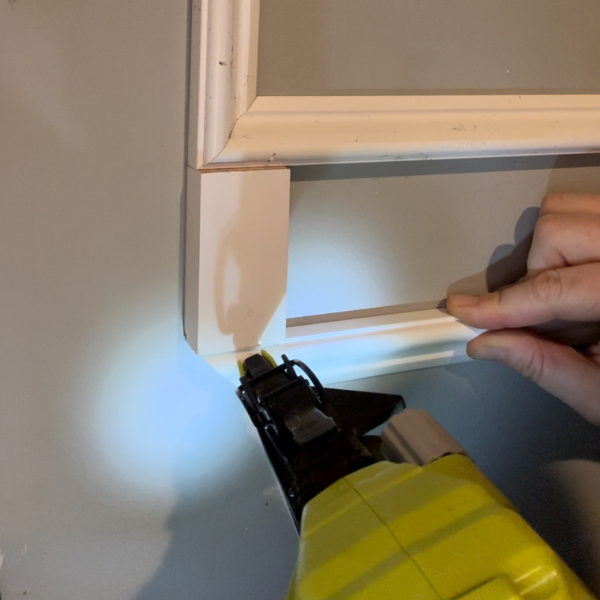
Add the interior box

I used the thicker, more decorative, base cap trim for the outer box. I wanted to add dimension with something smaller for the inside box and chose screen moulding. Initially I tried the 3″ spacing inside the box as well, but the scale looked off. So, I switched it to 2″ on the inside and it looked much better.

So I cut a 2″ spacer block and all of my pieces of trim and repeated the same steps as above. Because the screen moulding is smaller and easy to cut with miter snips, I used those here, again my templating one piece of trim them transferring the measurement and bulk cutting.

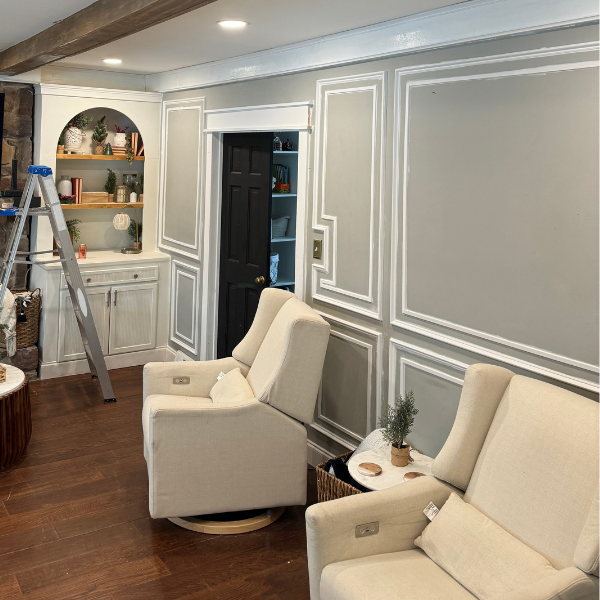
3″ spacing on the interior box, it just doesn’t look right
2″ inch spacing on the interior box is much better

Finish the boxes

Once the boxes are up, use wood filler to fill in nail holes or corner seams, and then caulk where the trim meets the wall. This will seal everything up and fill in any gaps that remain.
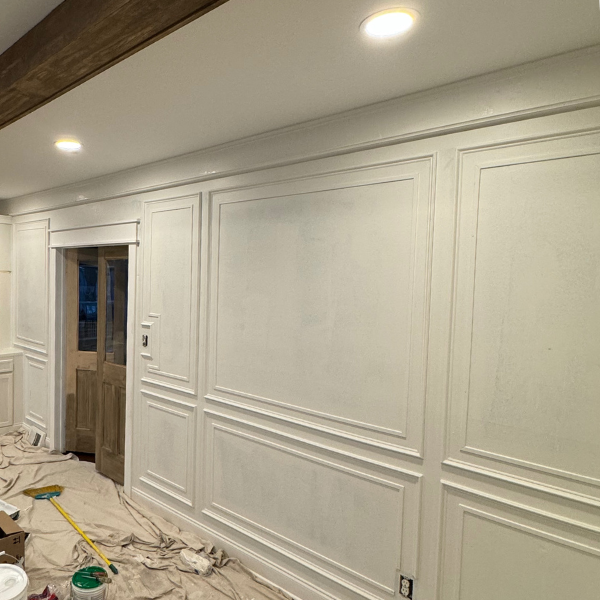
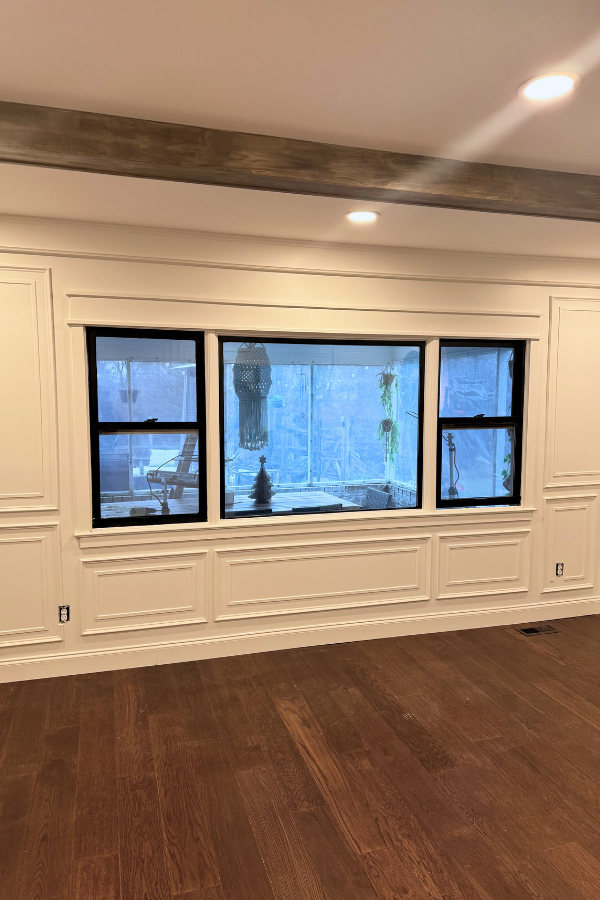
Once this is complete, you can add a coat of paint to make a uniform look between wall and trim and voila! Your double box moulding is complete and you have another DIY under your belt!
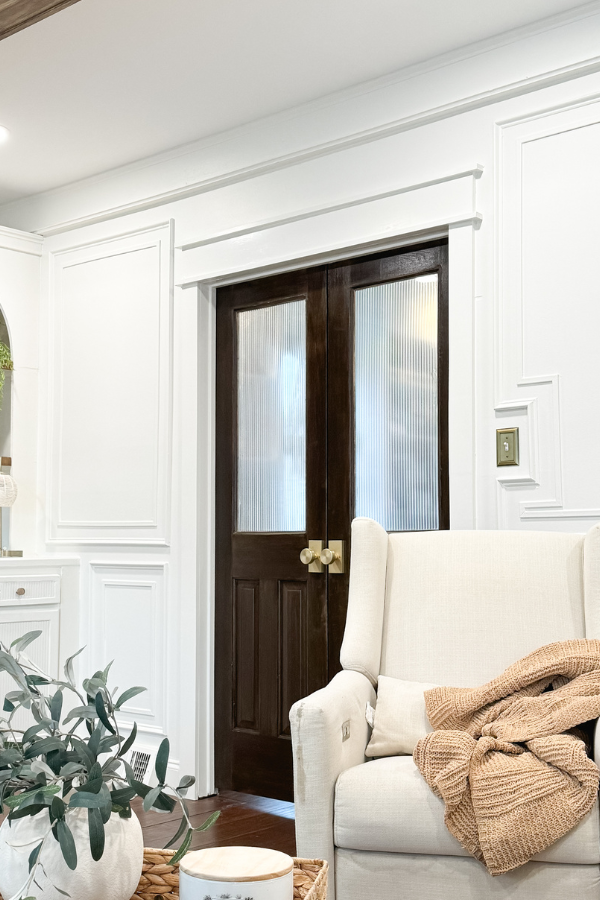
This DIY double picture frame moulding is great in any empty walls of your house. Follow this simple method do to it yourself!

Follow me on Instagram

Follow along on Instagram to see all of the behind the scenes, explanations, and mistakes!

makeitwithkate

🪚 Transforming builder grade into modern colonial
🔨 DIY builds and decor
🪑 Furniture flips

Make it with Kate | DIY Blog
These motorized roller shades from @smartwingshome These motorized roller shades from @smartwingshome are the final missing piece to this living room makeover! I just love how easy they are to use with the remote or as part of my home automation. The color is the perfect neutral and the linen provides great light-filtering. These are the SmartWings Motorized Light Filtering Roller Shades 70% Blackout Linen, color Caramel.
🌟🌟 L I V I N G  R O O M  R E V E A L 🌟🌟 what’s new? Wall treatment, door and window trim, stained beams, updated doors, lighting and paint! DIY is too much fun 🥰 do you have a favorite part? ➡️➡️ swipe to see some progress/before pics! #diyhome #livingroomdecor #moderntraditional #diydecor
🌟The living room I bought versus the one I crea 🌟The living room I bought versus the one I created. 🌟 The number one thing I’ve learned in DIY, is to follow and know the trends, but ultimately find your own style and create what you love, and what you are your family are comfortable in. #diy #diyhome #livingroom #moderntraditional
I’m loving how fresh this living room feels now! I’m loving how fresh this living room feels now! #diyhome #moderntraditional #livingroom #diydesign
These doors are DONE! This was a labor of love but These doors are DONE! This was a labor of love but I am happy with how they turned out! The reeded film over the plexiglass keeps the playroom mess out of sight, but the room feels a bit more open this way. More details in highlights! #diyhome I used @retiqueliquidwood to cover the chalk paint without any sanding!
Taking these doors from painted and scratched to w Taking these doors from painted and scratched to wood-grained French doors with @retiqueliquidwood - they are almost done, stay tuned for the end result! I think they will be good! #diydoors
I’m making progress in this living room! Next st I’m making progress in this living room! Next step is to take these beat up, painted doors and make them look like new French doors! I cut large holes in the middle of them and am going to make a plexiglass insert. Here’s hoping!
Let’s take these beams from painted black to a b Let’s take these beams from painted black to a barn wood look. Check out this fun and easy process! What do you think?!
Picture frame moulding in the living room phase 1! Picture frame moulding in the living room phase 1! I updated the door and window trim to a craftsman style, the added double box moulding to the walls, and board and batten to the breakfast bar. Stay tuned to watch this get finished! It’s gonna be good!
I’m switching out the trim work in my living roo I’m switching out the trim work in my living room to add Craftsman moulding to the doorway and window! This is part of a living room refresh, stay tuned for box moulding and updated doors and beams next! #craftsmantrim #craftsmanmoulding #doortrim #diy #doityourself
Sometimes, you just have to go for it. 🔨 🪚🪛
Load More… Follow on Instagram

DIY Stair Runner with Corner Turn

February 21, 2023DIY Woodworking

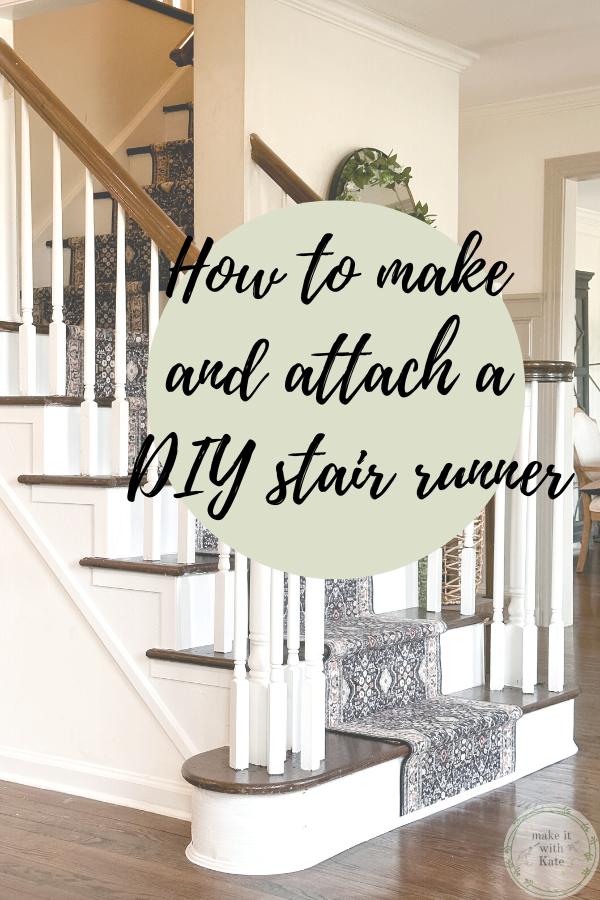
This DIY stair runner tutorial will explain how to take two runner rugs and join a cut diagonal seam to make a corner turn for a landing.

This staircase makeover is almost done! The last step in the process is adding a DIY stair runner to the now wooden steps. I call this a DIY runner because this tutorial will show you how to join two runners together to make a mitered corner for a staircase landing. This really gives this a nice finished effect.

This DIY stair runner tutorial will explain how to take two runner rugs and join a cut diagonal seam to make a corner turn for a landing.

How to create a DIY Stair Runner

My staircase has a right turn with a small landing in the middle of it. I knew that once I had removed the carpet from these stairs and stained the pine treads I would want a runner rug down the middle of the staircase.

The turn was proving to be a problem when shopping for a runner. I could have put two separate runners on each section of the stairs and then a standalone rug on the landing, but I thought one cohesive runner would look better, and it turned out to be really easy. Here’s how:

Purchase two runner rugs

Measure your staircase length and width, then find a runner that you like. This was difficult for me because given my staircase width which was only 36″ at the narrowest point, I didn’t want a runner wider than 2′ so that the wood would still show on the sides of the runner.

I ended up finding this runner from Amazon and it’s perfect. I wanted a flatweave rug for a low profile, and wanted it to be washable so that I could easily use my carpet spot cleaner on it without issue.

Once you have all of your measurements and your carpets ordered, it’s time to cut and join the two runners together to make an l-turn.

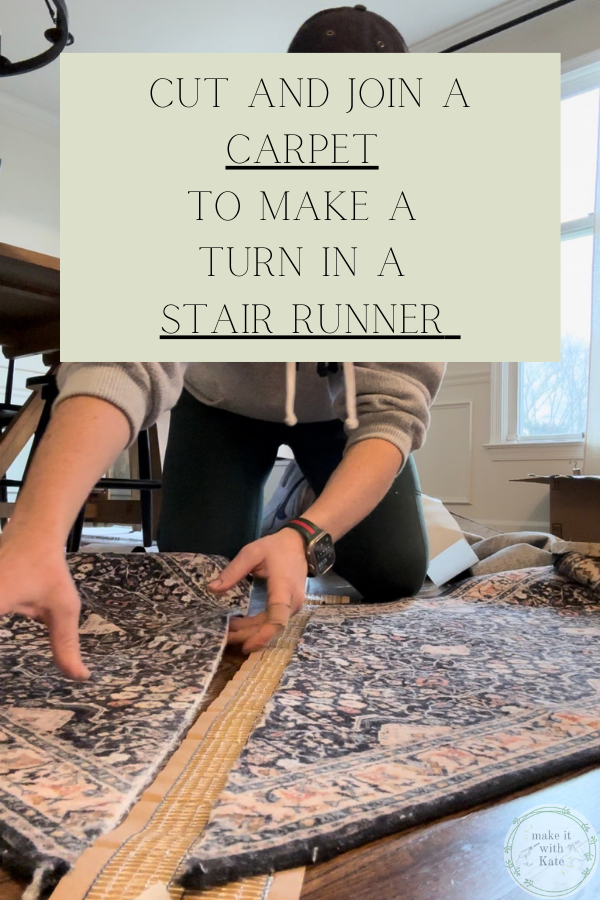
Cut and join the runners to make a turn

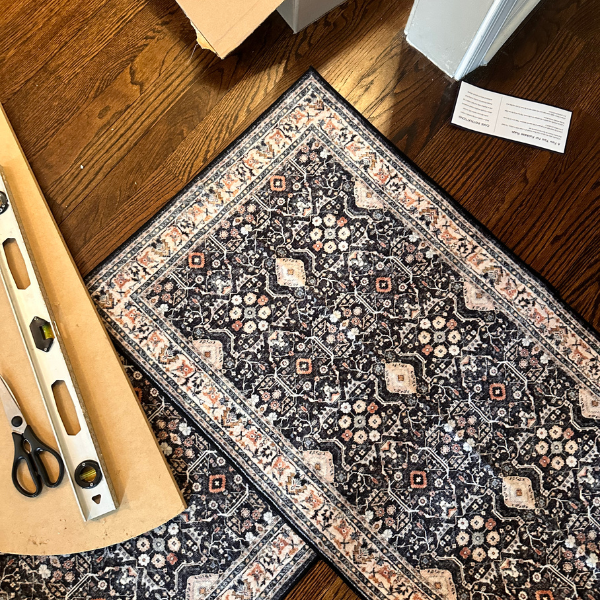
Overlap the runner ends to create a 90 degree turn, or an L turn.

This DIY stair runner tutorial will explain how to take two runner rugs and join a cut diagonal seam to make a corner turn for a landing.

Mark where the runners overlap one another at the inside corner of the turn.

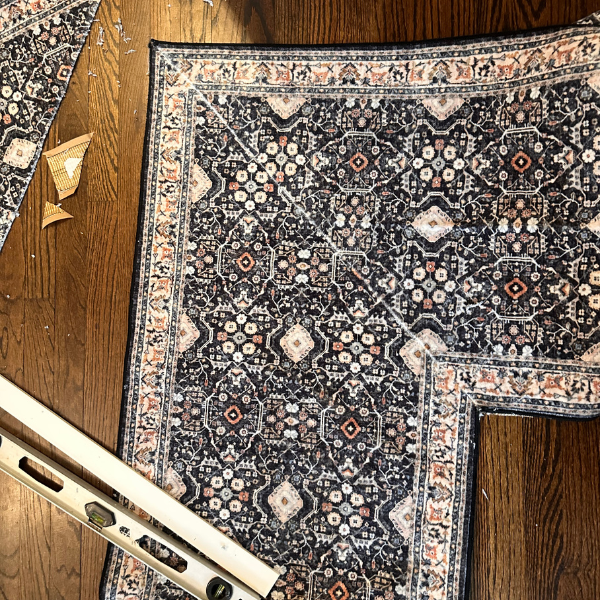
Cut diagonally from that inside overlap point to the outside top corner of the rug.

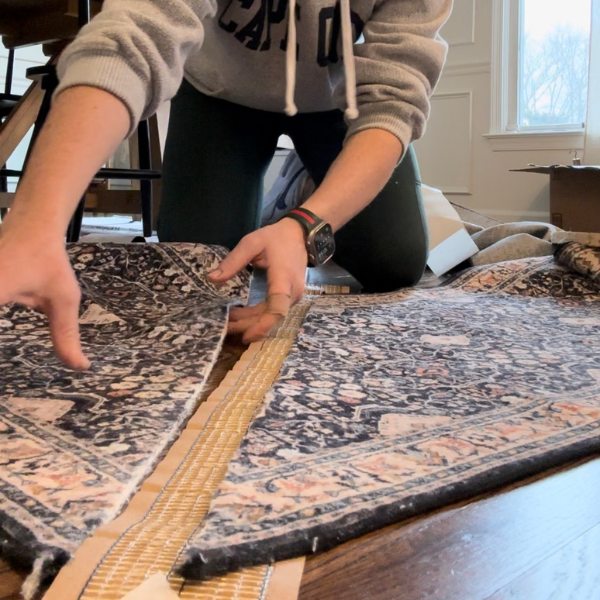
Now each runner will have a diagonal cut at the end, that when matched up create an L turn.

Using carpet joining tape, place a section of tape under the seam and press down so that the runners are now joined together. That’s it! Time to install your DIY stair runner onto your stairs now.

This DIY stair runner tutorial will explain how to take two runner rugs and join a cut diagonal seam to make a corner turn for a landing.

How to install carpet runner on stairs

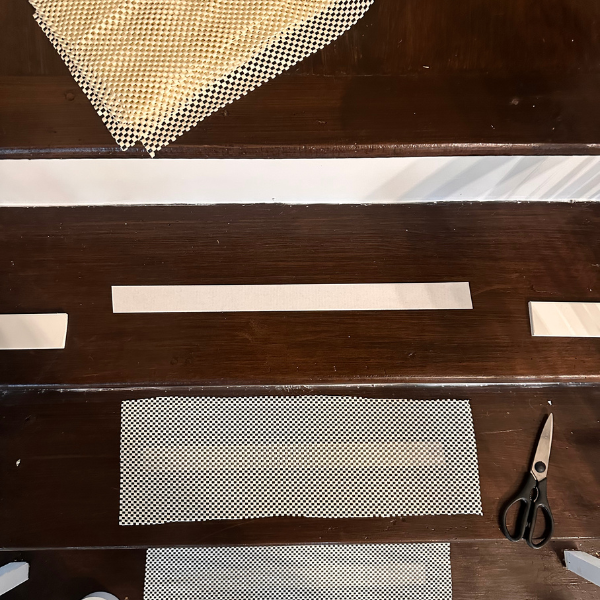
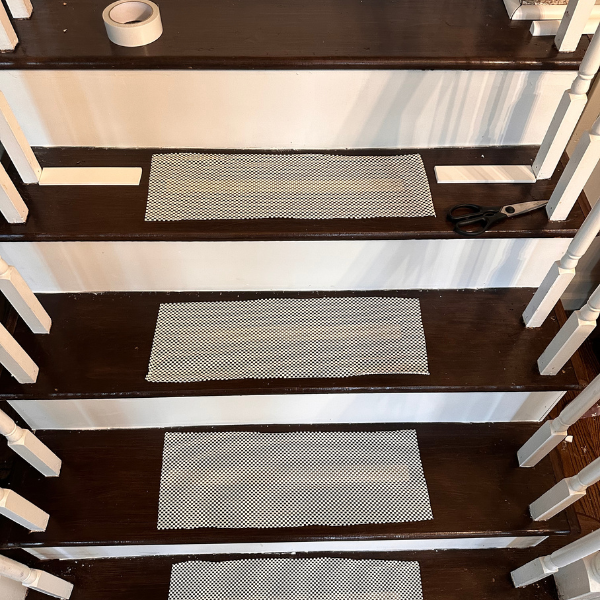
Your DIY stair runner is ready to be attached to the staircase. I like to add carpet tape and a carpet pad under the runner on each tread.

I do this by cutting a runner pad to fit under the runner on each tread and then layering with carpet tape (this is different from the carpet joining tape we used to join the seams above).

This DIY stair runner tutorial will explain how to take two runner rugs and join a cut diagonal seam to make a corner turn for a landing.

The layering on each tread goes:

carpet tape > rug pad > carpet tape > runner

This DIY stair runner tutorial will explain how to take two runner rugs and join a cut diagonal seam to make a corner turn for a landing.

So, on each tread add a strip of carpet tape, then the section of rug pad, then another strip of carpet tape. Additionally I placed a strip of carpet tape on the riser above the tread as well.

This DIY stair runner tutorial will explain how to take two runner rugs and join a cut diagonal seam to make a corner turn for a landing.

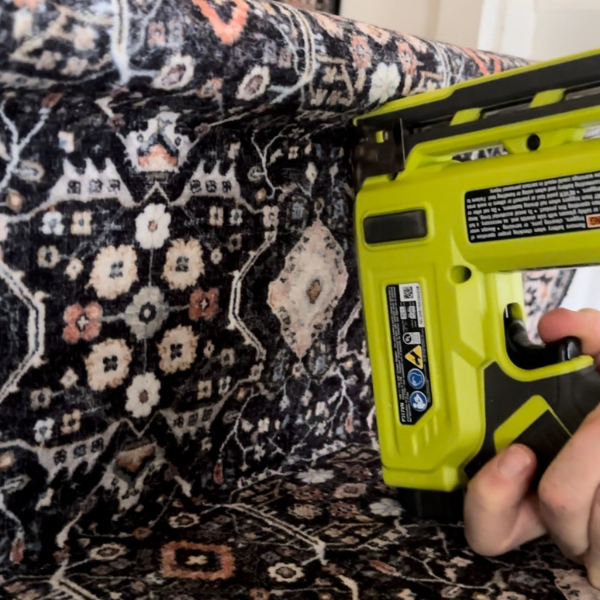
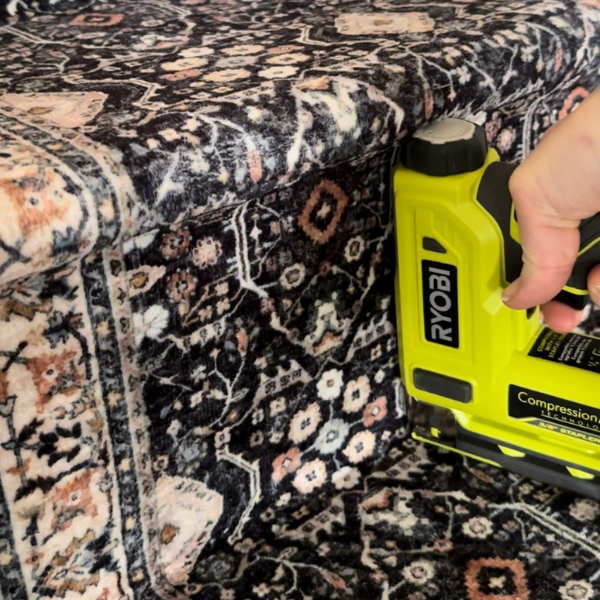
Use a staple gun to install the DIY stair runner

Place the runner on the stairs and do a ‘dry run’ to make sure that all looks good, lines up, and is long enough before you begin stapling.

Tip: make spacer blocks out of scrap wood to place on each side of the runner, this will ensure your placement stays the same and lined up on each tread.

I started with the landing to make sure that was square and where I wanted it to sit on the landing. Staple along the edges with a staple gun.

Continue working up or down, stapling the runner under the bullnose overhang of the stair tread, and then along the back of the stair tread.

This DIY stair runner tutorial will explain how to take two runner rugs and join a cut diagonal seam to make a corner turn for a landing.

This placement of staples will ensure a nice secure fit of the runner, but there won’t be any staples right where foot traffic will be.

Continue stapling, pulling tight as you go. Once you get to the end of the staircase, simply cut the runner off at the end and staple in place. You can burn the end of the rug with a lighter to keep the ends from fraying.

This DIY stair runner tutorial will explain how to take two runner rugs and join a cut diagonal seam to make a corner turn for a landing.

Add any trim at the base of the staircase and your DIY stair runner with a turn is installed! This is a much more cost effective way to add a runner to a staircase with a turn than purchasing a custom stair runner.

Related Posts

How to remove carpet from stairs

Painting and Staining Pine Stair Treads

DIY Stair Risers on a Budget

DIY Stair Risers on a Budget

February 10, 2023DIY Woodworking

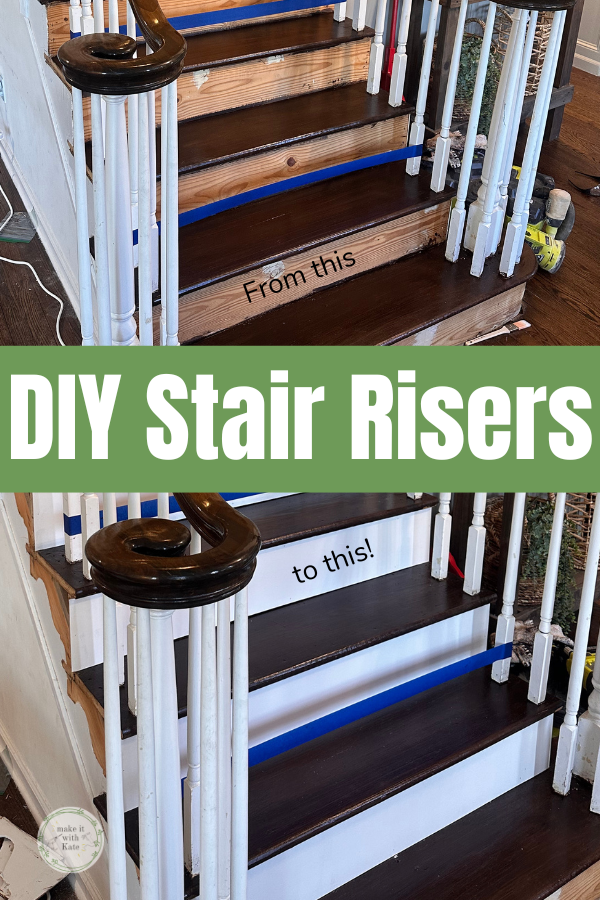
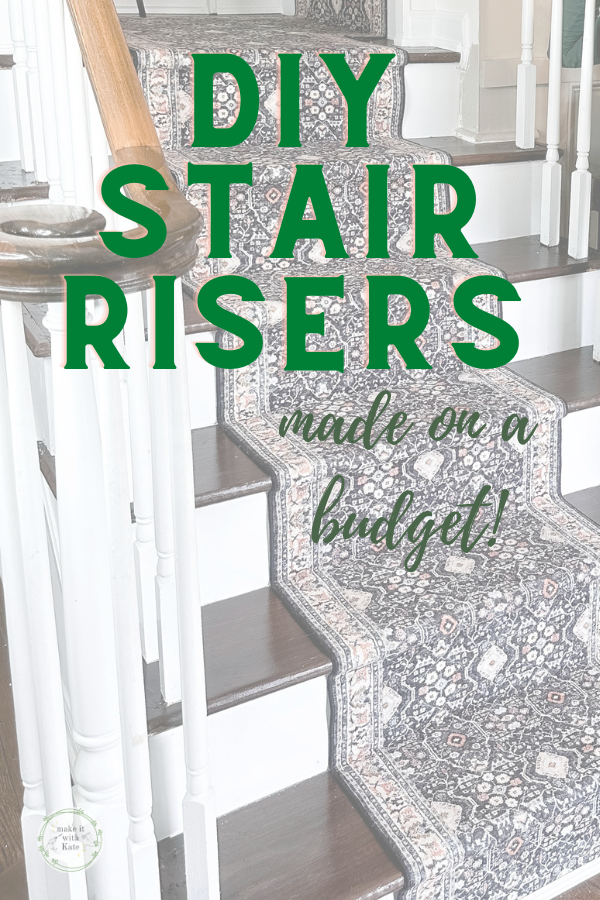
These DIY stair risers made out of 1/8″ hardboard are a great budget-friendly option for a staircase makeover going from carpet to wood.

DIY stair risers is the third major step of this staircase makeover. I have removed the carpet from the stairs, stained the stair treads and am now making new risers to attach to the current pine staircase. While painting the existing risers white is an option, I wanted a clean non-wood grain look for the risers.

These DIY stair risers made out of 1/8" hardboard are a great budget-friendly option for a staircase makeover going from carpet to wood.

How to Make DIY Stair Risers

This entire staircase redesign has been a budget-friendly project so I wanted to keep these risers basic. If I was re-doing the entire staircase with new wood I would choose oak for the treads and the risers.

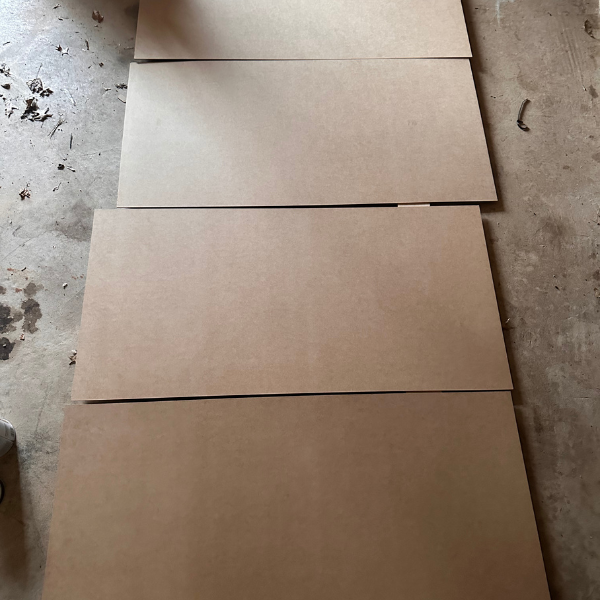
But, in keeping with the low budget, I made these risers out of hardboard. Hardboard is made of high density fiberboard and is an engineered wood project. I purchased these 2’x4′ hardboard panels for around $6 each making this a much cheaper alternative to oak.

The risers in this case are primarily decorative and won’t be walked on, and are covering a real wood so the hardboard is a fine choice here.

What you need to make the hardboard stair risers:

  • 1/8″ hardboard
  • primer
  • white paint (advanced or scuff proof)
  • paint rollers or brushes
  • circular saw or table saw
  • liquid nails or nail gun
  • caulk

Make the Stair Risers

Once your existing risers have been measured you will know how many hardboard panels to purchase, this amount will depend on the width of your stairs and the number of risers. I used (4) 2’x4′ panels for this project to make 11 stair risers.

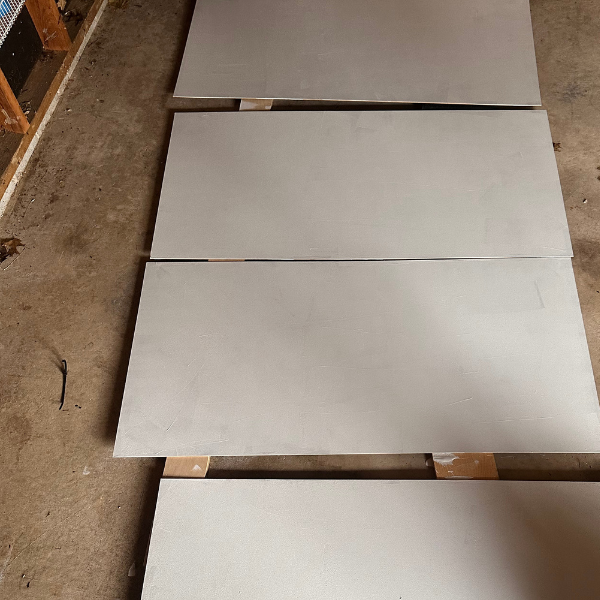
Because hardboard is a dark color, this needs to be primed prior to paint. I find it easier to prime them before cutting the wood to size.

Once primed, cut your hardboard to the riser dimensions needed. I used a circular saw for this step however a table saw would be a great choice as well.

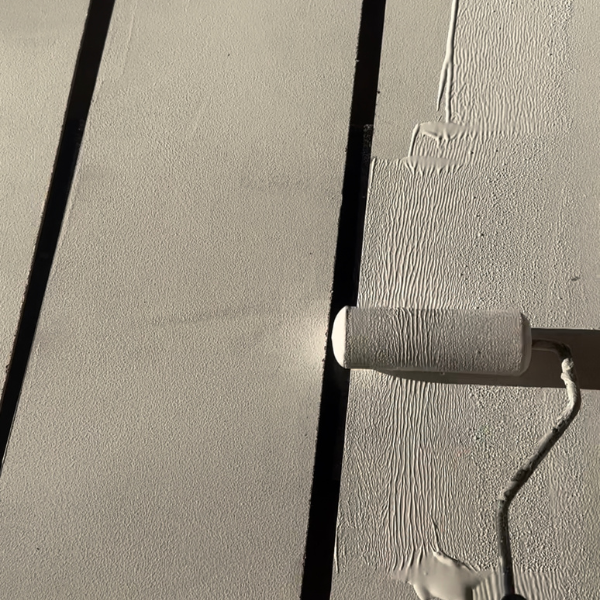
Once the pieces are primed and cut, you can paint them white. I like to use a foam roller for this and did two coats of white paint.

Attach the DIY Stair Risers

Your stair risers are made and now it’s time to attach them to the existing staircase. My stair treads have a bullnose overhang so the 1/8″ thickness didn’t take away from the overhang at all and fit nicely.

Ideally, the stair risers would be attached with liquid nails. My long term plan for this staircase is to add oak hardwood to the treads and risers when my budget allows. Removing these DIY stair risers after being glued on would be incredibly difficult and I didn’t want to create that challenge for myself.

To avoid this issue, I used a nail gun to attach the risers to the staircase and this option worked just fine. At this point you will just have nail holes that can be filled with wood filler and touched up with paint.

Once all of the stair risers are attached, caulk along all of the edges of the risers where they meet wood. Touch up any spots with paint and they should look great!

The cost of these risers (minus paint) was $24 for me. This was a worthwhile expense to get a nice clean look on the risers and I didn’t have to worry about any imperfections in the pine staircase risers that were existing.

These DIY stair risers made out of 1/8" hardboard are a great budget-friendly option for a staircase makeover going from carpet to wood.

Related Posts:

Check out the other posts in this series of a staircase makeover, going from carpet to wood.

How to remove carpet from stairs

Painting and Staining Pine Stair Treads

DIY Coffee Bar Ideas for Home Kitchens

February 8, 2023DIY Woodworking

These DIY coffee bar ideas include cabinets and floating shelves, building plans, and ideas for transforming furniture into home coffee bars.

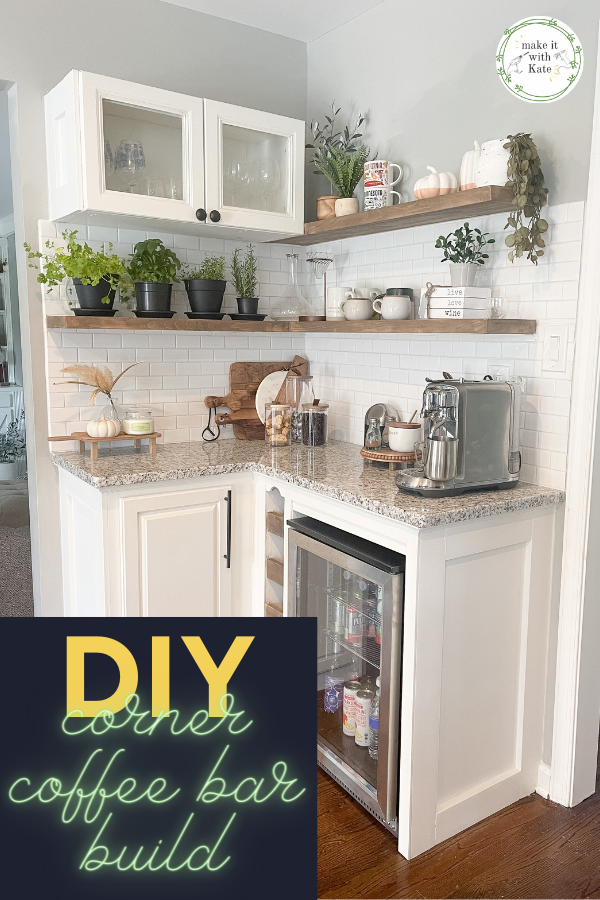
I love having a coffee bar in my kitchen at home. Not only is it my favorite part of my kitchen, but it also saves me money on takeout coffee (ahem, Starbucks). I added a DIY Corner Coffee Bar build that is great for everyday use or entertaining and here are ideas for inspiration for a coffee bar in your kitchen as well.

These DIY coffee bar ideas include cabinets and floating shelves, building plans, and ideas for transforming furniture into home coffee bars.

Coffee Bar Ideas for Your Kitchen

I love entertaining in my home, and so often I hear “it feels like I’m at a coffee shop!” when guests make a cappuccino or latte in my kitchen. It’s one of my favorite compliments, especially because this corner was completely bare when we moved in.

My corner coffee bar was a build from scratch. I built the base corner cabinet and added floating shelves and backsplash. But, there are so many fun ideas for coffee bars in your home.

You can build one from scratch, below I’ll link a few custom plans for these, or you can transform old furniture into a coffee cabinet. I hope you find some inspiration here so that you too can have that coffee shop feel without leaving your home.

Coffee Bars with Floating Shelves

I love the look of a cabinet base with floating shelves coffee bar. This is a really fun way to display a coffee mug collection or add some syrups and jars in an aesthetically pleasing style.

These DIY coffee bar ideas include cabinets and floating shelves, building plans, and ideas for transforming furniture into home coffee bars.

DIY Coffee Bar Build // Make it with Kate

DIY Rustic Farmhouse Beverage Bar // Repurposed & Upcycle

Modern DIY Coffee Station // Love Create Celebrate

DIY Coffee Bar Floating Shelves // Stay Home Style

Custom Coffee Cabinet Plans

Are you looking to build your own coffee cart or cabinet from scratch? Here are some fun tutorials to get started on building your own piece of furniture to house your coffee maker.

DIY Coffee Bar Table // Woodshop Diaries

DIY Coffee Bar Plans // Pine and Poplar

Coffee Bar Plans // Build Blueprint

Build a Wood Bar Cart for Entertaining and Storage // Remodaelholic

Coffee Bars Made from Carts

There are plenty of options for standalone and rolling carts that can be added to a home kitchen. These ideas will give you inspiration to give them a permanent space as a DIY coffee bar in your home.

How to Set Up a Small Coffee Station // Our Little Handmade Home

Coffee Cart at Home // Tell it to Your Neighbor

How to Turn an Armoire into a Coffee Bar // The Happy Farmhouse

Add a DIY Coffee Bar to Your Home

From DIY builds like cabinets and floating shelves to decorating a piece of furniture with coffee mugs, I hope these ideas inspire you to feel like you’re in a coffee shop in your own kitchen too!

These DIY coffee bar ideas include cabinets and floating shelves, building plans, and ideas for transforming furniture into home coffee bars.

How to remove carpet from stairs

February 7, 2023DIY Woodworking

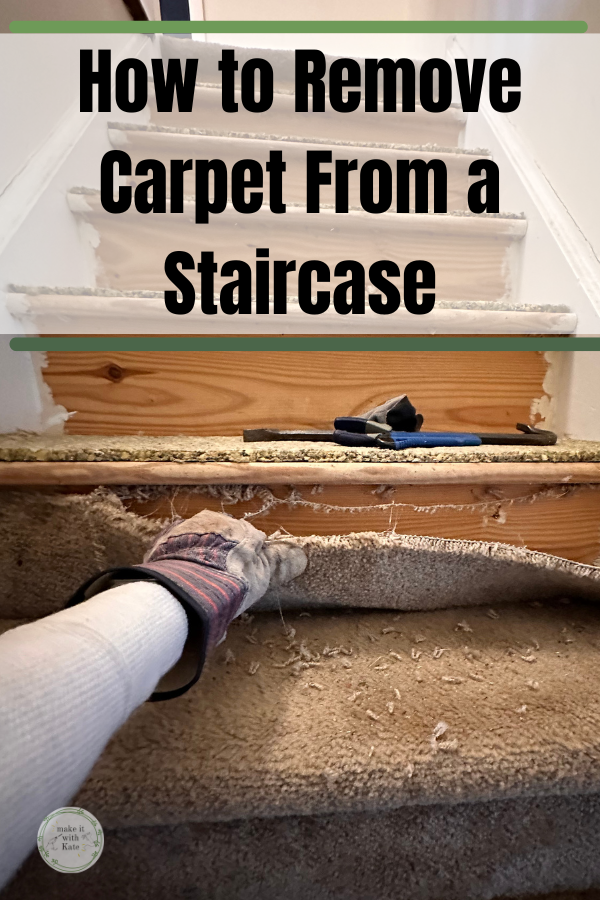
This tutorial will walk you through the tools and the process you need for how to remove carpet from stairs.

The first step of this staircase makeover was to get all of the carpet off of these stairs. I actually went in to this process not knowing exactly what my plan was going to be, but I knew that I wanted the carpet gone and that I wanted a DIY wooden looking finish at the end. So, how to remove carpet from stairs…it’s easier than you think!

How to remove carpet from stairs

Carpet removal from stairs can seem like a daunting task. There were a couple of things that I didn’t know to expect, such as how removal around the balusters would be and what all of the trim areas would look like once the carpet was removed.

The removal around the balusters was incredibly easy, that wasn’t an issue at all. The trim areas were the biggest challenge of this project but caulk and wood trim (and flexible vinyl trim) are almost always able to fix those areas and in this case it worked out just fine.

Related Post: DIY Mini Fridge Cabinet: Corner Coffee and Wine Bar

What’s under carpet on stairs?

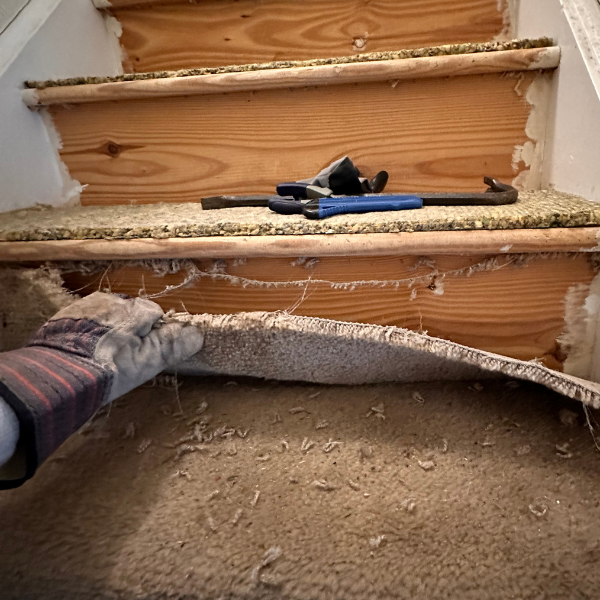
Before carpet removal it’s important to know what kind of flooring is under the carpet. It’s pretty easy to take a peek under carpet on the stairs by pulling on a corner at the riser with a pair of pliers. Take a look at what kind of flooring is under the carpet and then just push the carpet back into place.

In my case, there was a pine staircase underneath the carpet which had some pros and cons.

The pros of having a pine staircase was that the treads were risers with the bullnose overhang and the wood was in pretty good shape. A pine staircase like this is a great candidate for a painted staircase. However, I wanted the look of a wood stain for this staircase which is difficult with pine.

Pine wood is soft and porous making it a less than ideal wood for a staircase. A more durable choice would be oak wood treads but pine is manageable, and you’ll see in the end how I was able to make this pine staircase look like stained wood.

What you need to remove carpet from stairs

A few tools and safety measures will make this an easier process:

  • needle nose pliers
  • crowbar/pry bar
  • staple remover tool
  • gloves
  • face mask
  • safety goggles
  • utility blade

*A face mask, safety goggles and gloves are highly recommended with this project.

Pull the carpet from the stairs

makeitwithkate

🪚 Transforming builder grade into modern colonial
🔨 DIY builds and decor
🪑 Furniture flips

Make it with Kate | DIY Blog
These motorized roller shades from @smartwingshome These motorized roller shades from @smartwingshome are the final missing piece to this living room makeover! I just love how easy they are to use with the remote or as part of my home automation. The color is the perfect neutral and the linen provides great light-filtering. These are the SmartWings Motorized Light Filtering Roller Shades 70% Blackout Linen, color Caramel.
🌟🌟 L I V I N G  R O O M  R E V E A L 🌟🌟 what’s new? Wall treatment, door and window trim, stained beams, updated doors, lighting and paint! DIY is too much fun 🥰 do you have a favorite part? ➡️➡️ swipe to see some progress/before pics! #diyhome #livingroomdecor #moderntraditional #diydecor
🌟The living room I bought versus the one I crea 🌟The living room I bought versus the one I created. 🌟 The number one thing I’ve learned in DIY, is to follow and know the trends, but ultimately find your own style and create what you love, and what you are your family are comfortable in. #diy #diyhome #livingroom #moderntraditional
I’m loving how fresh this living room feels now! I’m loving how fresh this living room feels now! #diyhome #moderntraditional #livingroom #diydesign
These doors are DONE! This was a labor of love but These doors are DONE! This was a labor of love but I am happy with how they turned out! The reeded film over the plexiglass keeps the playroom mess out of sight, but the room feels a bit more open this way. More details in highlights! #diyhome I used @retiqueliquidwood to cover the chalk paint without any sanding!
Taking these doors from painted and scratched to w Taking these doors from painted and scratched to wood-grained French doors with @retiqueliquidwood - they are almost done, stay tuned for the end result! I think they will be good! #diydoors
I’m making progress in this living room! Next st I’m making progress in this living room! Next step is to take these beat up, painted doors and make them look like new French doors! I cut large holes in the middle of them and am going to make a plexiglass insert. Here’s hoping!
Let’s take these beams from painted black to a b Let’s take these beams from painted black to a barn wood look. Check out this fun and easy process! What do you think?!
Picture frame moulding in the living room phase 1! Picture frame moulding in the living room phase 1! I updated the door and window trim to a craftsman style, the added double box moulding to the walls, and board and batten to the breakfast bar. Stay tuned to watch this get finished! It’s gonna be good!
I’m switching out the trim work in my living roo I’m switching out the trim work in my living room to add Craftsman moulding to the doorway and window! This is part of a living room refresh, stay tuned for box moulding and updated doors and beams next! #craftsmantrim #craftsmanmoulding #doortrim #diy #doityourself
Sometimes, you just have to go for it. 🔨 🪚🪛
Load More… Follow on Instagram

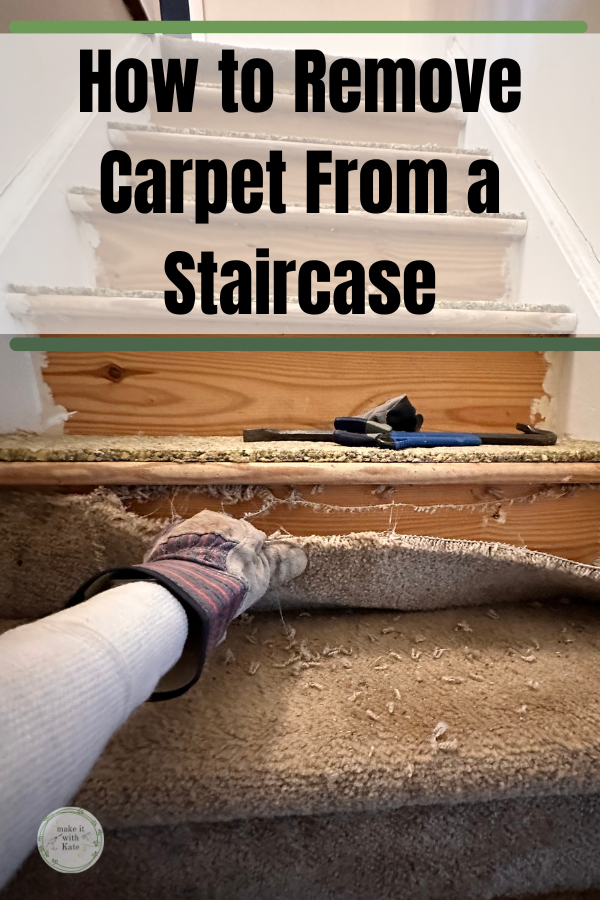
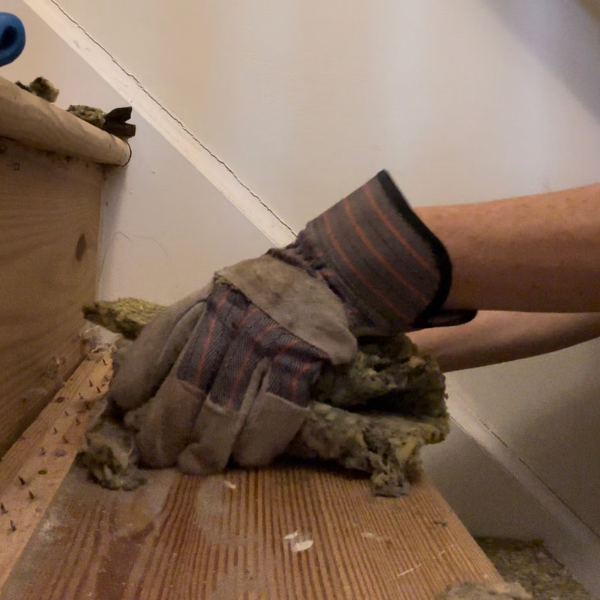
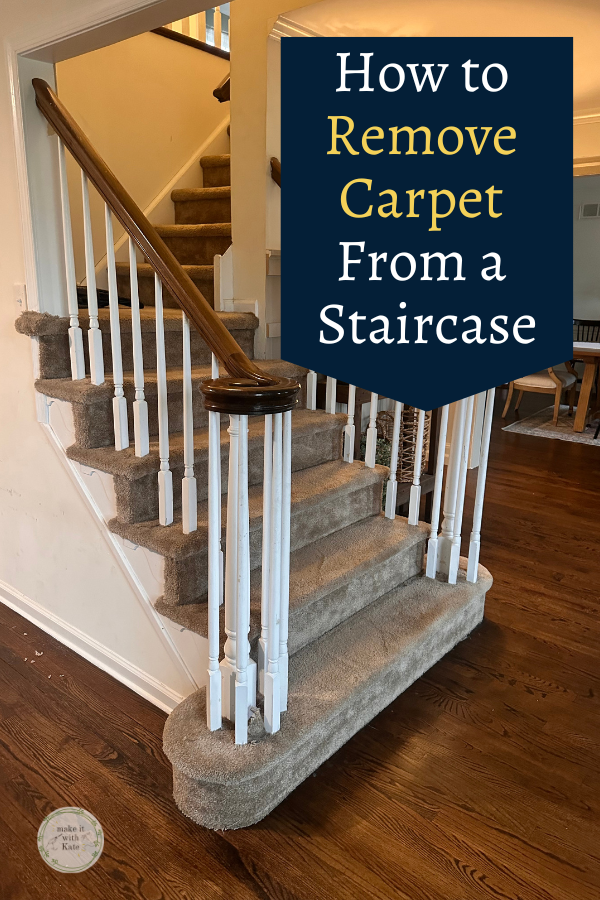
Begin at the top of the staircase and use pliers to start pulling the carpet at the top of the riser. The carpet should begin to come off quite easily. Continue pulling and ripping the carpet off using a utility knife or razor blade on any parts that get stuck.

Once all of the carpet is removed, the grunt work begins. On each tread under the carpet will be a piece of carpet foam stapled onto the tread. Using gloves, peel the carpet foam off of the treads.

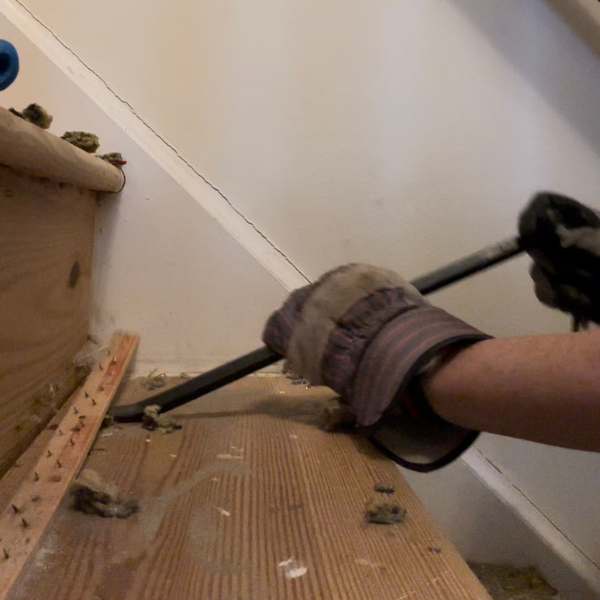
After the foam is removed there will be a carpet tack strip and the top of each tread. The easy way to remove this is by using a pry bar and pulling these off.

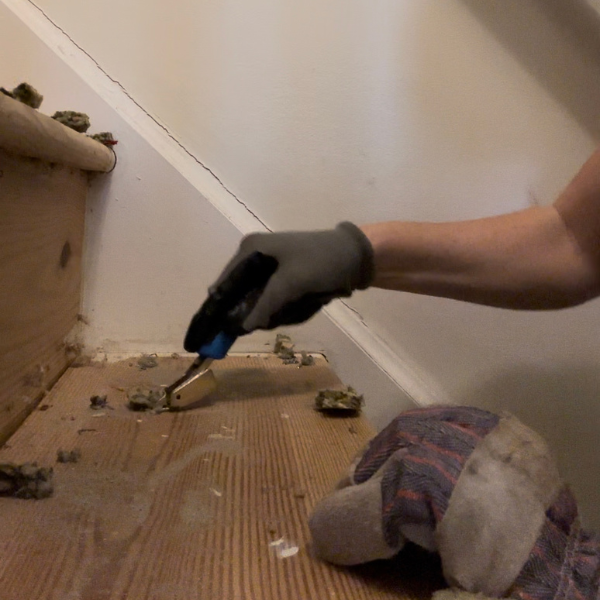
Once the carpet and the foam is removed, there will be staples galore to remove. In my opinion, this is the absolute worst part of this entire project, but, after a little bit of grunt work the carpet will be gone and the stairs will be ready for refinishing.

Prepare the staircase for refinishing

Now that the staircase is completely bare, it’s time to get to the next step of this staircase makeover, painting and staining pine wood stairs!

how to remove carpet from stairs. staircase with carpet

Read Next:

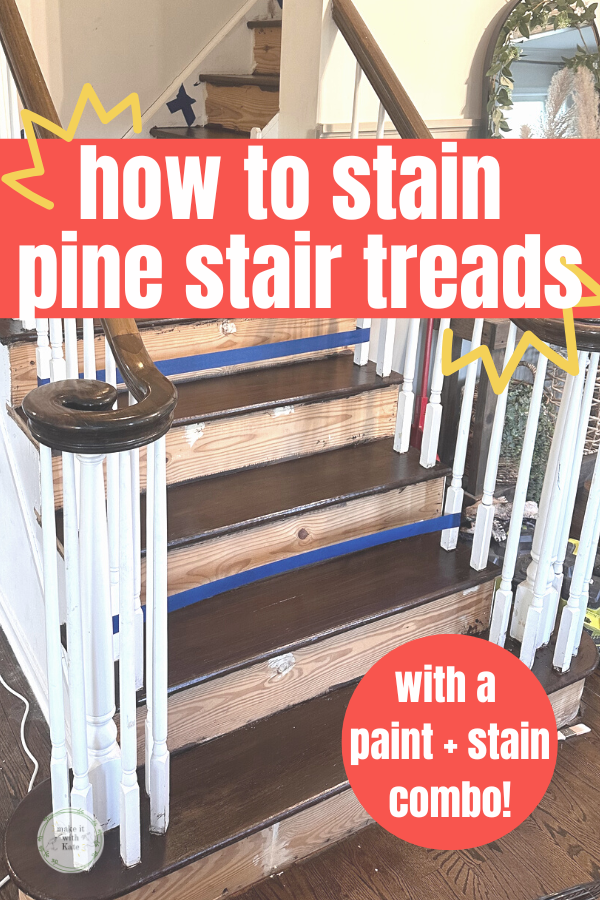
Painting and Staining Pine Stair Treads

Staining pine stair treads can be tricky, this paint + stain combo will show you how you can make pine stairs beautiful on a budget.

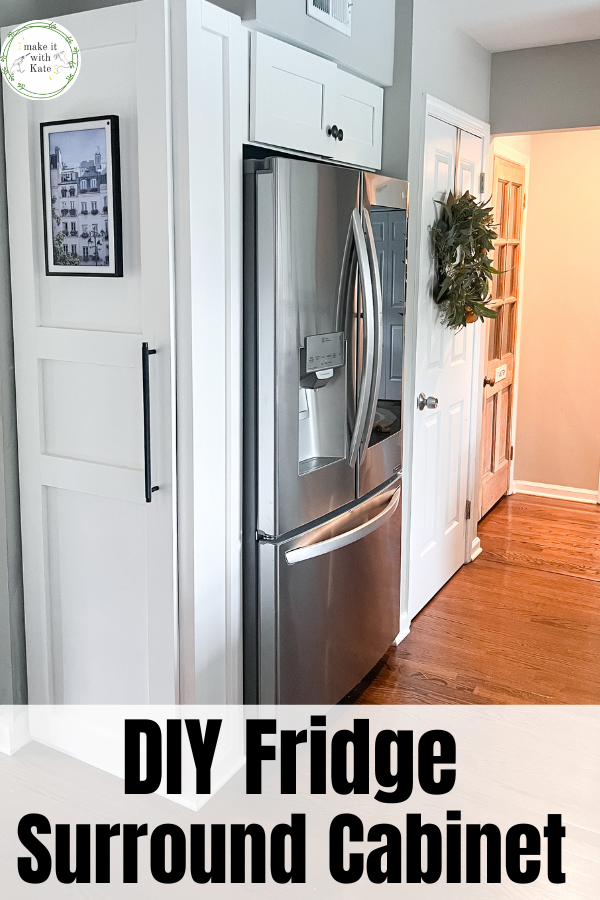
How to Build a Refrigerator Surround Cabinet

September 6, 2022Building Projects, DIY Woodworking, Uncategorized

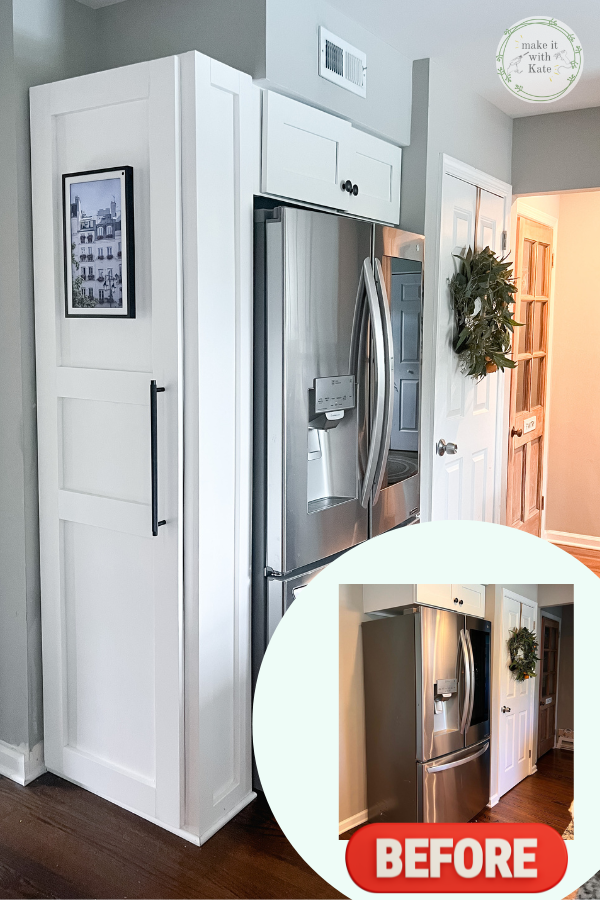
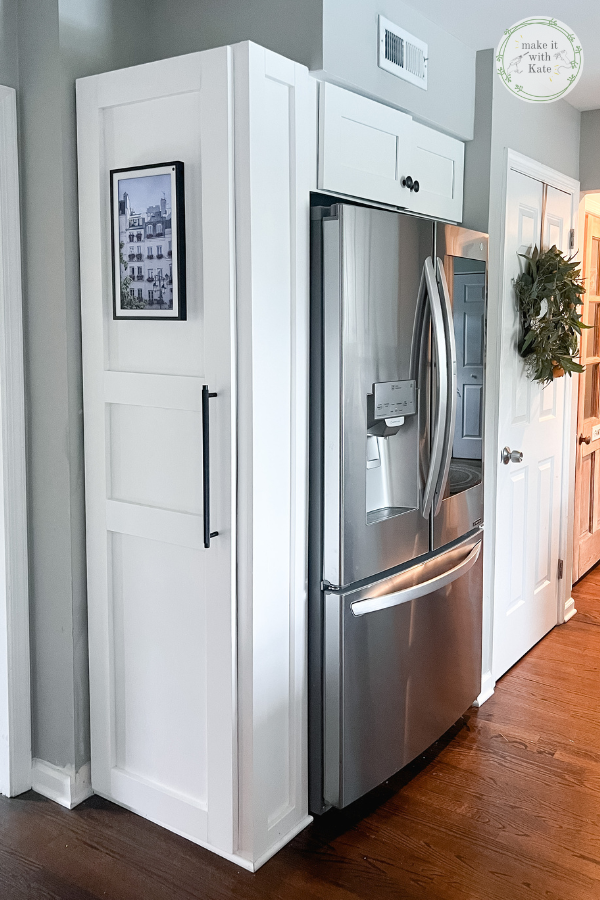
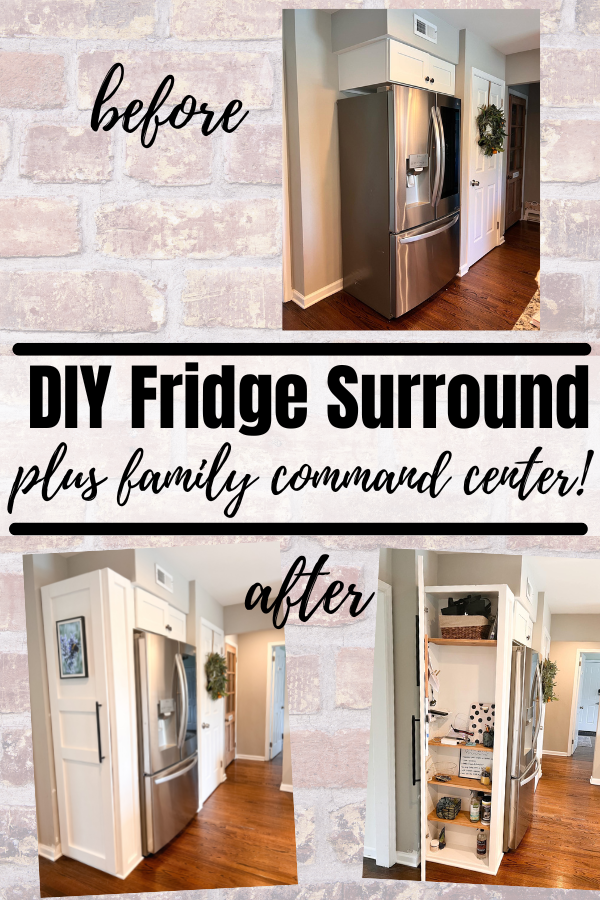
This refrigerator surround cabinet makes this kitchen fridge look built-in, plus it serves as a family command center.

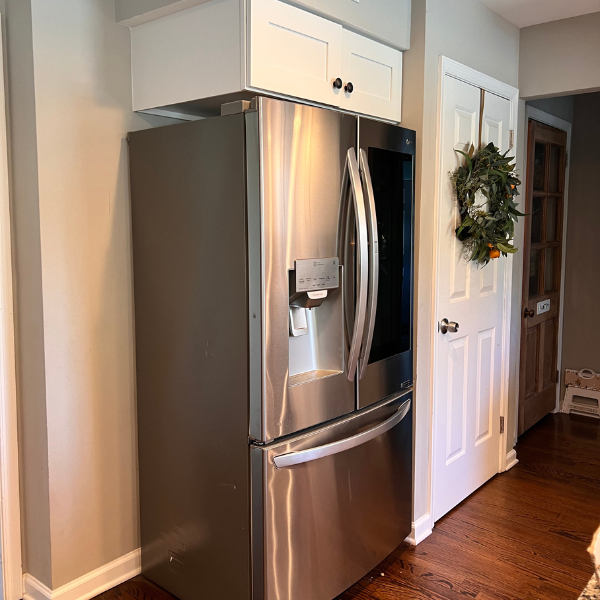
I have expanded my kitchen by adding a diy coffee corner and a breakfast bar, this refrigerator surround cabinet is the final addition here. Our kitchen was builder grade and had an overhead refrigerator cabinet with no other enclosure. This refrigerator surround cabinet makes the fridge look built in while serving as a command center for my family.

This refrigerator surround cabinet makes this kitchen fridge look built-in, plus it serves as a family command center.

How to Build a Refrigerator Surround Cabinet

Prior to building a fridge surround, it’s important to note what exactly you want to get out of your surround.

Are you looking for aesthetics? Do you need more cabinet space? In this case, I wanted the refrigerator to be built-in. Additionally, I decided that rather than building just an enclosure, I would add a cabinet to increase the storage space in my kitchen.

This kitchen enclosure is essentially a tall cabinet that is built in next to the refrigerator, as this particular fridge has a wall on the other side of it.

What you need to build a refrigerator surround cabinet:

  • 3/4″ sanded plywood (dimensions to fit cabinet box+face frame)
  • pocket hole tool
  • table saw or circular saw with jig
  • drill
  • 3/4″ MDF primed trim
  • 1/4″ sanded plywood (dimensions for door)
  • door hinge template
  • door hinges for 3/4″ overhang
  • base shoe moulding
  • wood glue
  • interior construction screws

Steps for building a tall cabinet

This tall cabinet will serve as a bulk of the refrigerator enclosure. To build a cabinet, make a basic box with a back, sides, top and bottom and then a face frame for the front.

Measure your space and how the cabinet will fit. When taking the measurements for your cabinet box, remember to take into account the thickness of the plywood you are using.

For example, if the cabinet is 80″ tall, the back will measure 80″ but with the top and bottom attached to the back (both at 3/4″ thickness) the sides will only be 78 1/2″ tall.

Measure your space and plan all of the cuts for the box. I like to sketch these out of graph paper.

Cabinet measurements you will need:

  • back
  • top
  • bottom
  • sides
  • face frame lengths (make this out of plywood or use 1×2 common board)

How to assemble the tall fridge surround cabinet

There are two options for assembling the cabinet box.

You can choose to use pocket holes or attach the pieces with construction screws through where the cabinet pieces meet up.

What are pocket holes?

Pocket holes are a type of joinery where a hole is drilled at an angle in one piece of the build. This is joined to another piece with a screw drilled in at that angle.

This can be achieved with a pocket hole tool. I like to use this one from Kreg which is a simple and straightforward tool to use. There are some instructions that are crucial to pay attention to such as the depth of the hole and the screw used. But, after getting the hang of pocket hole joinery I find this the easiest way to put a cabinet box together.

Tip: Pay attention to where the pocket holes are, though these holes can be filled, you will want to place the pocket hole on the wall side or back of the cabinet to keep everything looking clean.

Adding a face frame to a tall cabinet

A face frame isn’t a necessary component to a cabinet, I prefer using one when building a cabinet as it provides a more finished look when using plywood and gives more wiggle room in the cabinet door install.

A face frame is simply some trim that goes around the front of the cabinet box.

Cut the length of the entire side of the cabinet from a 1×2 common board or plywood and attach using wood glue and a nail gun.

Then cut the width remaining (total width minus face frame sides) and attach in the same way.

Your cabinet box should be complete!

This refrigerator surround cabinet makes this kitchen fridge look built-in, plus it serves as a family command center.

Build an Easy Shaker Cabinet Door

I feel bad calling this a shaker cabinet door because I definitely didn’t build it the “right” way. But, it is shaker style for sure, so I’ll show you how to build it the cheat way too.

Read the full tutorial and breakdown for building an easy shaker door here.

Essentially, I built a frame out of primed 1x4s using pocket holes so assemble the stiles and rails.

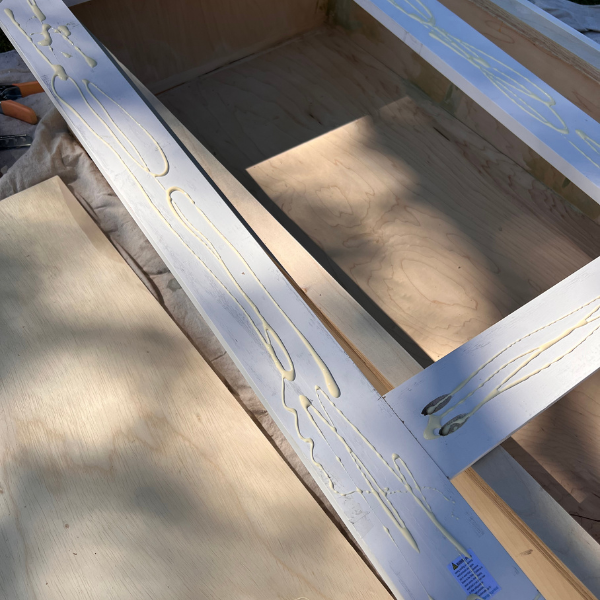
Then I glued the frame onto 1/4″ plywood. You could alternatively use hardboard or MDF for this for a smoother texture.

When making ‘real’ shaker cabinets, a groove or channel is cut out of the center of the stiles and rails and the middle slides into that. This creates a more seamless look.

I chose to build these the easy way for 2 reasons. One, my side pieces were almost 8′ tall and it felt unsafe to run that through a table saw the way I needed to to create a groove.

And 2, the thickness of the frame on the door the ‘easy’ way is now the same as the thickness on the trim on the side of the cabinet making the entire thing look uniform.

And, it was easier.

Adding hinges to a DIY cabinet door

Choosing hinges for a cabinet door can be overwhelming, but there are a couple of key things to look for when finding the right ones.

  • Does your cabinet have an overlay (face frame)?
  • How much swing or distance do you want your door to open to?

In this case, my doors had a 3/4″ overlay and I wanted a 90* open.

Using a hinge template, drill the holes on the inside of the cabinet doors and attach the hinges using provided screws.

Then, hang the door onto the cabinet by attaching the other side of the hinge to the face frame of the cabinet.

Tip: when hanging a door by yourself, prop the door up on the bottom with scrap wood to hold it in place while you attach the hinges to the cabinet.

DIY Command Center Fridge Surround

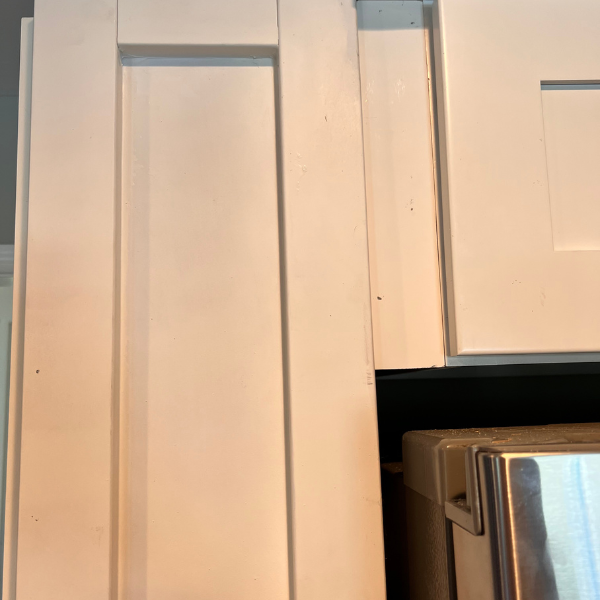
Once the DIY refrigerator cabinet is built it’s time to install. Do this by using construction screws on the inside of the cabinet into the wall (into a stud). Then use spacer blocks and a spacer board at the front to build the cabinet into the neighboring cabinets.

This can be a piece of scrap wood cut to the correct width and length of the gap in between cabinets.

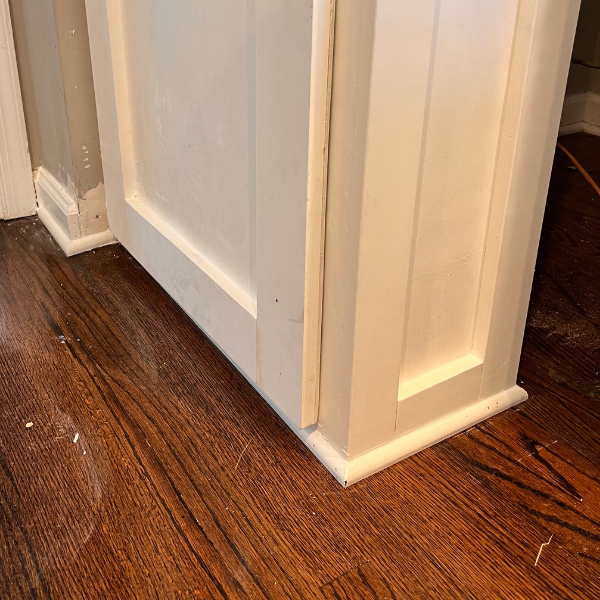
Add trim at the base of the cabinet to match existing trim in the room.

Add hardware to the refrigerator surround

For a tall cabinet like this I like a longer bar handle so that the proportions look accurate.

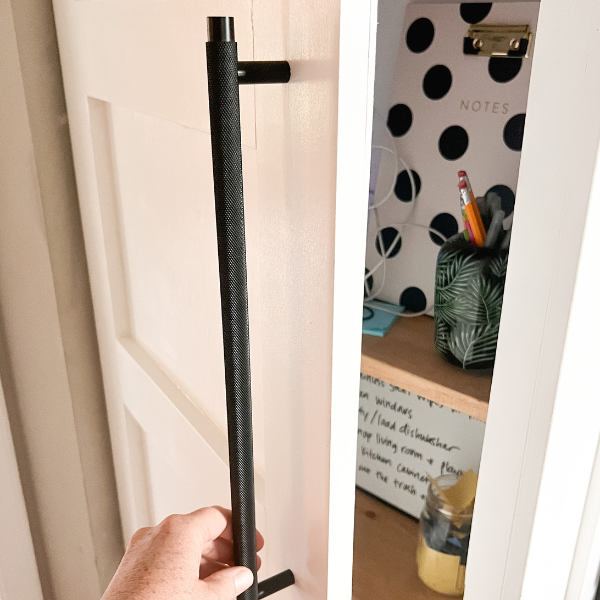
On this cabinet I used the Kepler Knurled T-Bar Handle from Plank Hardware which has a really nice weight and texture to it.

This refrigerator surround cabinet makes this kitchen fridge look built-in, plus it serves as a family command center.

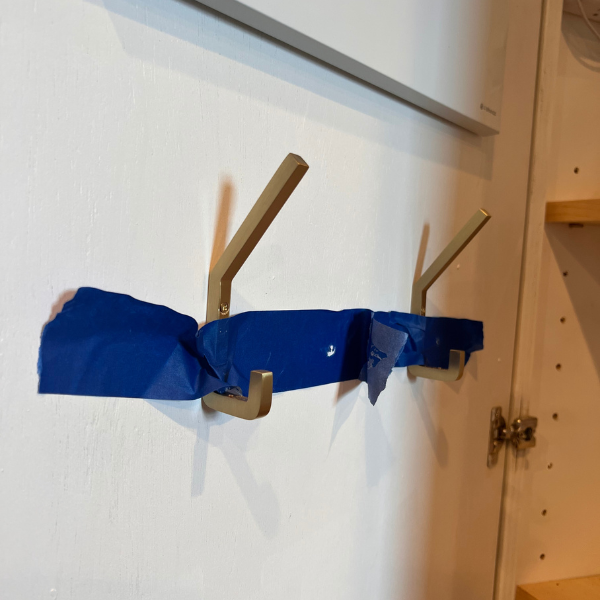
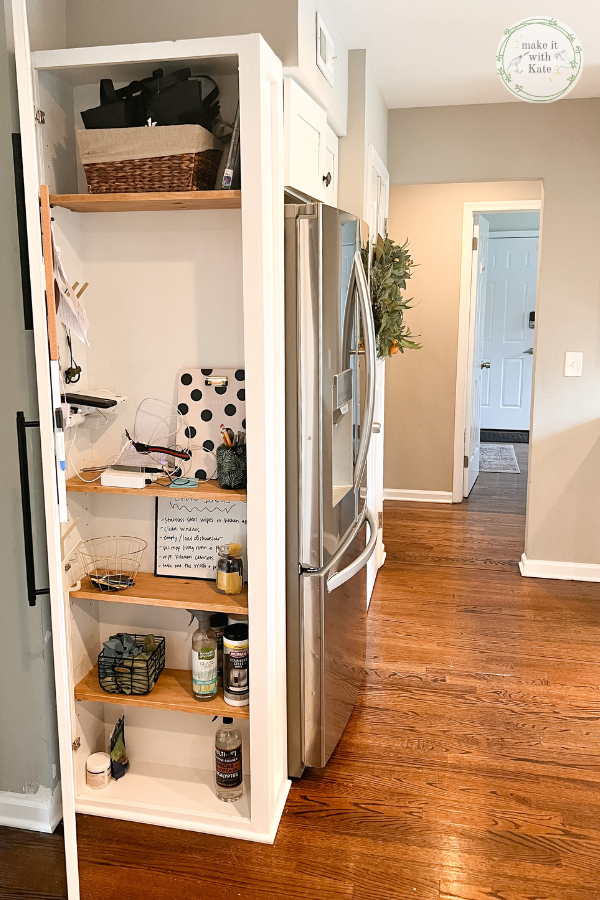
Additionally, I used their Levi Square Hooks in Brass on the inside of the cabinet.

When adding cabinet hardware, use a piece of painters tape to measure the distance between hardware holes, then place the tape on the door and drill through the holes in the tape.

This refrigerator surround cabinet makes this kitchen fridge look built-in, plus it serves as a family command center.

This is a quick and easy way to do this without measuring!

Additionally, when installing something like a hook by yourself, use painters tape to hold the hook in place while drilling pilot holes and attaching the hardware.

This refrigerator surround cabinet makes this kitchen fridge look built-in, plus it serves as a family command center.

Built in Refrigerator Cabinet plus Command Center

That’s it! Now the refrigerator looks built in with an enclosure, plus this cabinet can serve many purposes. In our family, it’s a command center with cleaning supplies, a chore chart and all charging ports for all the things!

Amazon recommendations for a family command center:

  • Echo Show 15 Alexa Device (what I hung on the outside of the door here)
  • Multi Ipad Charging Station
  • Power Strip with USB slots
  • Dry Erase Board
  • Corkboard
  • Meal Planning Sheets
  • Magnetic Strip

If you have any other ideas for this family command center, let me know in the comments!

This refrigerator surround cabinet makes this kitchen fridge look built-in, plus it serves as a family command center.

Installing a Tile Backsplash: DIY Corner Coffee Bar

December 10, 2021Building Projects, DIY Woodworking

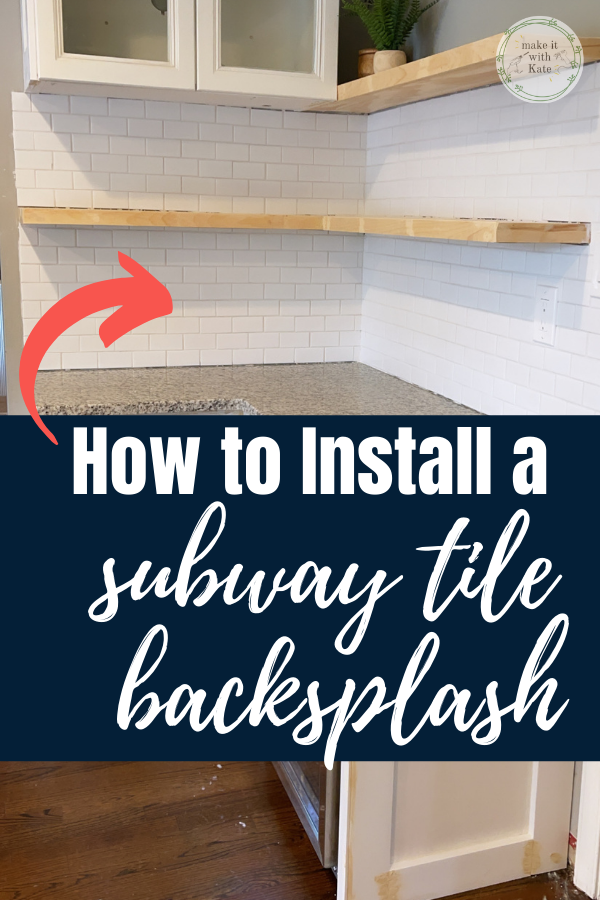
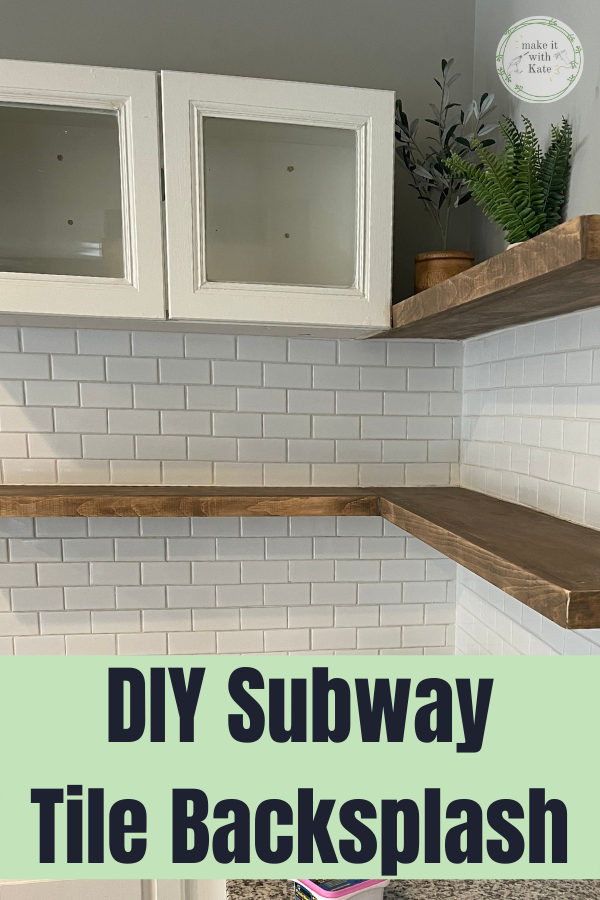
Installing a tile backsplash is a great way to make your space look upgraded. Check out the tips on making this beginner friendly.

The base of the DIY corner coffee bar is complete with the blind corner cabinet and mini fridge cabinet builds complete. I opted to get a granite that matched the rest of my kitchen as a countertop, and now it’s time for installing a tile backsplash. This is turning into such a fun DIY Woodworking project.

Read these to see how we got here:

Convert a Base Cabinet to a Blind Corner Cabinet: DIY Corner Coffee Bar

DIY Mini Fridge Cabinet: Corner Coffee and Wine Bar

Installing a tile backsplash is a great way to make your space look upgraded. Check out the tips on making this beginner friendly.

Installing a Tile Backsplash

I’ll admit that installing a tile backsplash intimidated me. I set out to make this as straightforward as possible without buying a whole collection of new tools.

If this is your first time tiling a backsplash, choose a tile that doesn’t require an intricate layout or tricky cuts. Taking this into consideration, I decided to go with a basic subway tile that came on a mesh sheet.

This provided me with an easy to follow pattern that was mostly set with the spacing of the tiles per square foot. Additionally, they only required straight cuts which I could use a tile cutter for instead of a wet saw.

Lastly, grout color matters! White grout on white tile will hide a lot of imperfections in spacing or jagged cuts, whereas using a gray grout will show these imperfections more.

So, white subway tile + white grout = easy!

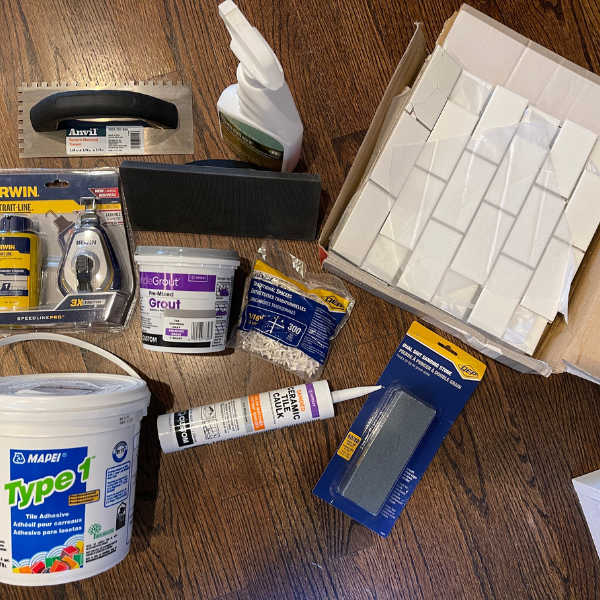
What you need to install a subway tile backsplash

  • Pre-mixed mortar or mastic
  • Notched trowel
  • White subway tile on mesh sheet
  • spacers that match the spacing on the mesh sheet
  • tile cutter
  • white grout
  • grout spreader
  • sponge
  • sanded caulk

How to tile the subway backsplash

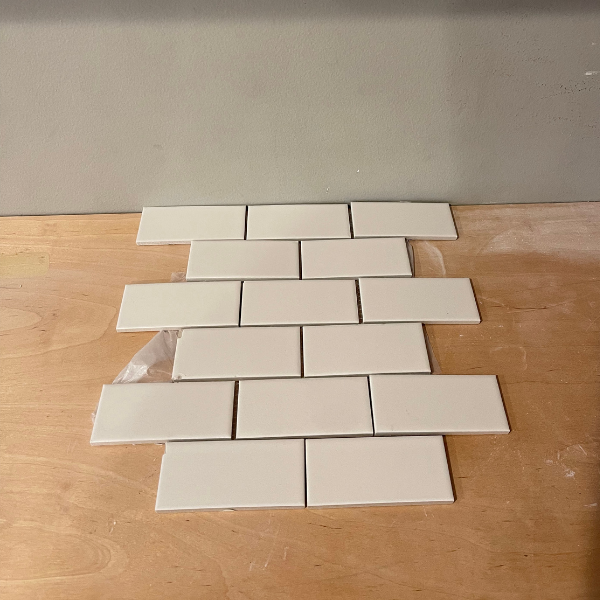
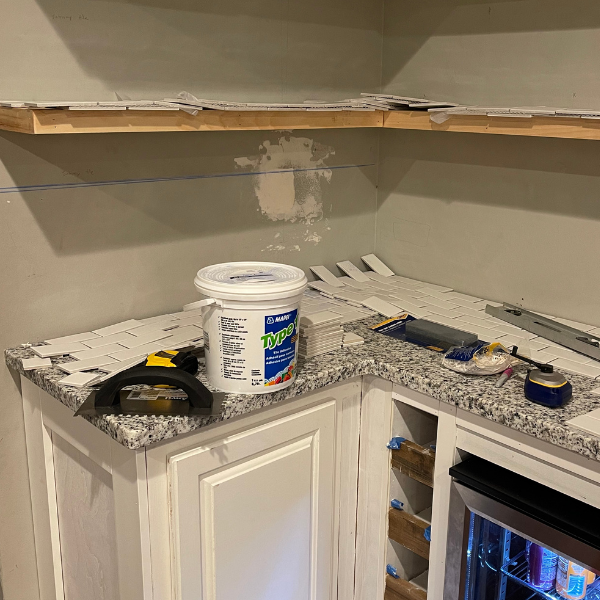
Prior to placing the tile on the wall, do a dry layout on the counter below the backsplash. This will ensure that the spacing will look good, as far as where tile cuts till be etc.

I like to start in the middle and work out, that way the end cuts end up looking similar and the line of sight in the middle of the backsplash looks good. This can also help make sure you have enough tile to fit your space.

Add the mastic to the wall

I like to use pre-mixed mortar or mastic. Mortar can be used with almost all tiles, glass and stone tiles need mortar. Mastic is designed for use with ceramic tiles and works for some porcelain tiles. Because I was using ceramic tiles, I could use mortar or mastic. My stores had mastic available so that is what I used for this project.

Work in small sections because mastic will begin to dry so small sections will keep you from having to scrape off mastic that is beginning to dry.

Use a notched trowel to spread the mortar on the wall in the section you will be working in. The notches will allow for grooves in the mortar on the wall which will help the tile adhere better.

Place the tile on the wall

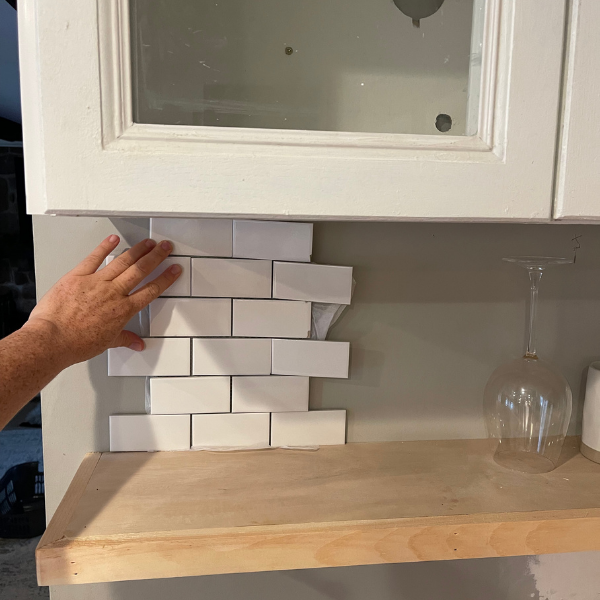
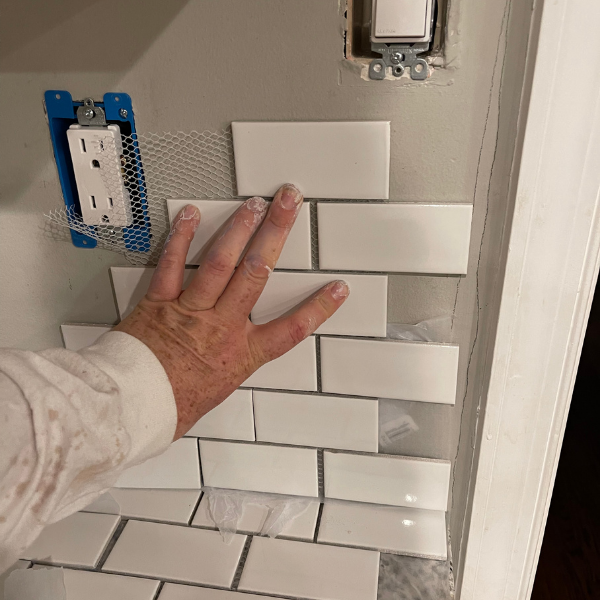
The tile in mesh sheets make this part easy. Grab a sheet of tile and place it on the wet mastic and triple check that the tile is level.

Because the tile should not be flush against the countertop, use spacers at the bottom of the tiles between the counter and the first tow of tile.

Continue to place sheets of tile across the backsplash. At the end of the row at the edge or the corner, tiles will need to be cut. I kept a sheet of mesh tile to the side for my cuts. The tiles peel off of the mesh sheets easily so that they can be cut and placed individually.

To cut a piece of tile, use an inexpensive tile cutter for straight cuts. Measure and mark the tile where you want to cut it, then score and snap with the cutter.

Place the individual cut tiles on the wall where need until all of the gaps are closed in. Use spacers where needed with cut tiles to keep them in place.

If you have outlets or light switches on the backsplash, cuts will need to be made around these areas as well.

Grout the backsplash

The mortar or mastic will take minimum 24 hours to dry. I like to give it a minimum of 48 hours to dry before grouting.

After the dry time is complete, remove the spacers and ensure that the tiles are set and not moving around.

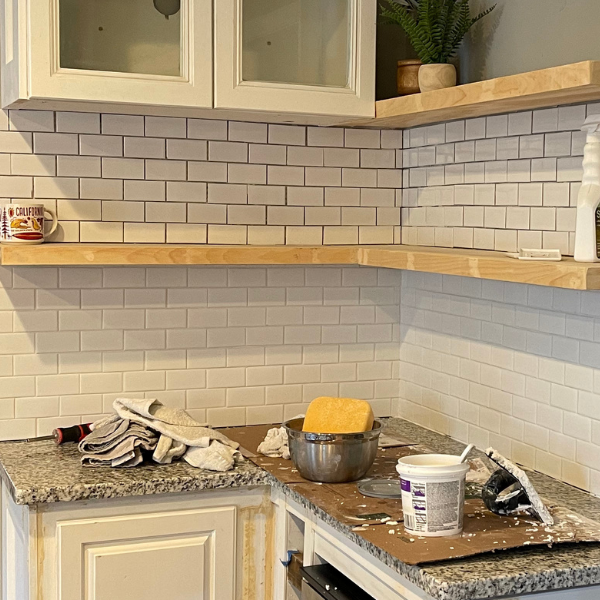
Spread the grout on the tile using a grout float, ensuring the grout is being pressed in all of the crevices between the tile. Once spread, wipe with a large wet sponge.

This is a messy process, but the sponge will get most of the grout off of the tile easily. The sponge and bowl of water will need to be cleaned often.

Continue adding grout until all of the crevices are filled and let dry!

Add sanded caulk along the edges of the backsplash and in the groove between the tile and the countertop.

Once dry, seal the grout with a grout sealer and wipe the tiles down with watered down vinegar to remove the grout haze.

Installing a tile backsplash is a great way to make your space look upgraded. Check out the tips on making this beginner friendly.

Reacp how to make installing a tile backsplash beginner friendly

  • Use a tile on a mesh sheet with clean lines/cuts
  • Use premixed mortar/mastic and premixed grout
  • Use a light grout color to easily hide imperfections
  • Make straight cuts with a simple tile cutter

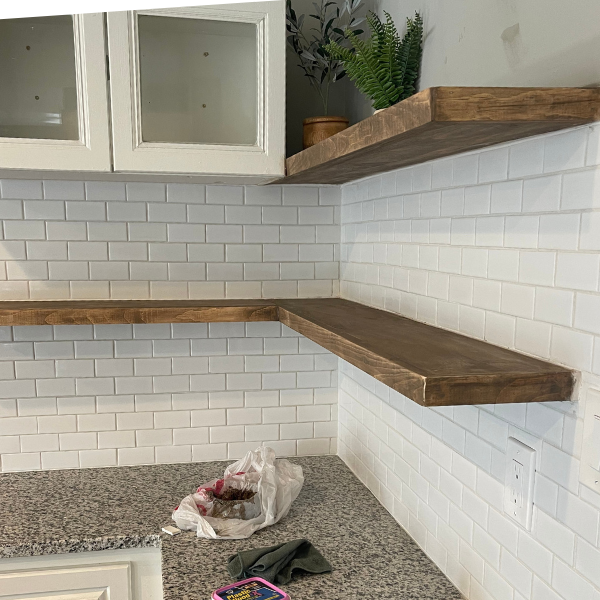
Enjoy your new, beautiful subway tile backsplash!

More in the DIY Corner Coffee Bar Series

  • Convert a Base Cabinet to a Blind Corner Cabinet: DIY Corner Coffee Bar
  • DIY Mini Fridge Cabinet: Corner Coffee and Wine Bar
  • Installing a Tile Backsplash (current post)
  • DIY Floating Shelves (upcoming)
  • DIY Glass Front Cabinets (upcoming)
  • Styling a Corner Coffee Bar (upcoming)

DIY Indoor Climbing Wall: ORC Week 8

November 21, 2021Building Projects, DIY Woodworking, One Room Challenge

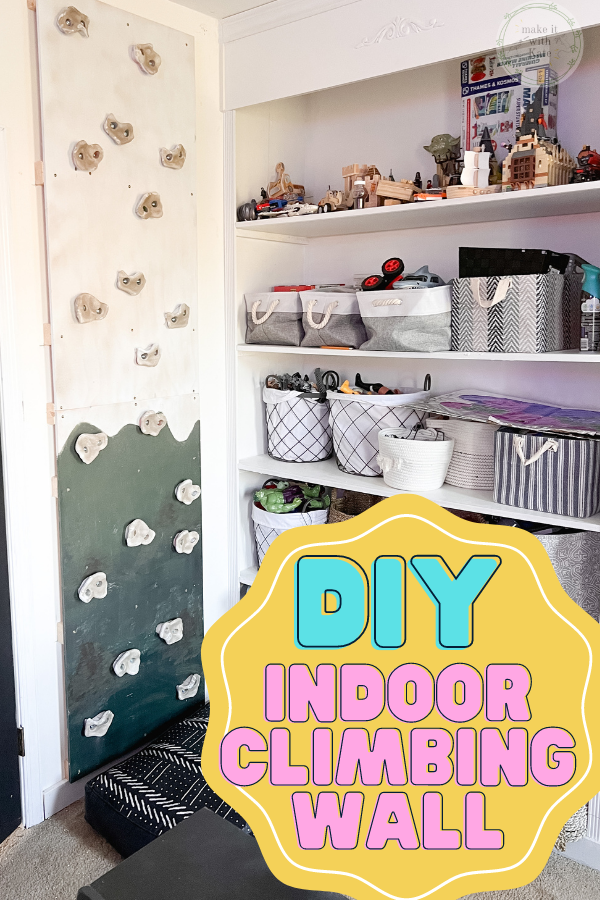
It’s Week 8 of the One Room Challenge, which means this DIY indoor climbing wall is the final component of this room makeover. This room has seen such a transformation over 8 weeks, to see how the room turned out and tutorials for each component, check out the Game Room Makeover here.

This DIY indoor climbing wall is such a fun addition to a game room for kids. Plus, it's a very easy beginnier build with only a few tools needed.

Build a DIY Indoor Climbing Wall

Building a climbing wall is easy! This is a great beginner project and only requires a few tools. Plus, it’s one that kids *and adults* will love. I’ll admit that I’ve climbed to the ceiling a few times, to test it of course.

I wanted a climbing wall as the final touch to this room to give it that extra touch of fun. I had an empty piece of wall next to the DIY built in shelving that I made was tucked away from the rest of the room. It just begged for a fun feature like this!

What you need to build an indoor rock wall

  • 2×3 boards (cut to length of your rock wall)
  • 3/4″ plywood (cut to the size of your wall)
  • 3″ construction screws
  • drill
  • stud finder
  • level
  • climbing holds
  • miter saw/circular saw

How to make the rock wall

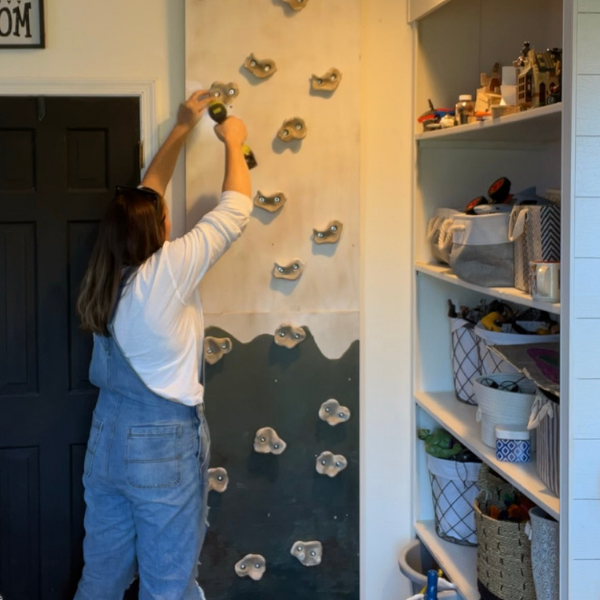
Determine the size of your rock wall. Mine was 2′ wide by 8′ tall, so I was able to buy two 2’x4′ plywood sheets to stack for this project.

Cut the 2″x3″ studs so that they can run across the width of the rock wall, and enough to space them 16″ apart for the entire height of the rock wall.

For this wall, I did six 2″x3″s spaced 16″ apart for the height of the rock wall.

Once cut to size, use 3″ construction screws to attach the 2″x3″s horizontally into the studs. This will look like a ladder when complete.

Assemble the rock wall by drilling holes where the climbing holds will be, and using the mounting hardware to attach the holds to the wall.

When determining the spacing of the climbing holds, do not place any holds where the plywood will meet the 2″x3″ brackets behind the wall.

Once the plywood wall is complete with the climbing holds, attach the rock wall to the 2″x 3″s on the wall with the construction screws.

The rock wall is complete!

I chose to spray paint the climbing holds with white spray paint and textured stone spray because I didn’t want the colorful climbing holds. I also painted the plywood, but you can choose to leave it natural or paint it whatever theme you like!

This DIY indoor climbing wall is one that my kids really enjoy, and it has provided the perfect final touch to this fun, kids game room.

CHECK OUT ALL OF THE POSTS IN THIS SERIES FOR PROGRESS

  • Week 1: Game Room Makeover Plans and Mood Board
  • Week 2: Make a Faux Brick Wall
  • Week 3: DIY Built in Gaming Console from Stock Cabinets
  • Week 4: DIY Faux Marble Countertop with Epoxy
  • Week 5: DIY Picture Frame Shelves
  • Week 6: DIY Neon LED Light Sign 
  • Week 7: DIY Couch with Stool Seating 
  • Week 8: DIY Indoor Climbing Wall (current post)
  • Final Game Room Reveal

DIY Gaming Couch from Scrap Wood: Fall ORC Week 7

November 11, 2021DIY Home Decor, DIY Woodworking, One Room Challenge

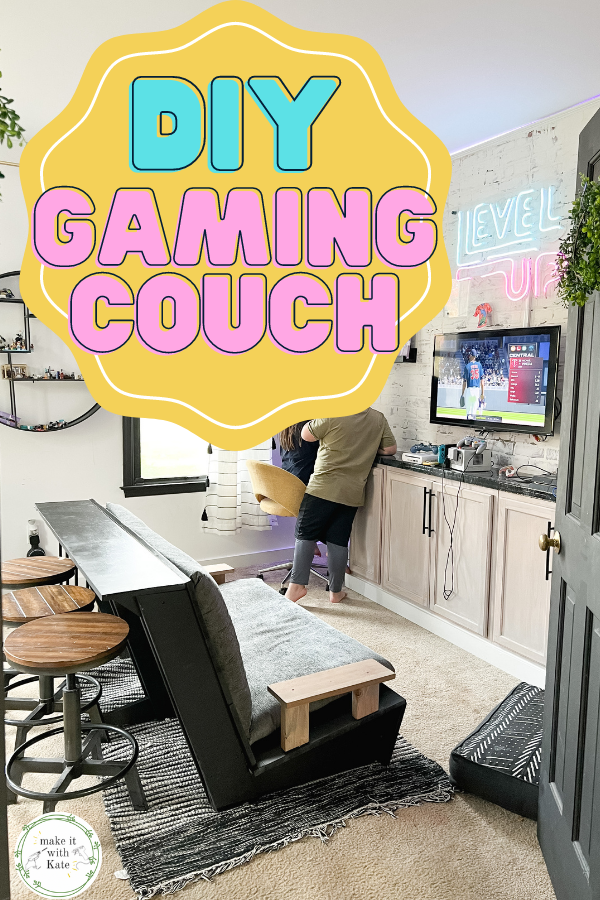
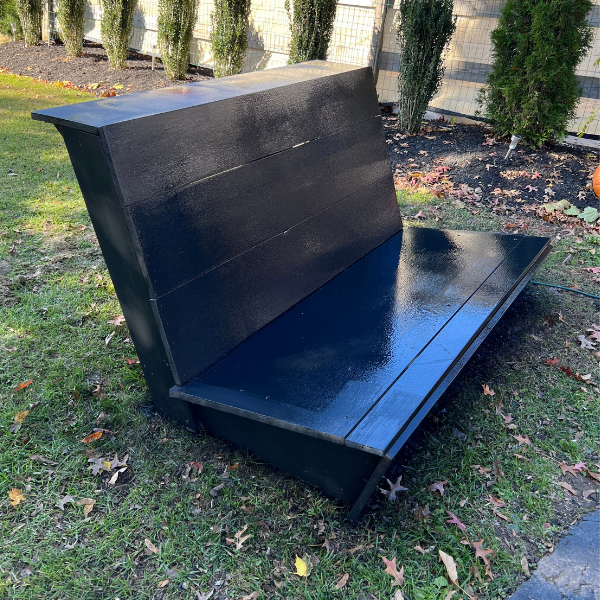
Week 7 of the fall one room challenge means the finishing touches! There is one week left until the final reveal of this game room makeover. One of the components I wanted to figure out most in this room was seating. I built this DIY gaming couch 100% from scrap wood in my garage, and it was easy!
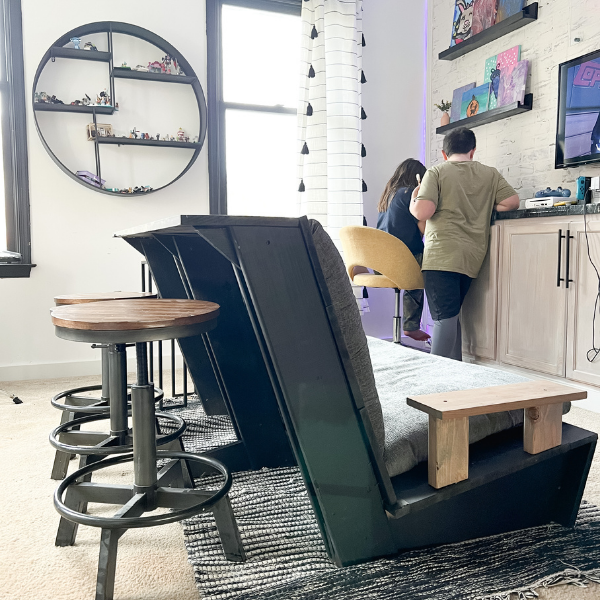
This gaming couch is made out of scrap wood and is the perfect addition to a game room for kids, with seating for 5 in a small space

Build a DIY Gaming Couch

When we bought this house, the first thing we did was convert this media room off to the living room into a playroom.

This entailed ripping out existing built in media shelving and making my own built ins that could house board games and bins of kids toys. Luckily I saved the wood from those media shelves, because they made their way into a couch for that same space! I love a good repurposed project.

This room as a play room needed floor space that was open for play on the ground. It was filled with Magnatile towers (my very favorite kids toy) and marble runs and other works in progress all the time.

My kids have since gotten older and do less floor play, and more hanging out together playing board games and video games. So, with the transition of this room from a preschool playroom to an older gaming room, came the need for seating.

As is the case with most of my DIY woodworking projects here I like to do things on a budget, and use what I have.

How to Build the Gaming Couch

I scoured Pinterest looking for the perfect simplistic design that I could create that would not take up a lot of space and that would provide quite a bit of seating.

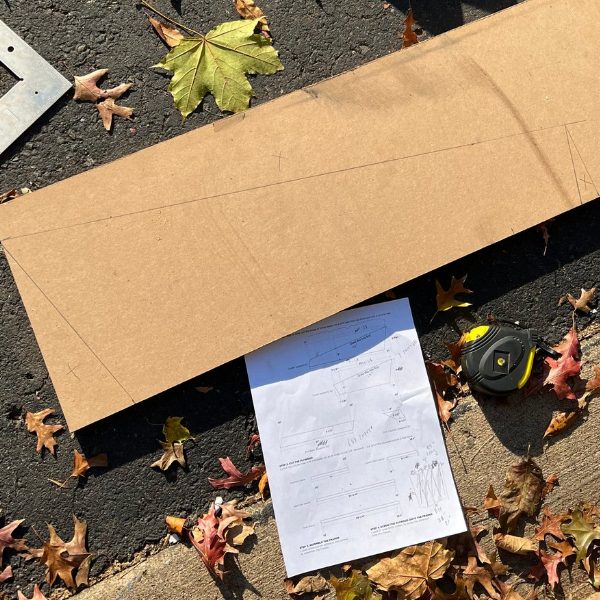
I landed on these plans for a Zig Zag Couch from Homemade Modern and it was perfect. It was low to the ground with a tilt up looking at the tv, perfect for gaming. BUT, it had a counter top back where 3 more bar stools can sit. This allows for 5 kids to hang out in this seating area that really doesn’t take up a lot of the room at all!

You can get the plans for the Zig Zag Couch here on their website, it has a detailed tutorial and cut list that is very easy to follow.

What scrap wood did I use?

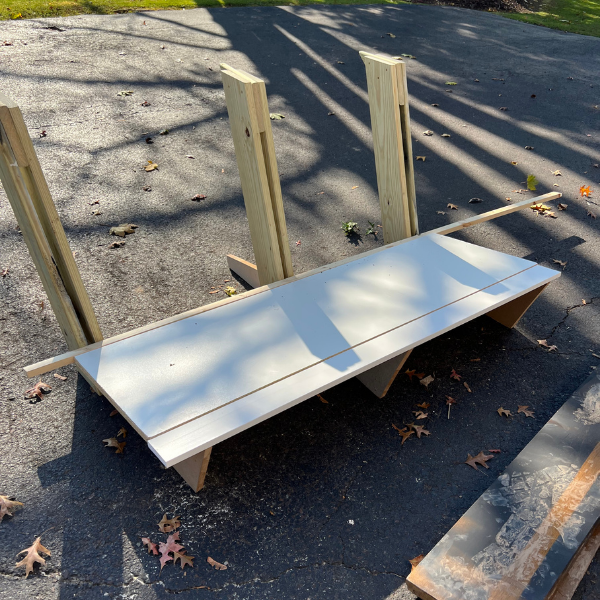
When I tell you I used scrap wood, I mean I seriously used scrap wood. If you look through the plans, they use 2x4s, 2x10s and 3/4″ plywood. When pricing this out, it would have cost me close to $200 to build, which it why I turned to the leftovers that I had!

I used:

  • 3/4″ MDF board for the bottom braces
  • 2×6 for the back braces and the countertop braces
  • 3/4″ melamine for the bench seat
  • 1×2 common board for the back of the bench to make the seat a bit longer
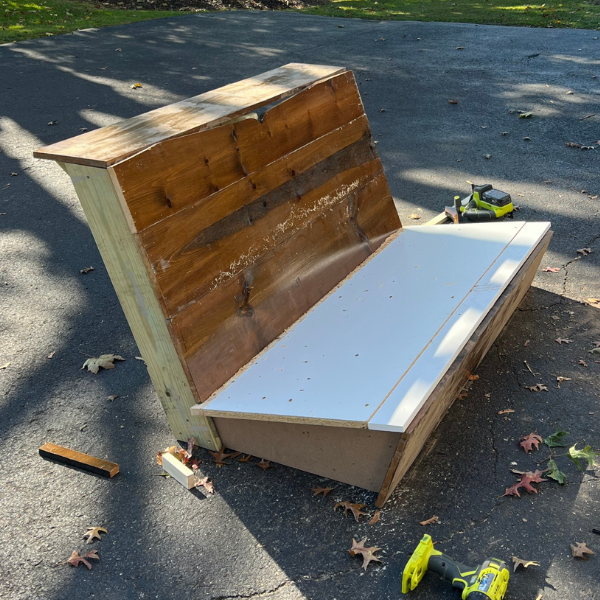
  • 9″ media shelves for the seat back, counter top and the bottom front

That is a serious mash up of scrap wood. But, the measurements of the wood were consistent in their thickness which is what allowed for all the variation in type.

Plus, most of these boards are quite sturdy.

I followed the tutorial using just a circular saw to make most of the cuts, and my miter saw to make the 20° angle cuts on the back braces.

Then, I assembled the couch using 2.5″ construction screws and my drill and a brad nailer!

Finishing the DIY Couch

Once constructed, it was sturdy but looked rough.

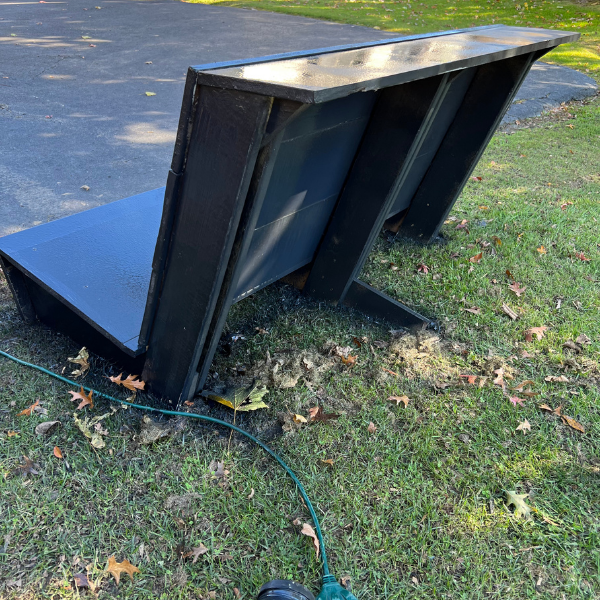
I sanded the entire unit with 40 grit sandpaper which is very rough. Even the melamine board I sanded to help it take the paint.

Then, I used Kilz primer to prime the entire piece, and used my paint sprayer to paint the entire thing black.

It now looks like a cohesive unit, and not one that was pieced together out of scraps!
Making simple couch cushions

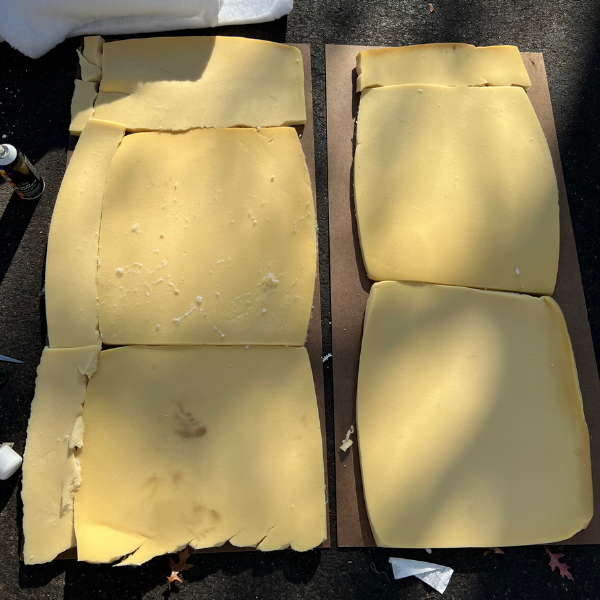
I like to save upholstery foam from various projects that I flip, and my friend graciously gave me the foam from outdoor cushions she was replacing.

So, guess what else got made out of scraps??

I’ll show you a very simple way to make a no-sew couch cushion.

What you need:

  • 2″ or 3″ upholstery foam
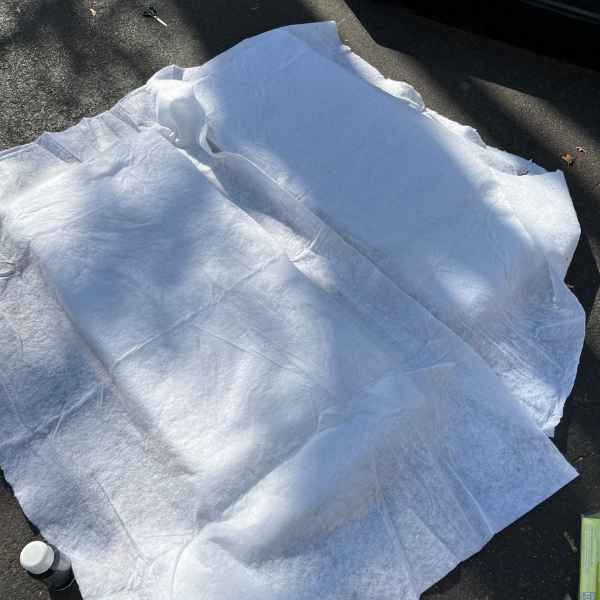
  • batting
  • spray adhesive
  • 1/4″ plywood (or hardboard if placing it on solid wood like this build)
  • staple gun
  • upholstery fabric

How to make the seat base cushion

Cut the piece of plywood to fit the seat base, slightly smaller than the base of the couch.

Use spray adhesive to attach the foam to the seat base.

Fill in any corners or empty spaces with poly fil.

Cover the foam and poly fil with batting to smooth out the foam top.

Wrap the entire thing with upholstery fabric and flip over.

Staple the fabric and batting to the underside of the plywood (now facing up) doing the sides first.

Once the sides are attached, trim excess batting and fabric at the corners and staple to the wood.

You should have a simple bench seat cushion that you can place right on the couch base!
I used velcro to keep the cushion from sliding around the base of the couch.

I made one of these for the seat and one for the back of the couch.

This gaming couch is made out of scrap wood and is the perfect addition to a game room for kids, with seating for 5 in a small space

This was the perfect addition to the game room makeover!

CHECK OUT ALL OF THE POSTS IN THIS SERIES FOR PROGRESS

  • Week 1: Game Room Makeover Plans and Mood Board
  • Week 2: Make a Faux Brick Wall
  • Week 3: DIY Built in Gaming Console from Stock Cabinets
  • Week 4: DIY Faux Marble Countertop with Epoxy
  • Week 5: DIY Picture Frame Shelves
  • Week 6: DIY Neon LED Light Sign 
  • Week 7: DIY Couch with Stool Seating (current post)
  • Week 8: DIY Indoor Climbing Wall
  • Final Game Room Reveal

DIY Mini Fridge Cabinet: Corner Coffee and Wine Bar

November 9, 2021DIY Woodworking

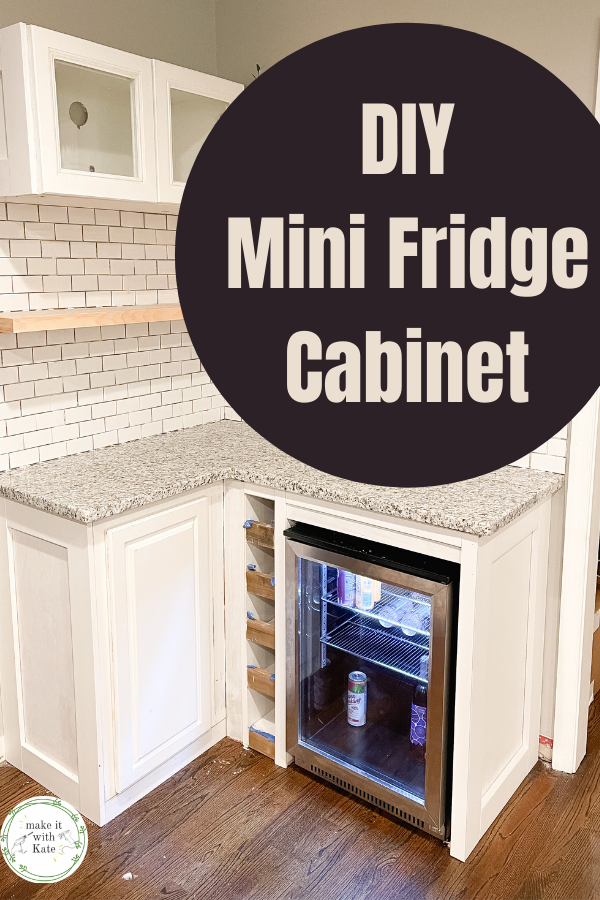
This DIY mini fridge cabinet is a very easy build with plywood and pocket holes. It will make your fridge look completely built in.

This mini fridge cabinet surround DIY was the perfect pairing to the blind corner cabinet that I made to go next to it. In this DIY coffee bar build I needed space for wine storage too.

If you want a fridge in your coffee or wine bar, there is an easy way to make a DIY mini fridge cabinet to make it look built in with the rest of your cabinetry.

This DIY mini fridge cabinet is a very easy build with plywood and pocket holes. It will make your fridge look completely built in.

*This post contains affiliate links.

How to Make a DIY Mini Fridge Cabinet

Building a cabinet surround for a mini fridge isn’t a complicated process, but there are a couple of things to consider to make this a successful built in.

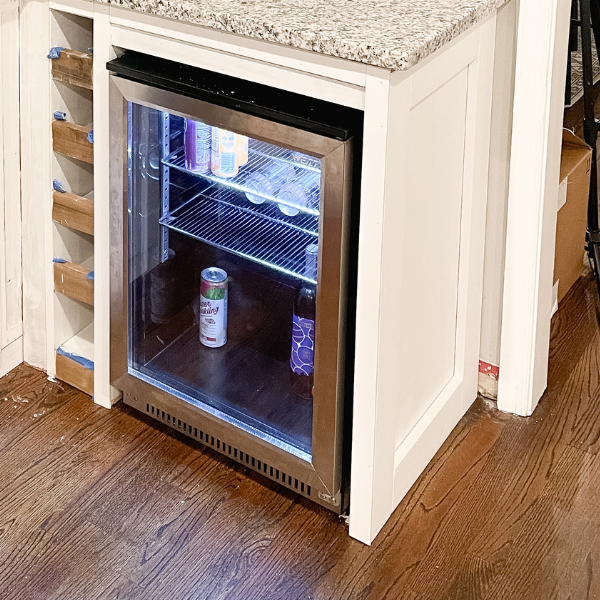
When choosing a mini fridge for your space, the choices will feel endless. If you are going to make it built in like this one, you need to choose one that has a vent at the bottom.

Many other mini fridges will have the vent in the back, but since this will not have the space behind it, a vent at the bottom will be essential.

Additionally, the height and depth of mini fridges can vary greatly, so make sure you double check the dimensions of yours before purchasing. The exact one I purchased isn’t available anymore, but it’s similar to this one on Amazon.

Build the cabinet surround

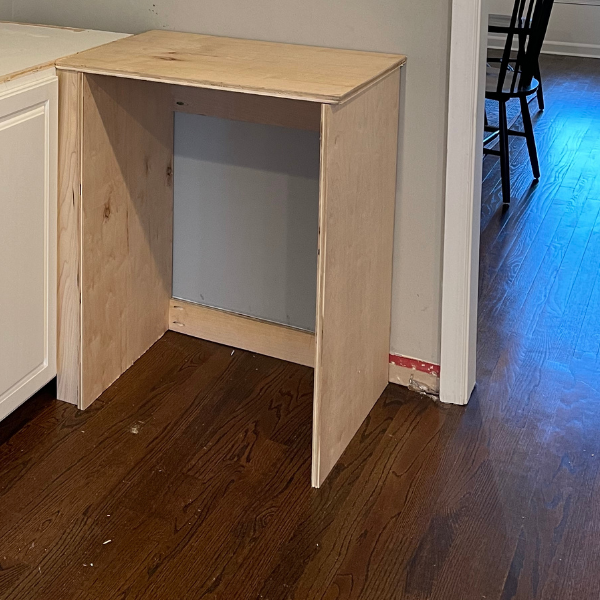
A cabinet surround is basically a box that will surround an appliance. In this case I made it the same height and depth of the other cabinets in this DIY corner coffee bar.

Using 3/4″ sanded plywood, cut the sides and the top to the lengths you need and secure using wood glue and pocket holes.

Once you have a 3 sided box, add supports to the back to act as braces. I like to use 1×4 common board for these and secure one to the top and the bottom of the surround with pocket holes.

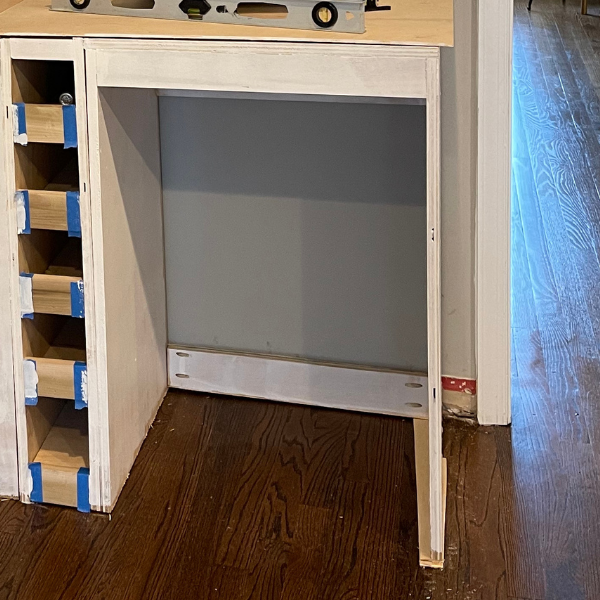
Then to really make this look built in, add trim to the top front of the surround depending on the height of the fridge. Add the trim about an inch above the top of the fridge.

Use wood filler and sandpaper to fill in and smooth all of the seams to your box and attach it to the cabinetry in your space, and to the wall through the back braces.

Here I used a shim to account for the slope in the floor, this will get covered by trim!

Then, simply slide your mini fridge in! If there isn’t an outlet directly behind the mini fridge, you can use a hole bore to create a hole in the side of the cabinet surround to feed the power cord through.

Once this is installed, add any trim that you are using on the rest of the cabinetry. If you aren’t using any face trim, the front edges of your plywood will be exposed. Use iron on edge banding here to hide this!

More Posts in the DIY Coffee Corner Build:

How to Convert a Base Cabinet into a Blind Corner Cabinet

  • Go to page 1
  • Go to page 2
  • Go to page 3
  • Older

Primary Sidebar

Search for what you need

Welcome!

Find inspiration for DIY home projects and crafts on a budget! You can usually find me with either a hot glue gun or a can of spray paint in hand 🙂

Get social:

  • Instagram

Recent Posts

  • Double Picture Frame Moulding DIY
  • 7 Easy DIY Fall Centerpieces
  • Fall House Decoration to Add Warmth
  • DIY Stair Runner with Corner Turn
  • DIY Stair Risers on a Budget

makeitwithkate

🪚 Transforming builder grade into modern colonial
🔨 DIY builds and decor
🪑 Furniture flips

Make it with Kate | DIY Blog
These motorized roller shades from @smartwingshome These motorized roller shades from @smartwingshome are the final missing piece to this living room makeover! I just love how easy they are to use with the remote or as part of my home automation. The color is the perfect neutral and the linen provides great light-filtering. These are the SmartWings Motorized Light Filtering Roller Shades 70% Blackout Linen, color Caramel.
🌟🌟 L I V I N G  R O O M  R E V E A L 🌟🌟 what’s new? Wall treatment, door and window trim, stained beams, updated doors, lighting and paint! DIY is too much fun 🥰 do you have a favorite part? ➡️➡️ swipe to see some progress/before pics! #diyhome #livingroomdecor #moderntraditional #diydecor
🌟The living room I bought versus the one I crea 🌟The living room I bought versus the one I created. 🌟 The number one thing I’ve learned in DIY, is to follow and know the trends, but ultimately find your own style and create what you love, and what you are your family are comfortable in. #diy #diyhome #livingroom #moderntraditional
Here are 5 tips for styling your shelves! 👇

1️⃣ Balance: vary shapes, sizes, and height to create visual interest

2️⃣ Color Coordination: You can group similar colors together or use gradients of a color palette. An easy way to do this is to stick with either warm or cool tones.

3️⃣ Layering: Place larger items at the back and smaller items in front to create depth and visual intrigue, or small items on top of large. 

4️⃣ Negative Space: Leave some empty space to allow the eye to rest and to highlight the items you’ve chosen to display.

5️⃣ Personal Touches: Incorporate items personal to you such as photos, artwork, or keepsakes to make the shelves feel more personal and reflective of your style and interests.
I’m loving how fresh this living room feels now! I’m loving how fresh this living room feels now! #diyhome #moderntraditional #livingroom #diydesign
These doors are DONE! This was a labor of love but These doors are DONE! This was a labor of love but I am happy with how they turned out! The reeded film over the plexiglass keeps the playroom mess out of sight, but the room feels a bit more open this way. More details in highlights! #diyhome I used @retiqueliquidwood to cover the chalk paint without any sanding!
Taking these doors from painted and scratched to w Taking these doors from painted and scratched to wood-grained French doors with @retiqueliquidwood - they are almost done, stay tuned for the end result! I think they will be good! #diydoors
I’m making progress in this living room! Next st I’m making progress in this living room! Next step is to take these beat up, painted doors and make them look like new French doors! I cut large holes in the middle of them and am going to make a plexiglass insert. Here’s hoping!
Let’s take these beams from painted black to a b Let’s take these beams from painted black to a barn wood look. Check out this fun and easy process! What do you think?!
Picture frame moulding in the living room phase 1! Picture frame moulding in the living room phase 1! I updated the door and window trim to a craftsman style, the added double box moulding to the walls, and board and batten to the breakfast bar. Stay tuned to watch this get finished! It’s gonna be good!
I’m switching out the trim work in my living roo I’m switching out the trim work in my living room to add Craftsman moulding to the doorway and window! This is part of a living room refresh, stay tuned for box moulding and updated doors and beams next! #craftsmantrim #craftsmanmoulding #doortrim #diy #doityourself
Sometimes, you just have to go for it. 🔨 🪚🪛
Load More... Follow on Instagram
Copyright © 2025 · Make it with Kate · Hearten Made ⟡
Cleantalk Pixel