• Skip to primary navigation
  • Skip to main content
  • Skip to primary sidebar
  • Skip to footer
  • Home
  • About
  • Work with Me

Make it with Kate

  • Home
  • DIY Woodworking
    • Building Projects
      • DIY Mudroom Build
      • DIY Corner Coffee Bar Build: Wine Storage, Floating Shelves, Cabinets and more!
      • DIY Living Room Projects: Built-ins, Wall Treatment, Beams, and More!
      • Staircase Makeover: Carpet to Wood Stairs
      • Fall One Room Challenge 2021: Game Room Makeover
  • DIY Home Decor
    • Furniture Flips
    • Dollar Tree Crafts
    • Small Wooden DIYs
      • 3 DIY Farmhouse Trays to Make
    • Wall Decor
  • Fall One Room Challenge
  • Seasonal
  • Holiday
  • Instagram

3 DIY Farmhouse Trays to Make

I love decorating with trays. It gives your home decor dimension and allows for functionality plus neat display of holiday or seasonal items. And, with the right wood stain, it can really kick your farmhouse decor up a notch.

These 3 farmhouse trays make great DIY home decor projects and are great for beginners wanting to dabble in woodworking.
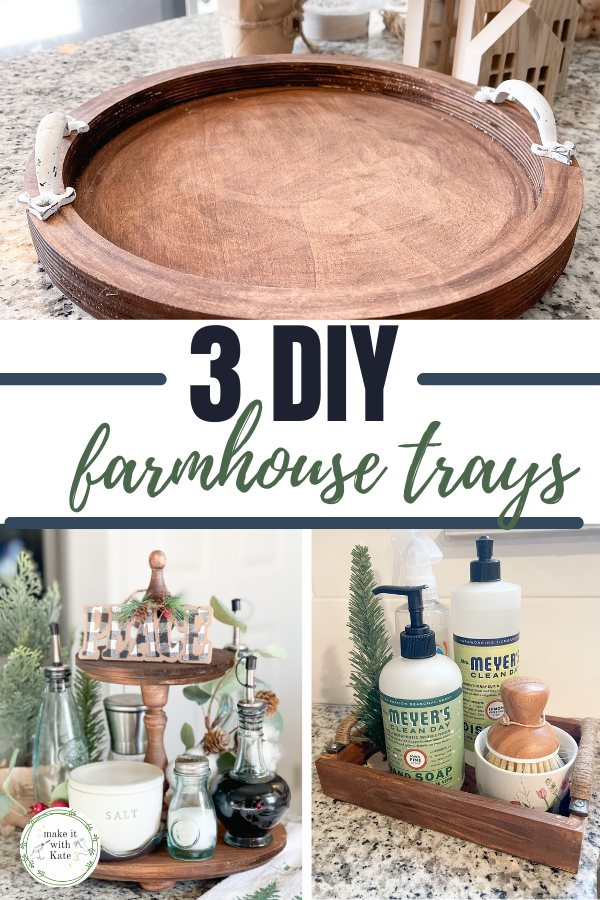
These DIY farmhouse trays are so much fun to make, plus they're easy! Check out the single round tray, tiered tray, and small serving tray.

DIY Farmhouse Trays

Tiered trays, single trays, serving trays and more are all very popular amongst modern farmhouse decor enthusiasts.

What is modern farmhouse decor?

Think rustic wood tones, neutral color schemes and whites. Rich fabrics and inviting spaces that shout cozy and warm, but not like cozy and warm in a literal barn, but cozy and warm in a modern living space.

It’s a really beautiful decor style and one that I love because of the play with texture and wood tone rather than just with color. But, you can definitely play around with and change colorful accents which is always fun!

Make DIY Farmhouse Trays on a Budget

Woodwork can get very expensive, even for a DIY’er. Buying good quality wood, having the right power tools, and the trial and error involved can make for an expensive and time-consuming hobby (worth it though if you ask me).

These farmhouse trays are all different, but have a common thread.

They aren’t made from cutting out meticulous shapes with a jigsaw through a slab of pine, but are instead made from unfinished wood pieces from the craft store.

Craft stores like Hobby Lobby, A.C Moore and Michaels all have at least one aisle of wood shapes for various projects.

Grab a can of stain and a hot glue gun and you can make all 3 of these farmhouse trays for a fraction of the cost it would be to buy them.

3 DIY Farmhouse Trays

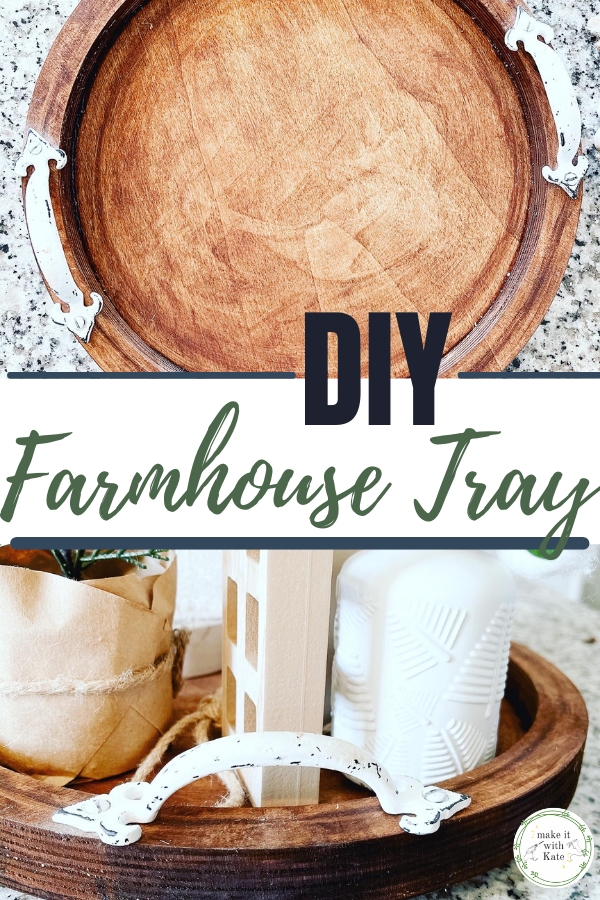
DIY Round Farmhouse Tray

I love the simplicity and versatility of this single round tray. The addition of the nice hardware really made this one look store-bought.

Bonus, I’ve styled it so many different ways already and love it every time!
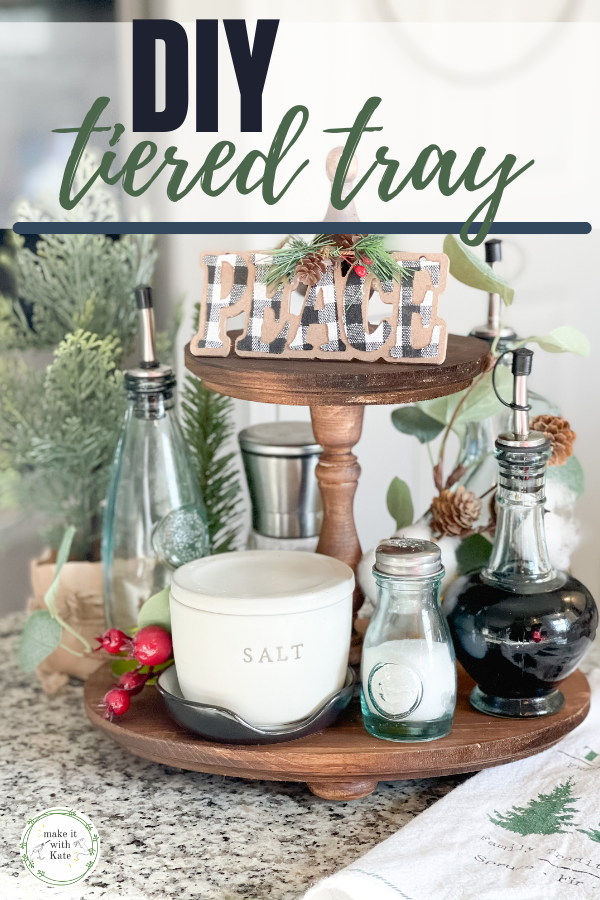
DIY Tiered Tray

A tiered tray is perfect for using vertical space to decorate. I’ve used this tray in my kitchen to house oils and spices, and I’ve also used it for displaying some holiday decor.

See how to stack various wooden pieces to make this tiered tray!

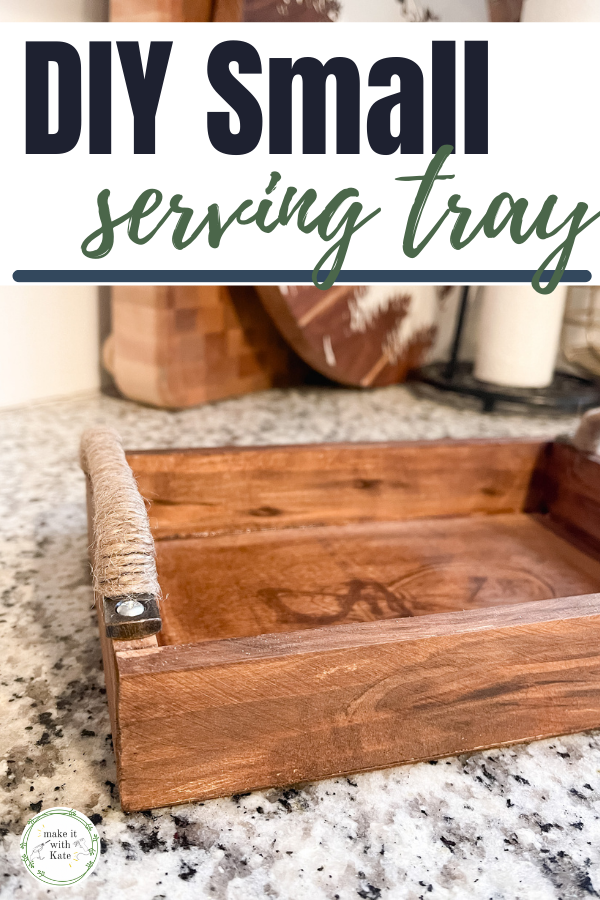
DIY Small Serving Tray

This small serving tray DIY is actually made from a wooden plaque. Adding stain and hardware made this the perfect little tray for a variety of uses.

I’ve placed my soap containers in it near the sink, and have filled it with hot chocolate packets for our snow day hot chocolate bar!

Making trays is so much fun!

What a great budget-friendly way to add some farmhouse decor to your home, all while creating some organization and functionality.

Plus, the same jar of stain goes a long way, making these 3 DIY Farmhouse Trays even better on the wallet!

Follow me on Instagram for more fun and easy DIYs, along with some behind-the-scenes building projects 🙂

Primary Sidebar

Search for what you need

Welcome!

Find inspiration for DIY home projects and crafts on a budget! You can usually find me with either a hot glue gun or a can of spray paint in hand 🙂

Get social:

  • Instagram

Recent Posts

  • Double Picture Frame Moulding DIY
  • 7 Easy DIY Fall Centerpieces
  • Fall House Decoration to Add Warmth
  • DIY Stair Runner with Corner Turn
  • DIY Stair Risers on a Budget

makeitwithkate

🪚 Transforming builder grade into modern colonial
🔨 DIY builds and decor
🪑 Furniture flips

Make it with Kate | DIY Blog
These motorized roller shades from @smartwingshome These motorized roller shades from @smartwingshome are the final missing piece to this living room makeover! I just love how easy they are to use with the remote or as part of my home automation. The color is the perfect neutral and the linen provides great light-filtering. These are the SmartWings Motorized Light Filtering Roller Shades 70% Blackout Linen, color Caramel.
🌟🌟 L I V I N G  R O O M  R E V E A L 🌟🌟 what’s new? Wall treatment, door and window trim, stained beams, updated doors, lighting and paint! DIY is too much fun 🥰 do you have a favorite part? ➡️➡️ swipe to see some progress/before pics! #diyhome #livingroomdecor #moderntraditional #diydecor
🌟The living room I bought versus the one I crea 🌟The living room I bought versus the one I created. 🌟 The number one thing I’ve learned in DIY, is to follow and know the trends, but ultimately find your own style and create what you love, and what you are your family are comfortable in. #diy #diyhome #livingroom #moderntraditional
Here are 5 tips for styling your shelves! 👇

1️⃣ Balance: vary shapes, sizes, and height to create visual interest

2️⃣ Color Coordination: You can group similar colors together or use gradients of a color palette. An easy way to do this is to stick with either warm or cool tones.

3️⃣ Layering: Place larger items at the back and smaller items in front to create depth and visual intrigue, or small items on top of large. 

4️⃣ Negative Space: Leave some empty space to allow the eye to rest and to highlight the items you’ve chosen to display.

5️⃣ Personal Touches: Incorporate items personal to you such as photos, artwork, or keepsakes to make the shelves feel more personal and reflective of your style and interests.
I’m loving how fresh this living room feels now! I’m loving how fresh this living room feels now! #diyhome #moderntraditional #livingroom #diydesign
These doors are DONE! This was a labor of love but These doors are DONE! This was a labor of love but I am happy with how they turned out! The reeded film over the plexiglass keeps the playroom mess out of sight, but the room feels a bit more open this way. More details in highlights! #diyhome I used @retiqueliquidwood to cover the chalk paint without any sanding!
Taking these doors from painted and scratched to w Taking these doors from painted and scratched to wood-grained French doors with @retiqueliquidwood - they are almost done, stay tuned for the end result! I think they will be good! #diydoors
I’m making progress in this living room! Next st I’m making progress in this living room! Next step is to take these beat up, painted doors and make them look like new French doors! I cut large holes in the middle of them and am going to make a plexiglass insert. Here’s hoping!
Let’s take these beams from painted black to a b Let’s take these beams from painted black to a barn wood look. Check out this fun and easy process! What do you think?!
Picture frame moulding in the living room phase 1! Picture frame moulding in the living room phase 1! I updated the door and window trim to a craftsman style, the added double box moulding to the walls, and board and batten to the breakfast bar. Stay tuned to watch this get finished! It’s gonna be good!
I’m switching out the trim work in my living roo I’m switching out the trim work in my living room to add Craftsman moulding to the doorway and window! This is part of a living room refresh, stay tuned for box moulding and updated doors and beams next! #craftsmantrim #craftsmanmoulding #doortrim #diy #doityourself
Sometimes, you just have to go for it. 🔨 🪚🪛
Load More... Follow on Instagram
Copyright © 2025 · Make it with Kate · Hearten Made ⟡
Cleantalk Pixel