• Skip to primary navigation
  • Skip to main content
  • Skip to primary sidebar
  • Skip to footer
  • Home
  • About
  • Work with Me

Make it with Kate

  • Home
  • DIY Woodworking
    • Building Projects
      • DIY Mudroom Build
      • DIY Corner Coffee Bar Build: Wine Storage, Floating Shelves, Cabinets and more!
      • Fall One Room Challenge 2021: Game Room Makeover
  • DIY Home Decor
    • Furniture Flips
    • Dollar Tree Crafts
    • Small Wooden DIYs
      • 3 DIY Farmhouse Trays to Make
    • Wall Decor
  • Fall One Room Challenge
  • Seasonal
  • Holiday
  • Instagram

Mud Room Part 4: DIY Board and Batten with Peg Rail Top

January 27, 2021Building Projects, DIY Woodworking

<< DIY Mud Room Part 1: DIY Mudroom Bench

<<DIY Mud Room Part 2: Adding Mudroom Locker Cabinets

<<DIY Mud Room Part 3: DIY Mudroom Lockers

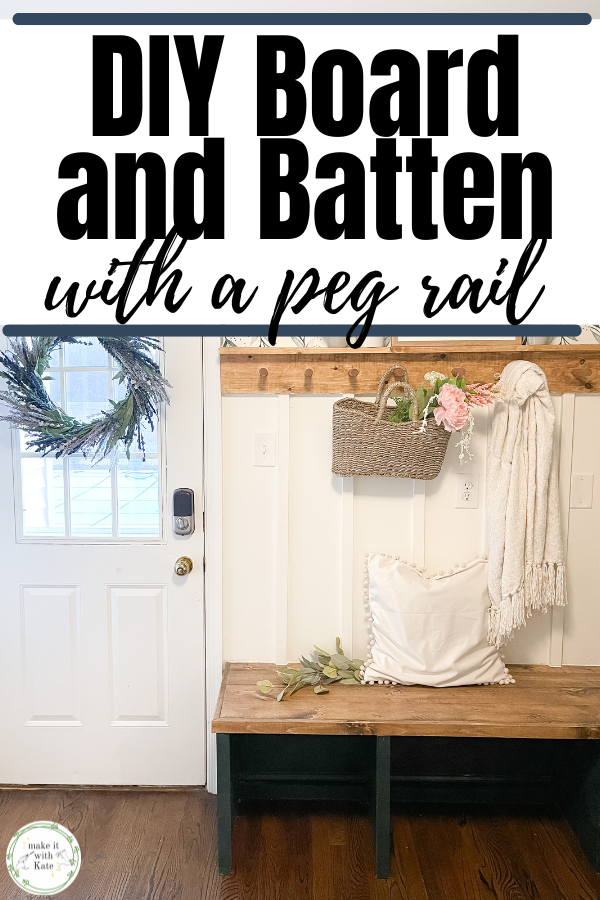
The bench is built, the cabinets are installed, the lockers are done. It’s time to finish the other mudroom wall off with a DIY board and batten with a peg rail top!

This is the perfect detail wall that will really finish off the corner mud room unit, and the addition of the peg rail will add extra space to hang coats, towels and decor.

This DIY board and batten with a peg rail top makes the perfect addition to an entryway or mud room design. Super easy to make! #diymudroom #diyboardandbatten #millwork #woodworking #housedesign

DIY Board and Batten

Board and batten is one of my favorite mill work styles. It’s essentially when vertical and horizontal pieces of wood come together on an interior or exterior wall for design.

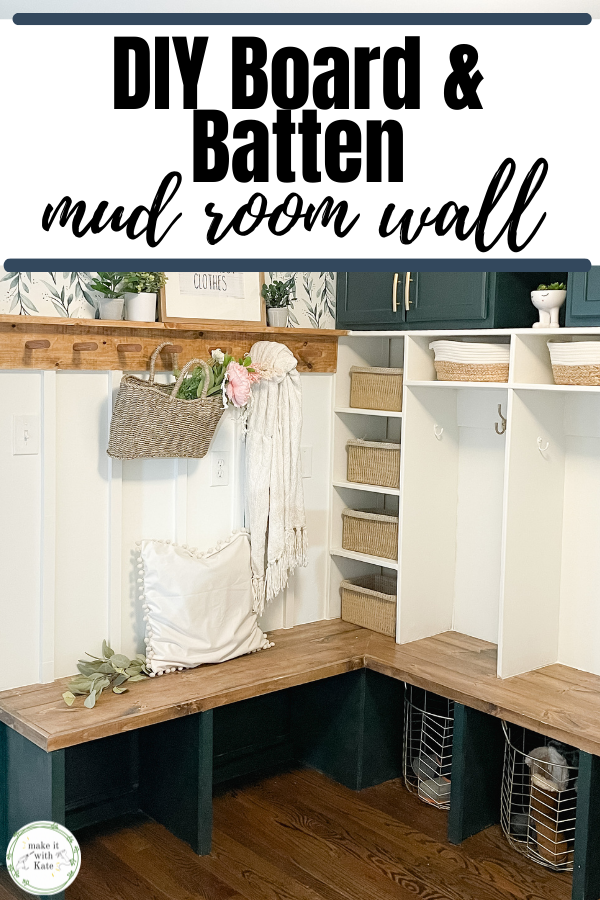
There are varying styles of board and batten, in the mud room I did a half wall design with a peg rail on top. This design provided me with both pretty and functional.
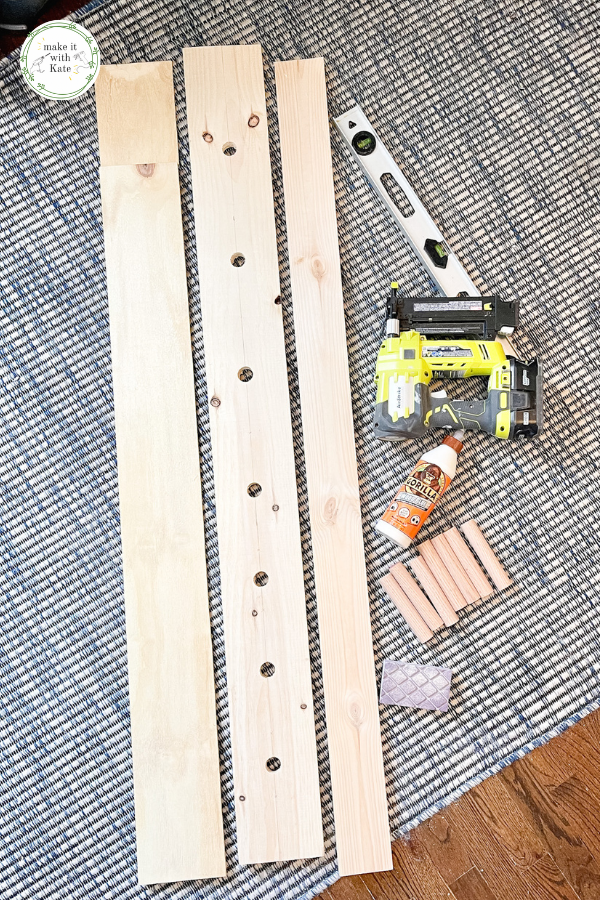
What you need:

  • 1×2″ common board
  • 1×6″ common board
  • 1/4″ plywood to match the 1×6″ common board
  • 1×4″ common board
  • level
  • nail gun
  • wood glue
  • 1″ dowels
  • sandpaper
  • 1″ spade drill bit
This DIY board and batten with a peg rail top makes the perfect addition to an entryway or mud room design. Super easy to make! #diymudroom #diyboardandbatten #millwork #woodworking #housedesign

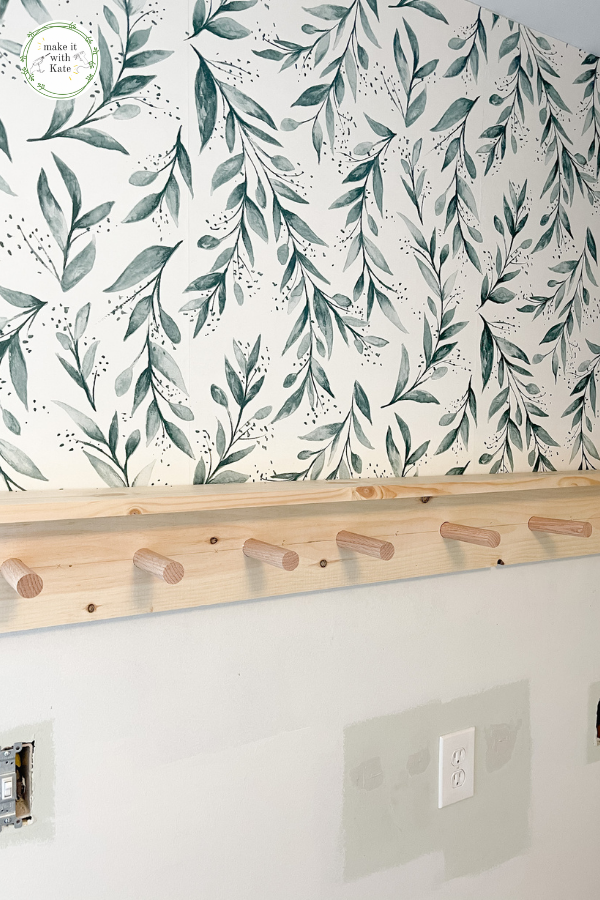
How to make a peg rail

The peg rail will serve as the top of the DIY board and batten.

Measure the length of the top of the board and batten wall, then cut the 1×6 to size.

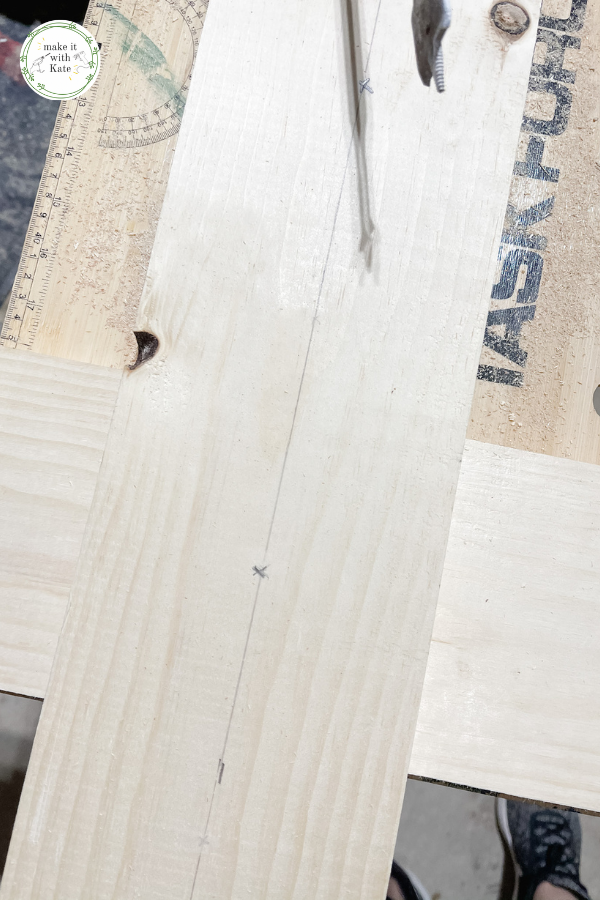
Determine the number of pegs you want to include in the peg rail. Measure and mark the center of the board, then mark where each peg will go spacing them evenly.

This DIY board and batten with a peg rail top makes the perfect addition to an entryway or mud room design. Super easy to make! #diymudroom #diyboardandbatten #millwork #woodworking #housedesign

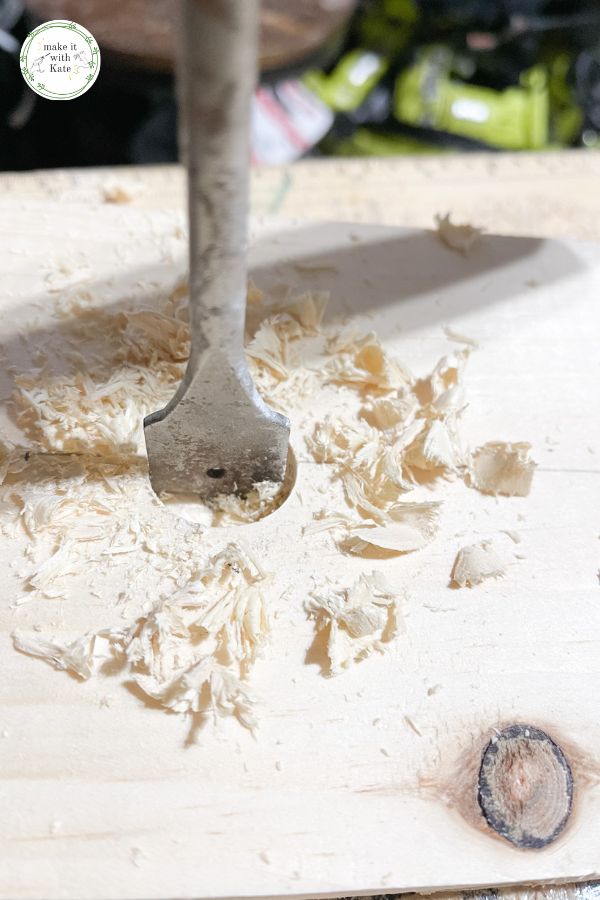
Using the 1″ spade bit, bore holes in the 1×6″ across the middle.

Cut the 1/4″ plywood to fit the back of the 1×6″ with holes in it.

This DIY board and batten with a peg rail top makes the perfect addition to an entryway or mud room design. Super easy to make! #diymudroom #diyboardandbatten #millwork #woodworking #housedesign

Attach to the back of the board with a nail gun and finishing nails. Use 3/4″ finishing nails so they don’t come through the front of the board.

Cut the 1″ dowels to the length that you like. For this peg rail, I cut them to 5″ lengths, this leaves about 4″ exposed for items to hang on.

This DIY board and batten with a peg rail top makes the perfect addition to an entryway or mud room design. Super easy to make! #diymudroom #diyboardandbatten #millwork #woodworking #housedesign

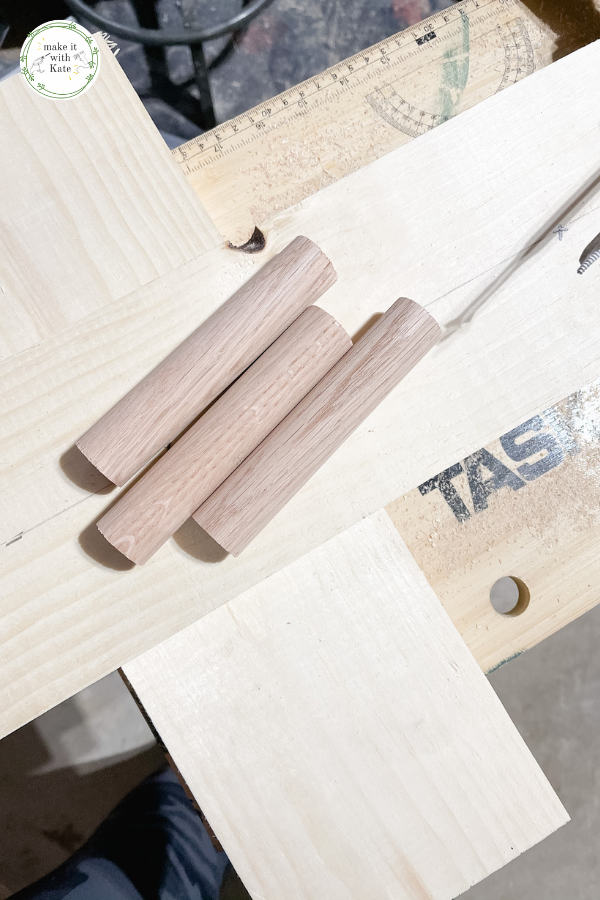
We will be using this rail primarily for towels in the summer as the mud room is the entry from the pool, so this length will work well.

Place a generous amount of wood glue in the holes of the 1×6, then place the cut 1″ peg inside each hole. Use a mallet to make sure they are firmly inside the holes and let the wood glue dry.

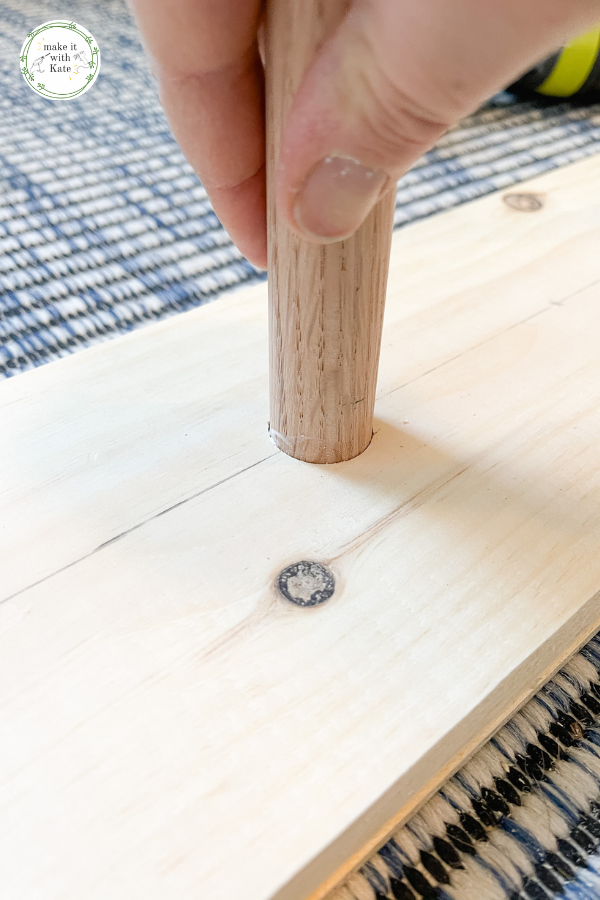
Wipe off any glue that comes out of the holes (wipe well because the glue won’t be able to be stained if you are planning on staining it).

Once dry, it’s ready to mount on top of the board and batten.

This DIY board and batten with a peg rail top makes the perfect addition to an entryway or mud room design. Super easy to make! #diymudroom #diyboardandbatten #millwork #woodworking #housedesign

How to make the board and batten wall

For this board and batten wall, it will be coming off of the bench in the mud room so won’t rest against any baseboard.

If you are placing this on a wall where the batten is going down to the floor, remove baseboard and replace with a 1×4″ board.

Cut the 1×2″ to the height that you want your board and batten wall, taking into account the peg rail and shelf top.

For this build since my wall corner was butting up again the cabinets on the other wall, I wanted the top of the shelf to meet the bottom of the cabinet.

Place the peg rail on the wall and nail it into place, then lay the 1×4″ across the top of the peg rail like a shelf, and nail into place through the top down into the peg rail.

This DIY board and batten with a peg rail top makes the perfect addition to an entryway or mud room design. Super easy to make! #diymudroom #diyboardandbatten #millwork #woodworking #housedesign

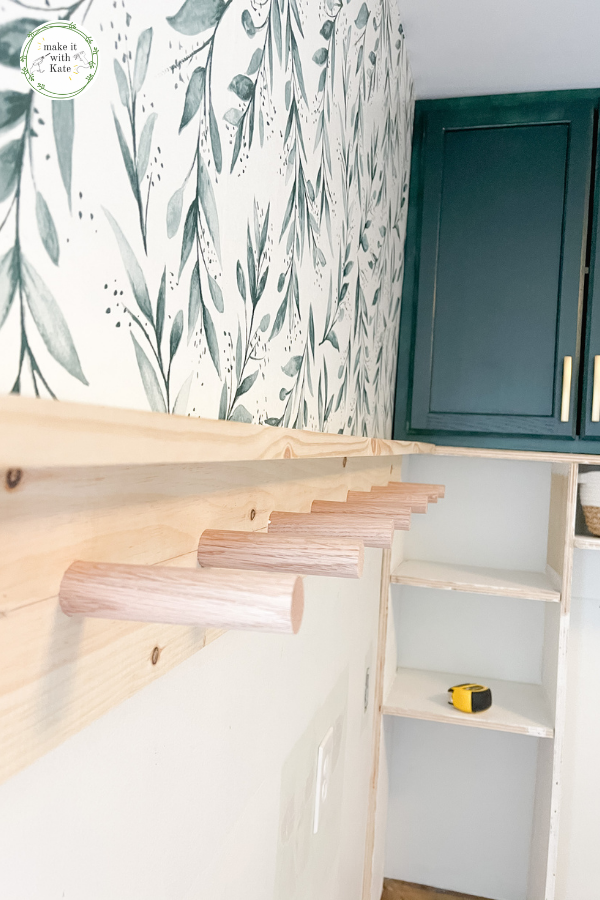
Space the 1×2″ battens out equally under the peg rail and nail into place with the nail gun.

This DIY board and batten with a peg rail top makes the perfect addition to an entryway or mud room design. Super easy to make! #diymudroom #diyboardandbatten #millwork #woodworking #housedesign

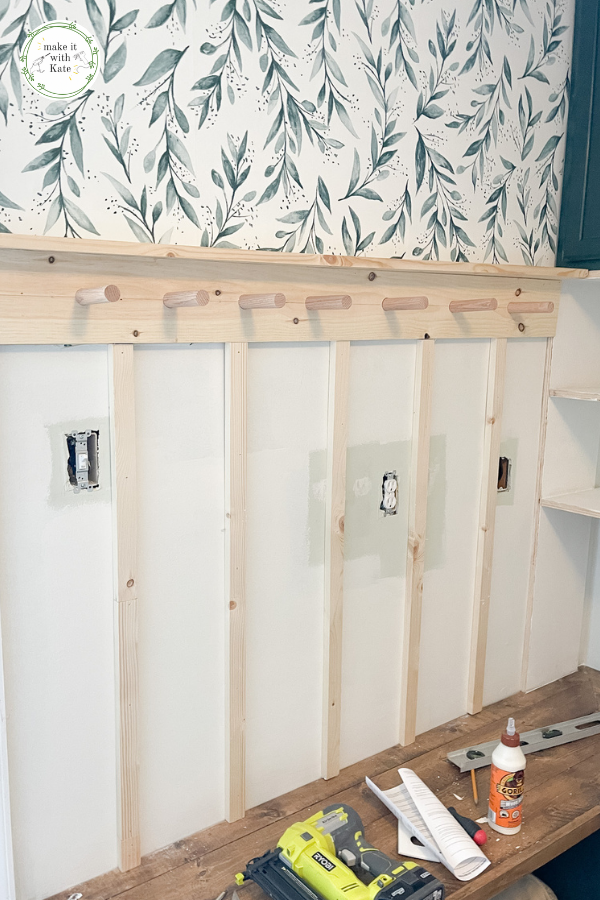
Caulk along the edges of the batten boards where they meet the wall, the peg rail and the bench, then wipe clean.

This DIY board and batten with a peg rail top makes the perfect addition to an entryway or mud room design. Super easy to make! #diymudroom #diyboardandbatten #millwork #woodworking #housedesign

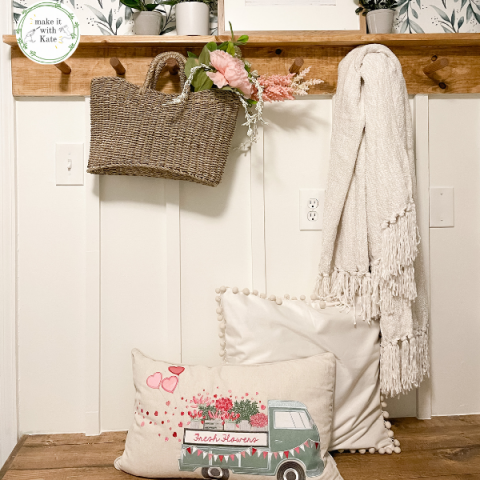
Finish the DIY board and batten with peg rail

At this point, the batten wall with a peg rail is complete! Fill in all of the joints where wood meets wood with wood filler.

Let the wood filler dry and sand the entire project.

Prime and paint the batten and the wall.

I chose to stain the peg rail and shelf with Varathane Early American, and painted the batten and wall with White Dove Benjamin Moore.

I just love the way this wall came out! It might actually be my favorite part of the entire mudroom (shh don’t tell the lockers!).

This DIY board and batten with a peg rail top makes the perfect addition to an entryway or mud room design. Super easy to make! #diymudroom #diyboardandbatten #millwork #woodworking #housedesign

More Posts in the DIY Mud Room Series

  • DIY Mud Room Part 1: DIY Mudroom Bench
  • DIY Mud Room Part 2: Adding Mudroom Locker Cabinets
  • DIY Mud Room Part 3: DIY Mudroom Lockers
  • Mud Room Part 4: DIY Board and Batten with Peg Rail Top (currently reading)
  • DIY Mud Room: Final Reveal and Styling (coming soon)
DIY Board and Batten with Peg Rail Top

DIY Board and Batten with Peg Rail Top

This DIY board and batten with a peg rail top makes the perfect addition to an entryway or mud room design. Super easy to make!

Materials

  • 1×2″ common board
  • 1×6″ common board
  • 1/4″ plywood to match the 1×6″ common board
  • 1×4″ common board
  • wood glue
  • 1″ dowels
  • sandpaper
  • 1″ spade drill bit

Tools

  • level
  • nail gun

Instructions

  1. Mark the center of the 1x6 common board, and place an 'x' where the pegs will go.
  2. Drill 1" holes through each 'x'.
  3. Place 1/4" sanded plywood as backing on the 1x6 with holes in it. Attach with a nail gun.
  4. Cut the 1" dowels to the length desired for each peg.
  5. Place wood glue inside each hole and attach the peg.
  6. Use a mallet to ensure pegs are placed all the way inside the holes, and wipe any excess wood glue clean.
  7. Hang on the wall at the top of the board and batten.
  8. Lay a 1x4" common board down across the top of the peg rail and nail into place with the nail gun.
  9. Cut 1x2 common boards to correct lengths.
  10. (If going to the floor, replace baseboard with 1x4" board)
  11. Nail the 1x2" boards into place, spaced evenly across the wall.
  12. Caulk seams where the wood meets the wall, and wood fill any nail holes or joints where wood comes together such as where the battens meet the peg rail.
  13. Stain or paint.
© makekate
Category: DIY Woodworking

Related Posts:

  • DIY Mudroom Build: Corner Bench with Lockers, Cabinets and Board and Batten Peg Rail
    DIY Mudroom Build: Corner Bench with Lockers,…
  • DIY Mud Room Part 3: DIY Mudroom Lockers
    DIY Mud Room Part 3: DIY Mudroom Lockers
  • DIY Mud Room Part 1: DIY Mudroom Bench
    DIY Mud Room Part 1: DIY Mudroom Bench
  • DIY Mud Room Part 2: Adding Mudroom Locker Cabinets
    DIY Mud Room Part 2: Adding Mudroom Locker Cabinets
  • Game Room Makeover: Fall One Room Challenge 2021 (Week 1)
    Game Room Makeover: Fall One Room Challenge 2021 (Week 1)
  • Fall One Room Challenge 2021: Game Room Makeover
    Fall One Room Challenge 2021: Game Room Makeover
Previous Post: « DIY Mud Room Part 3: DIY Mudroom Lockers
Next Post: DIY Mudroom: Final Reveal, Styling and FAQ’s »

Reader Interactions

Leave a Reply Cancel reply

Your email address will not be published. Required fields are marked *

Primary Sidebar

Search for what you need

Welcome!

Find inspiration for DIY home projects and crafts on a budget! You can usually find me with either a hot glue gun or a can of spray paint in hand 🙂

Get social:

  • Instagram

Recent Posts

  • Installing a Tile Backsplash: DIY Corner Coffee Bar
  • Ikea Malm Hack: Flip a 2 Drawer Malm Nightstand
  • DIY Indoor Climbing Wall: ORC Week 8
  • DIY Gaming Couch from Scrap Wood: Fall ORC Week 7
  • DIY Mini Fridge Cabinet: Corner Coffee and Wine Bar

makeitwithkate

Who loves a planked ceiling? 🤚 🤚🤚 This is Who loves a planked ceiling? 🤚 🤚🤚 This is a great beginner project - details below, and highlight bubble titled “ceiling”:

🌟 unfinished pine tongue and groove from @loweshomeimprovement 
🌟 Early American and Weathered Oak stain from @varathane 
🌟  @ryobitoolsusa  sander, nail gun and miter saw 
🌟 moulding from @homedepot 
🌟 inspiration from @angelarosehome 

Steps:

1️⃣Sand and stain all of the boards, I like to layer the stains with early American first then weathered oak

2️⃣ cut boards to width

3️⃣ place them in the opposite direction of the ceiling joists with the nailer, nailing into studs as you go

4️⃣ attach moulding and caulk the seams

#diy #plankedceiling #moderntraditional #diyhomedecor #diyhomeprojects #girlswithpowertools #homedesign #halfbath #halfbathmakeover #walltreatment
Arched built-ins are done!! 🤍🤍 I love this s Arched built-ins are done!! 🤍🤍 I love this simple transformation and think it really updates this living room a bit. ➡️swipe all the way through to see the before! #diy #diybuilds #girlswithpowertools #homedesign #homedecor #livingroomdesign #moderntraditional #shediys
Back to renovating this space piece by piece, good Back to renovating this space piece by piece, goodbye carpet and hello hardwoods! Next up, updating the built ins a bit :) ⏩ swipe to see the before 😳 #diyblogger #homedecor #moderntraditional #homerenovation #bhg #houseflip #homeupdate @flooranddecor
⭐🌲⭐It's now week 82 of the #RefinishedFurni ⭐🌲⭐It's now week 82 of the #RefinishedFurnitureTour !⁣⁣⁣⁣
⁣
We hope you will join us to connect with new artists and get inspired to refinish and style your furniture in unique ways!⁣⁣⁣⁣
⁣
Here’s how to join!⁣⁣⁣⁣
⁣
🎨 1. Follow Our Hosts:⁣⁣⁣⁣
⁣
@lubblyjubblyfurniture⁣⁣⁣⁣
@click2restore⁣⁣⁣⁣
@bluewreninteriors
@khicktiques_ 
@redeemedwoodcreations 
⁣
And Guest hosts

@lively.by.lu
@needleandbrushdecor
@ourlovelylittlefarm
@purposely_refurbished
@renata.tully
@the_shabby_pearl
@upbycris
@vintage_mimosa_fl

🎨 2. Follow the hashtag #RefinishedFurnitureTour⁣⁣⁣⁣
⁣
🎨 3. Follow the accounts under the hashtag you find inspiring!⁣⁣⁣⁣
⁣
🎨 4. DM a permanent host to join the tour and start connecting with new friends!⁣⁣⁣⁣
⁣
The #RefinishedFurnitureTour will run every Monday at 12 noon EST through Wednesday at 12 noon EST.⁣⁣⁣⁣
⁣
In addition, we will be hosting giveaways once a month for tour members! 🎉⁣⁣⁣

#refinishedfurnituretour82
Who loves a good #ikeaflip ?! 🤚 Better yet, who Who loves a good #ikeaflip ?! 🤚 Better yet, who loves a FB Marketplace/IKEA flip??!! 🤚🤚🤚 #ad Would you take a look at how this @myoverlays Gracie kit COMPLETELY transformed this piece! It looks so custom! ➡️➡️ swipe to see the before and tell me if you would think it’s the same piece!
.
.
@myoverlays are decorative overlay panels that can be glued to drawer fronts and painted, it seriously couldn’t be easier. PLUS, they are made to fit different styles of IKEA furniture and there are so many different overlays to choose from.

🌟 use the coupon code MAKEITWITHKATE15 to get 15% off your O’verlays purchase!
.
.
#furnitureflip #ikeahack #ikeamalm #ikeanightstand #diy #buildit #moderntraditional #girlswhobuild #restoredfurniture #fbmarketplace #marketplaceflip
🌟 WEEK 8 🌟 The game room is DONE!! This #one 🌟 WEEK 8 🌟 The game room is DONE!! This #oneroomchallenge was so much fun to participate in. I got quite a bit done in this room! Here’s a recap: .
.
1️⃣ mock up and design 
2️⃣ faux brick wall 
3️⃣ built in gaming console 
4️⃣ faux marble countertop
5️⃣ picture frame shelves 
6️⃣ diy neon sign 
7️⃣ diy gaming couch
8️⃣ build a rock wall

And that’s a wrap!! You can find tutorials for all of these components on my blog (link in bio) and video walkthroughs in the highlight bubbles @betterhomesandgardens @oneroomchallenge 
.
What’s your favorite part?? 
#bhgorc #oneroomchallenge #diybuilds #gameroom #playroom #girlswithpowertools #buildlikeagirl #diybabegang #diyprojects #girlswhodiy #interiordesign #moderncolonial
🌟 WEEK 7 🌟 I built a couch!!! Out of SCRAP W 🌟 WEEK 7 🌟 I built a couch!!! Out of SCRAP WOOD. Fun fact- the back of this couch, swipe to see, is made out of wood that made up built-ins in this room that I ripped out as part of my very first DIY project. That is some awesome repurposing! 
.
.
The tutorial I used is from @homemade_modern 
.
. 
Next week is the end of this challenge, it’s been so fun! #oneroomchallenge #repurposed #diybuilds #girlswithpowertools #bhgorc #ryobitools #diyfurniture #girlswhobuild @oneroomchallenge @betterhomesandgardens
🌟 WEEK 6 🌟 I made a neon light sign!! Learni 🌟 WEEK 6 🌟 I made a neon light sign!! Learning new things is one of my favorite parts of DIY. This was a roller coaster of emotions but I’m so thrilled with how it came out!! This challenge is almost over, but I have a few more tricks up my sleeve. (Also this week, the backlit moulding!) #bhgorc #oneroomchallenge @betterhomesandgardens @oneroomchallenge #diyneonsign #ledsign #diyled #diyblogger
🌟 WEEK 5 🌟 I can’t believe we are in the f 🌟 WEEK 5 🌟 I can’t believe we are in the final stretch of the #oneroomchallenge - if I’m being honest, I’m loving the slower pace of taking this room bit by bit instead of doing it as quickly as I can. Have you enjoyed following the slower pace or are you ready for me to move on to the next space already? ▶️ this week, I’ll be making a neon LED sign 🤞- I’m excited for this!! #bhgorc @betterhomesandgardens @oneroomchallenge #gameroommakeover #kidsplayroom #builtins #brickwall #fauxmarble #paintedleather
I like to DIY, and I also love to have fun :) Foll I like to DIY, and I also love to have fun :) Follow my journey as I discover a love of power tools, and turning my builder grade colonial into a home. The real fun is in stories ;) see ya there! #diy #girlswithpowertools #diyblogger #buildlikeagirl
Psst…if you missed it in stories, these leather Psst…if you missed it in stories, these leather chairs are PAINTED! My mind has been truly blown by this. I wish you could feel them through the screen, you would never know! I used the @heirloomtraditionspaint all-in-one paint and they look updated and perfect. #oneroomchallenge @oneroomchallenge @betterhomesandgardens #bhgorc #furnitureflip #leatherchairs #diyblogger
See that sideboard over there? ▶️ swipe to see See that sideboard over there? ▶️ swipe to see what it looked like before! #furnitureflip #diyprojects #furnituremakeover
Load More... Follow on Instagram
Copyright © 2022 · Make it with Kate · Hearten Made ⟡