<< DIY Mud Room Part 1: DIY Mudroom Bench
<< DIY Mud Room Part 2: Adding Mudroom Locker Cabinets
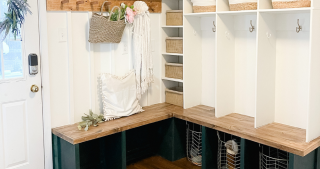
Now that the bench is built and the cabinets are in, it’s time to build the DIY mudroom lockers! This is my favorite part of this space. When the kids come home from school, they can hang their backpacks, jackets and face masks (yep, writing this during the pandemic) and everything stays organized and easy to find.
Not walking through a pile of jackets and backpacks on the floor make me so happy. Plus, this is a fun building project that is pretty easy and straightforward.
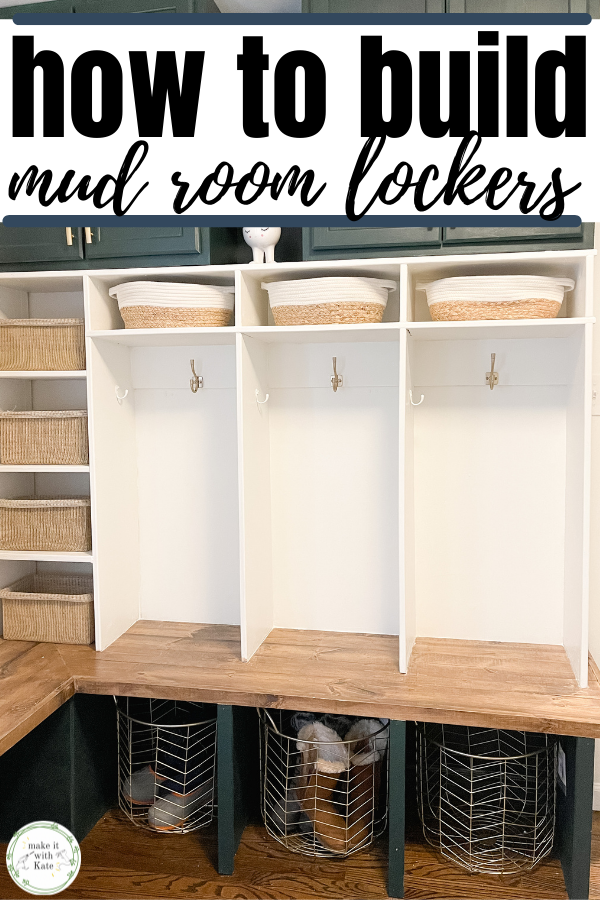
Building Mudroom Lockers
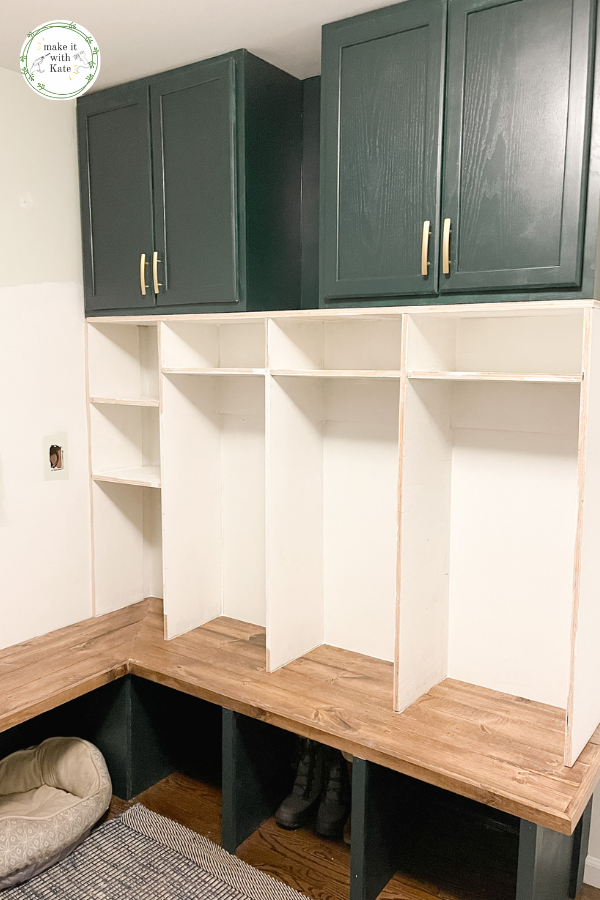
These lockers are basically a grid of cut plywood which have an open back (up against the wall) and contain space for baskets and hooks.
As I have mentioned in other posts, because this is a custom built-in unit the dimensions will vary project to project.
So rather than a detailed plan, I’ll show you the steps to measuring, cutting and assembling the unit so that you can customize it for your own space.
While the bench wraps around the corner, the locker unit goes along one wall and does not wrap around the corner.
*The next post in the series will show you how to place a pretty DIY peg rail on the other wall, keeping that space streamlined yet functional.
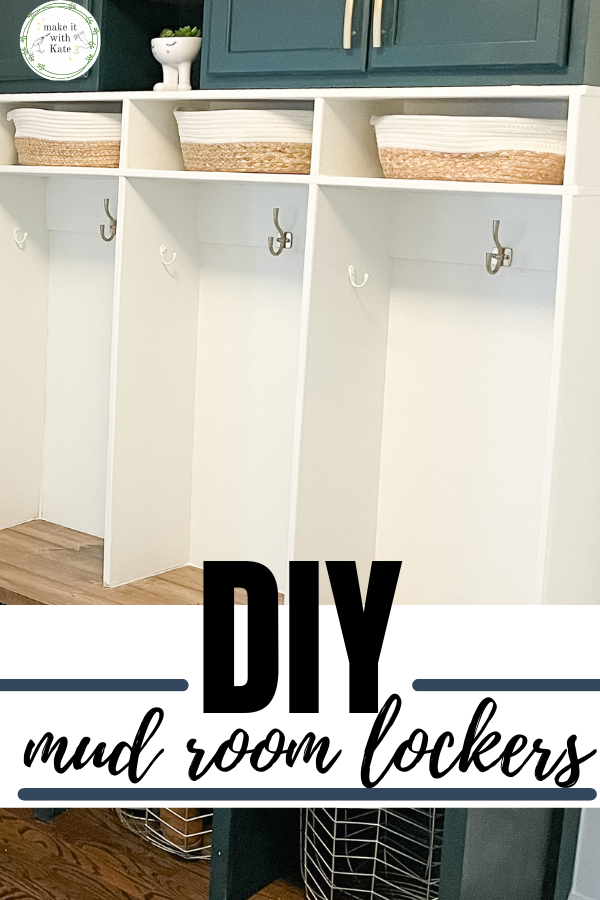
Planning the DIY Mudroom Lockers
Drawing your plan to scale on graph paper and then ‘drawing’ it out on the wall in painters tape is the best way to visualize the layout of the space prior to building.
With my bench and cabinets in place, I put some painters tape on the wall to layout my lockers. I did have a rough plan of this at the beginning of the build, so my cubby spacing under the bench matched up to the locker spacing above. This kept the whole wall looking symmetrical.
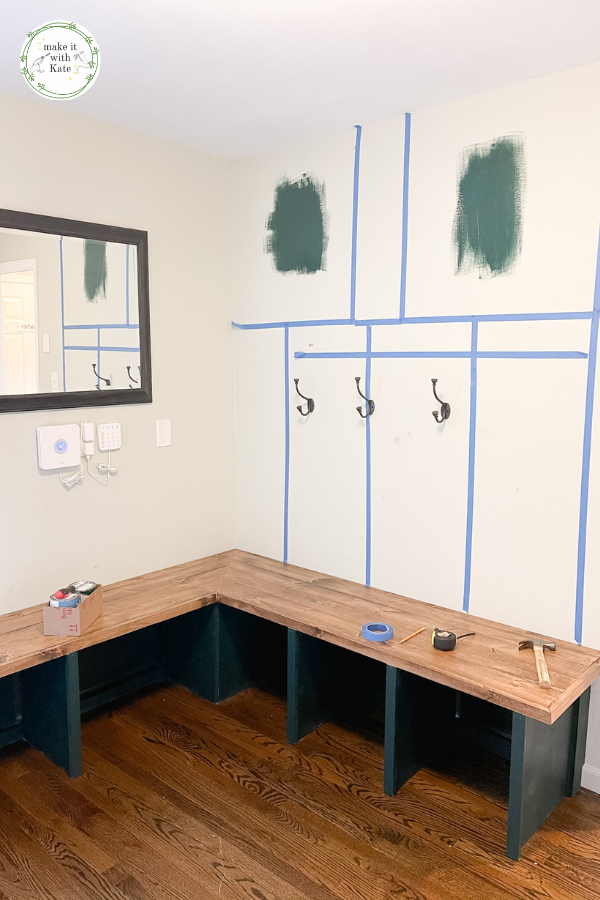
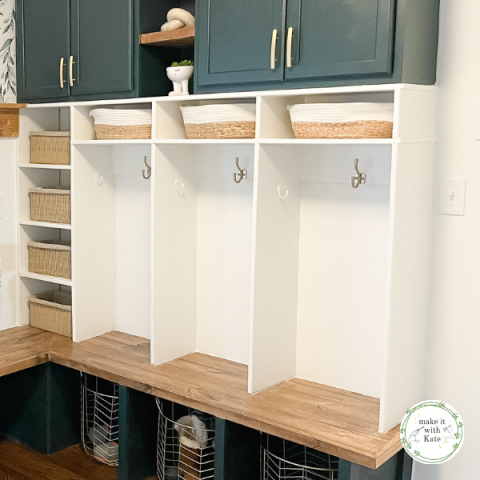
My locker wall was wide enough to place three lockers and a shelving unit. The lockers were spaced out above the cubbbies under the bench, and the corner of the bench housed a unit with shelving for basket storage.
At the top of each locker, I wanted a shelf for a basket for each child to place their hats, gloves, etc. in. A 6 inch shelf here was just enough.
I also marked out where I would want to place the hooks. Keep in mind the height of the hooks if you are building these for children. You definitely want them to be easy to reach so that they actually use them!
Supplied needed:
- 3/4″ sanded plywood
- circular saw (or table saw)
- Kreg Jig pocket hole tool
- 1 1/4″ pocket hole screws
- level
- drill
- wood filler
- caulk
- sandpaper or orbital sander
- primer
- paint
- Band-it or 3/4″ trim
- nail gun
- finishing nails
- wood glue
Building the Locker Units
Step 1
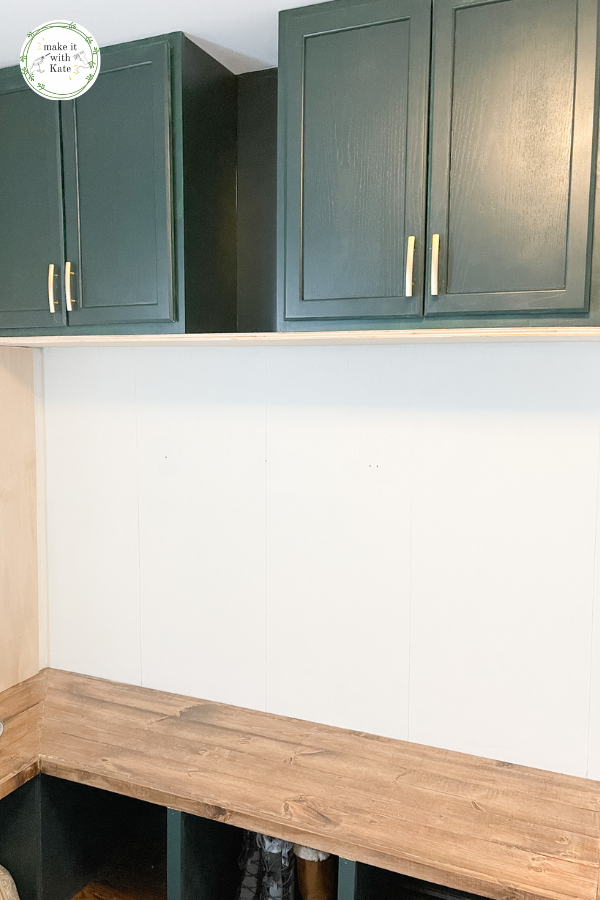
Measure the length of the top of the closet unit by measuring end to end of the cabinets above.
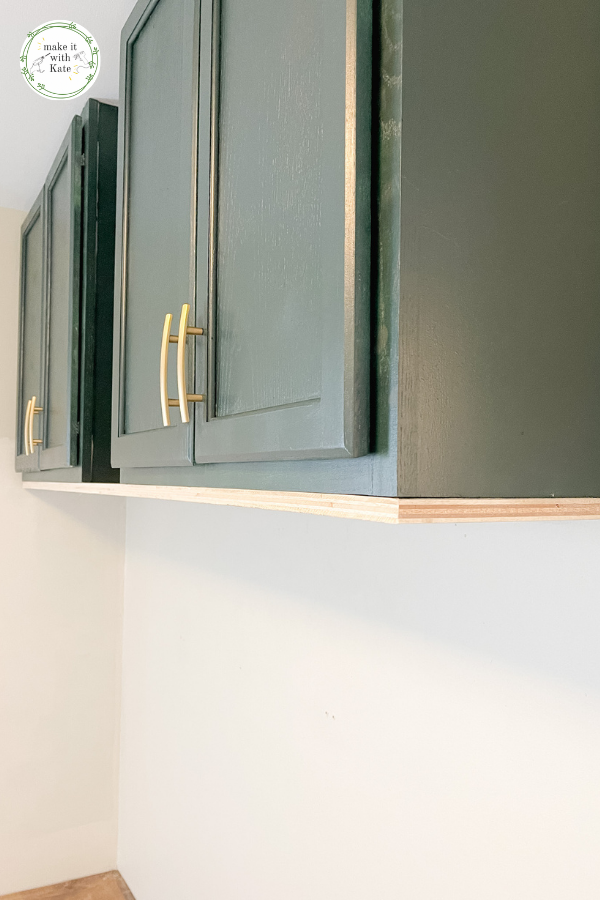
Cut a piece of 3/4″ plywood to length of the top and attach to the bottom of the cabinets with a nail gun.
The depth of my stock cabinets was 12″ so this was the depth of my locker unit as well.
Step 2
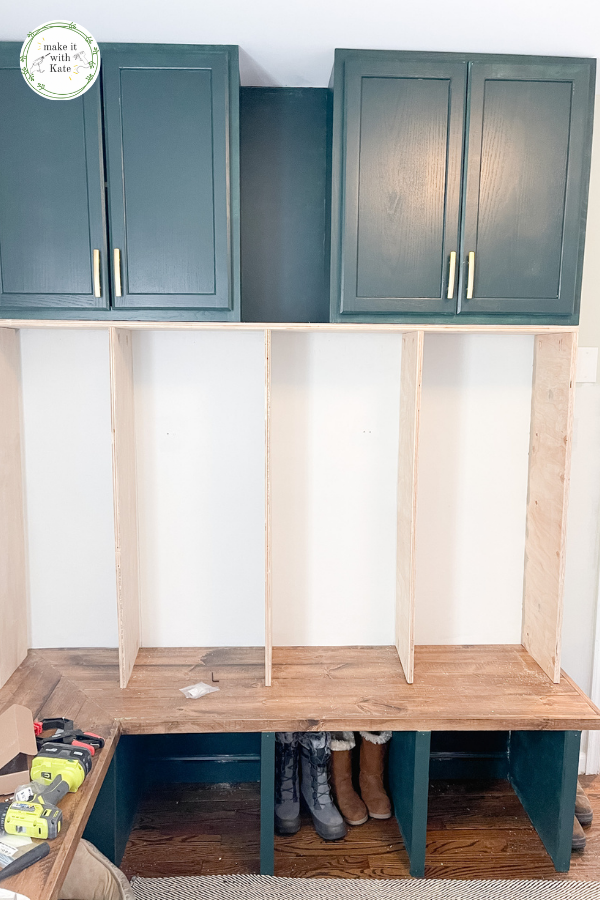
Measure the locker walls by measuring from the bottom of the locker top board to the top of the bench.
Cut each locker wall out of the 3/4″ plywood and drill 4 pocket holes in the top and bottom of each locker wall.

Step 3
Attach the locker walls to the unit by adding screws through the pocket holes at the top and bottom of each locker wall.
Using pocket holes will allow you to attach the walls to the top and the bench without any visible screws.
Step 4
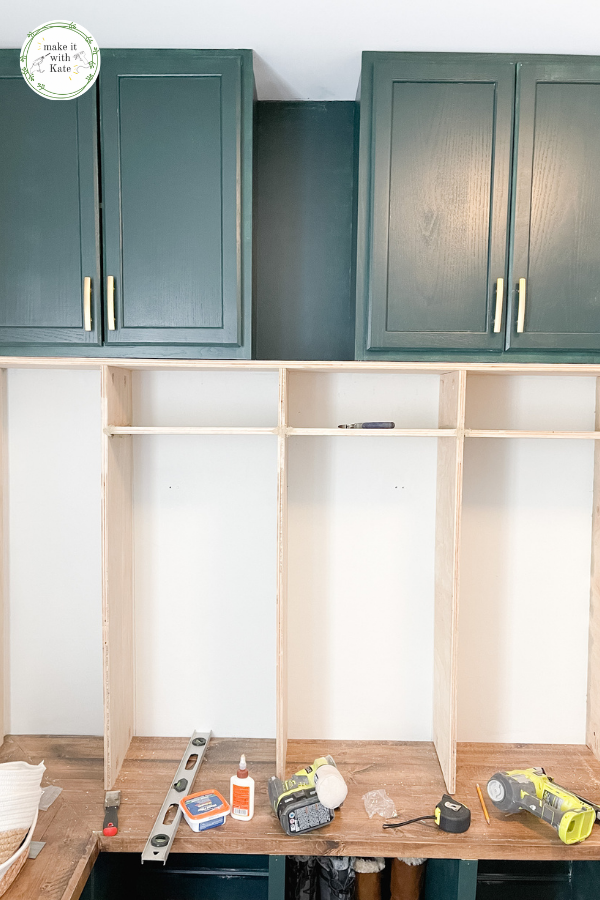
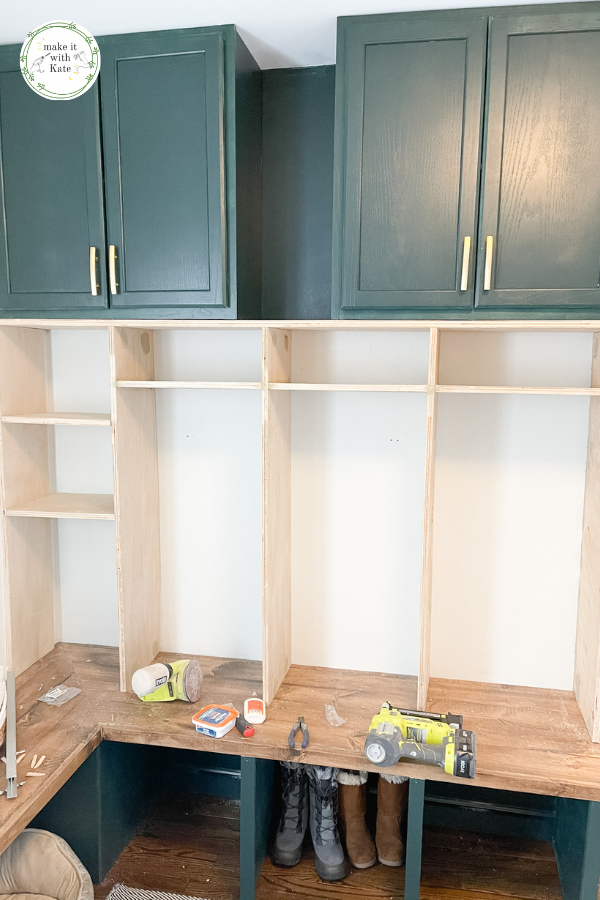
Add the top shelf to each locker unit.
Measure the space between the locker walls and cut the shelf out of 3/4″ plywood.
Similar to the way we added the locker walls, drill pocket holes in the sides of each shelf, and attach to the inside walls of the locker with 1 1/4″ pocket hole screws.
Repeat this process for the unit on the end with shelving as well.
*TIP: when adding pocket holes, change where you place them for each shelf. One pocket hole can’t be directly across from the other as you attach these to the lockers.
Step 5
Under the width measurements for the locker shelves, cut a 1×6″ common board the same width.
Place this below the shelf, against the wall and nail into place. This will be where you hang the hooks for the locker.
*If you want your hooks lower in the locker, place this piece of wood lower in the locker.
This piece of wood isn’t necessary, but it will keep your hooks much more secure. Adding hooks straight into the drywall will require a wall anchor, and still might not be as secure as you might like. But, adding the hook to a piece of wood with screws will be very secure.
Step 6
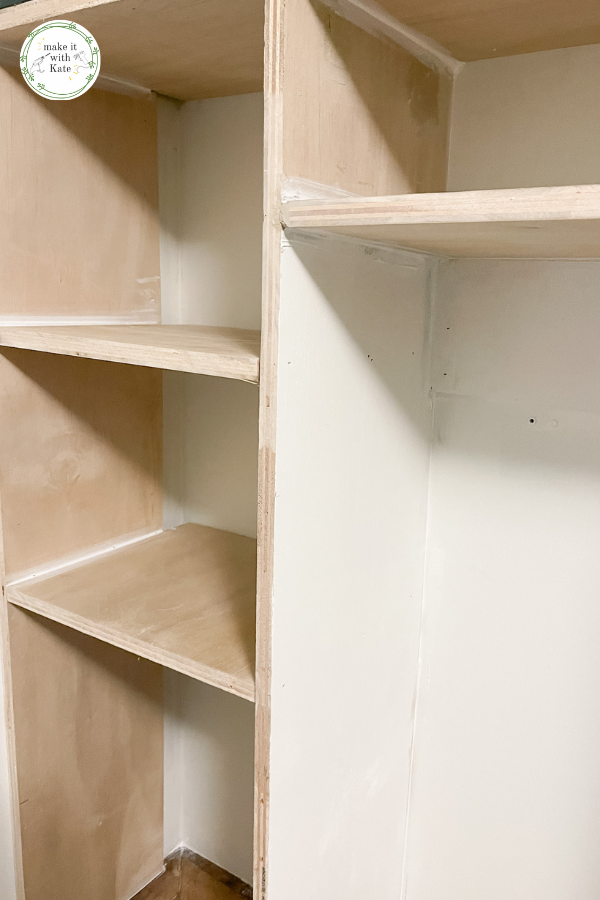
The unit it built, but the front edges of the plywood unit will look unfinished. You can choose to use Band-it or Edgetape which is a wood veneer tape that can be ironed on to the side of plywood to give it a nice finish.
I wanted to use real wood as the trim, so purchased 3/4″ trim to finish off the locker front. This is a more expensive option compared to the veneer tape.
I spent roughly $45 on my wood trim vs. the $7 roll of wood veneer because I have found that the detail of the finish can really make or break a project.
That said, I have used the veneer tape for other projects like the DIY Built-ins with Stock Cabinets in my living room and the DIY Built-in Shelving in my playroom and they look great.
Attach the trim by using wood glue and a nail gun working in sections. Another reason I wanted to use the trim is because I could use my miter saw to cut 45° angles and wrap the outside wall of the locker unit as well with the trim.
Step 7
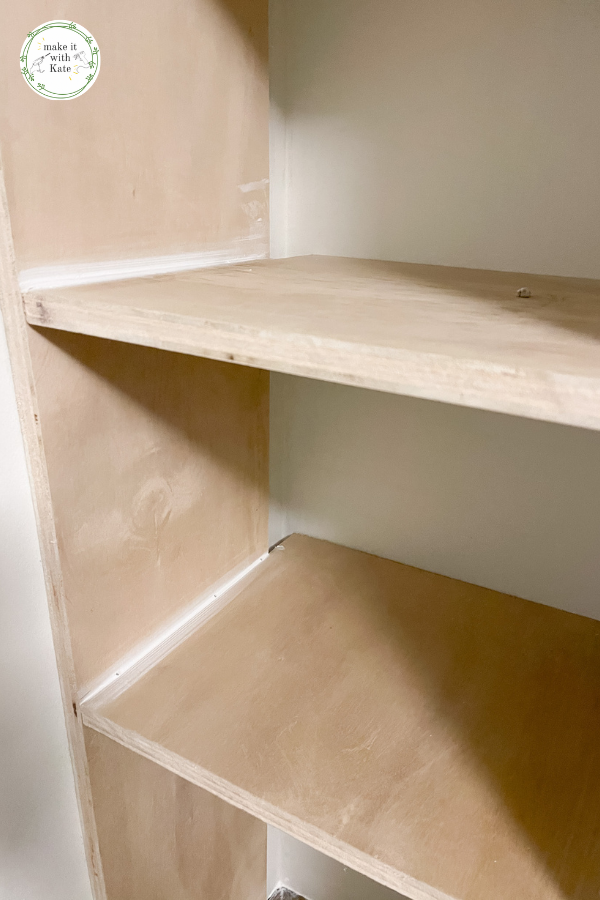
Fill all of the pocket holes and wood trim joints with wood filler.
Caulk along any of the spaces where the wood meets the wall and where the locker joins the bench.
Sand the unit and the dried wood filler with an orbital sander or sanding block starting with a high grit such as 80 grit, and working up to a fine grit such as 220.
Step 8
Prime the unit, and paint!
I chose to use the Stix primer which works great for plywood and White Dove paint by Benjamin Moore.
This was a nice contrast to the Benjamin Moore Salamander of the cabinets and the bench.
I also went with a semi-gloss instead of an eggshell finish to the paint. This gave it that shinier finished look, and should not scuff as easily.
DIY Mudroom Lockers
The lockers are not complete! You can add hooks and baskets and decorate to your hearts content.
If you want to add board and batten and a peg rail to the other wall, keep reading the series!
DIY Mudroom Build Series
- DIY Mud Room Part 1: DIY Mudroom Bench
- DIY Mud Room Part 2: Adding Mudroom Locker Cabinets
- DIY Mud Room Part 3: DIY Mudroom Lockers (currently reading)
- DIY Mud Room Part 4: DIY Peg Rail with Board and Batten (coming soon)
- DIY Mud Room: A Corner Bench with Lockers and Cabinets (coming soon)
DIY Mudroom Lockers
These DIY mudroom lockers are the perfect way to add storage and functionality to any wall space.
Materials
- 3/4" sanded plywood
- 1 1/4" pocket hole screws
- wood filler
- caulk
- sandpaper or orbital sander
- primer
- paint
- Band-it or 3/4" trim
- finishing nails
- wood glue
Tools
- circular saw (or table saw)
- Kreg Jig pocket hole tool
- level
- drill
- nail gun
Instructions
- Measure the length of the locker top and cut the 3/4" plywood to fit.
- Measure and cut the locker walls from the top of the locker to the bench.
- Drill pocket holes in the bottom and top of the wall pieces, and attach with pocket hole screws.
- Measure and cut the 3/4" plywood for the locker shelves.
- Drill pocket holes in the ends of the shelves (staggering so no two pocket holes are opposite one another).
- Attach the shelves with pocket hole screws to each locker.
- Cut 1x6" common board to fit the width of each locker, and nail to the back of the wall under the shelf. This is where the hook will attach.
- Place 3/4" trim or veneer tape to the front of the lockers and shelves.
- Fill nail holes, pocket holes and trim joints with wood fill.
- Caulk where the wood meets the wall.
- Prime and paint the unit.
- Add hooks.



Leave a Reply