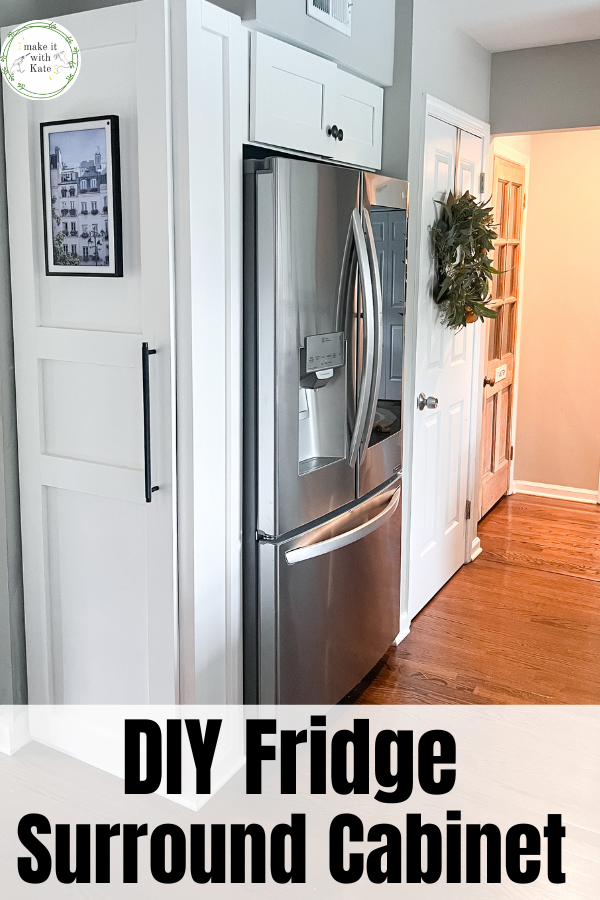
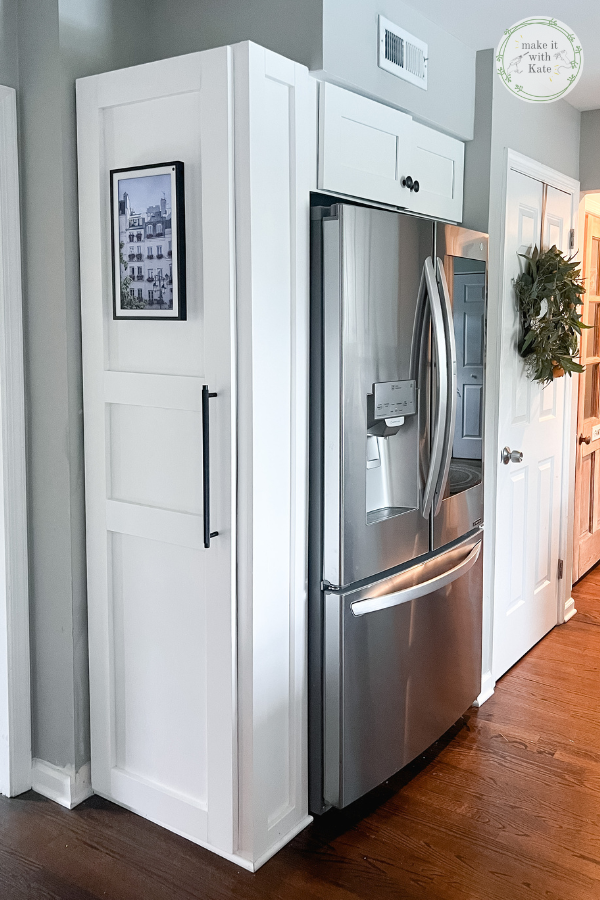
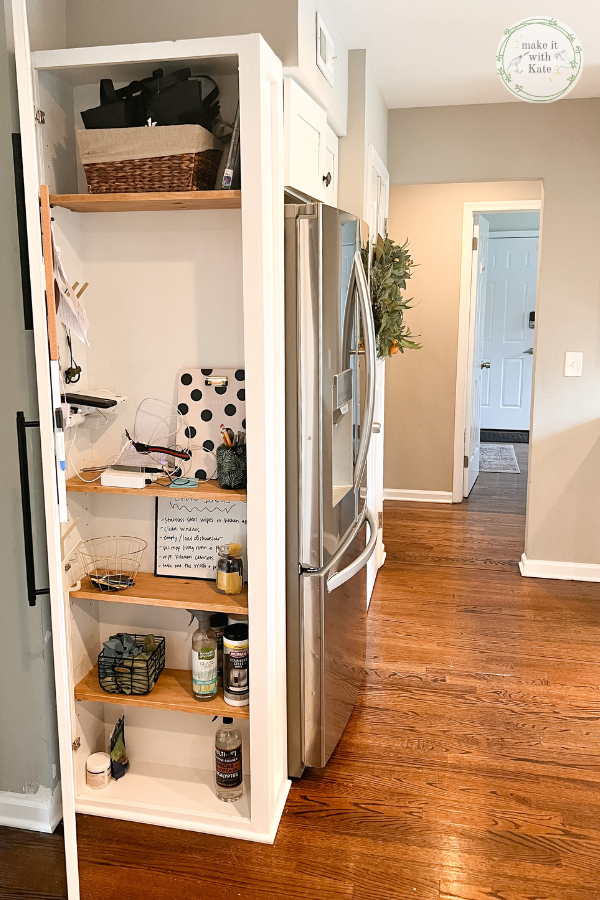
This refrigerator surround cabinet makes this kitchen fridge look built-in, plus it serves as a family command center.
I have expanded my kitchen by adding a diy coffee corner and a breakfast bar, this refrigerator surround cabinet is the final addition here. Our kitchen was builder grade and had an overhead refrigerator cabinet with no other enclosure. This refrigerator surround cabinet makes the fridge look built in while serving as a command center for my family.
How to Build a Refrigerator Surround Cabinet
Prior to building a fridge surround, it’s important to note what exactly you want to get out of your surround.
Are you looking for aesthetics? Do you need more cabinet space? In this case, I wanted the refrigerator to be built-in. Additionally, I decided that rather than building just an enclosure, I would add a cabinet to increase the storage space in my kitchen.
This kitchen enclosure is essentially a tall cabinet that is built in next to the refrigerator, as this particular fridge has a wall on the other side of it.

What you need to build a refrigerator surround cabinet:
- 3/4″ sanded plywood (dimensions to fit cabinet box+face frame)
- pocket hole tool
- table saw or circular saw with jig
- drill
- 3/4″ MDF primed trim
- 1/4″ sanded plywood (dimensions for door)
- door hinge template
- door hinges for 3/4″ overhang
- base shoe moulding
- wood glue
- interior construction screws
Steps for building a tall cabinet
This tall cabinet will serve as a bulk of the refrigerator enclosure. To build a cabinet, make a basic box with a back, sides, top and bottom and then a face frame for the front.
Measure your space and how the cabinet will fit. When taking the measurements for your cabinet box, remember to take into account the thickness of the plywood you are using.
For example, if the cabinet is 80″ tall, the back will measure 80″ but with the top and bottom attached to the back (both at 3/4″ thickness) the sides will only be 78 1/2″ tall.
Measure your space and plan all of the cuts for the box. I like to sketch these out of graph paper.

Cabinet measurements you will need:
- back
- top
- bottom
- sides
- face frame lengths (make this out of plywood or use 1×2 common board)
How to assemble the tall fridge surround cabinet
There are two options for assembling the cabinet box.
You can choose to use pocket holes or attach the pieces with construction screws through where the cabinet pieces meet up.
What are pocket holes?
Pocket holes are a type of joinery where a hole is drilled at an angle in one piece of the build. This is joined to another piece with a screw drilled in at that angle.
This can be achieved with a pocket hole tool. I like to use this one from Kreg which is a simple and straightforward tool to use. There are some instructions that are crucial to pay attention to such as the depth of the hole and the screw used. But, after getting the hang of pocket hole joinery I find this the easiest way to put a cabinet box together.
Tip: Pay attention to where the pocket holes are, though these holes can be filled, you will want to place the pocket hole on the wall side or back of the cabinet to keep everything looking clean.
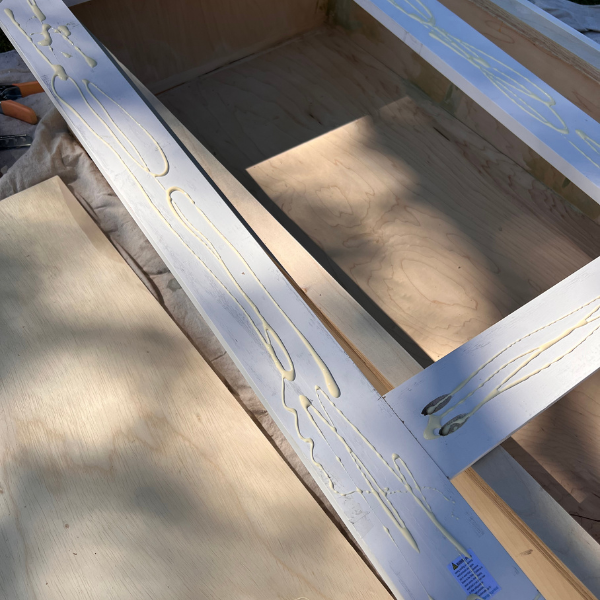
Adding a face frame to a tall cabinet
A face frame isn’t a necessary component to a cabinet, I prefer using one when building a cabinet as it provides a more finished look when using plywood and gives more wiggle room in the cabinet door install.
A face frame is simply some trim that goes around the front of the cabinet box.
Cut the length of the entire side of the cabinet from a 1×2 common board or plywood and attach using wood glue and a nail gun.
Then cut the width remaining (total width minus face frame sides) and attach in the same way.
Your cabinet box should be complete!
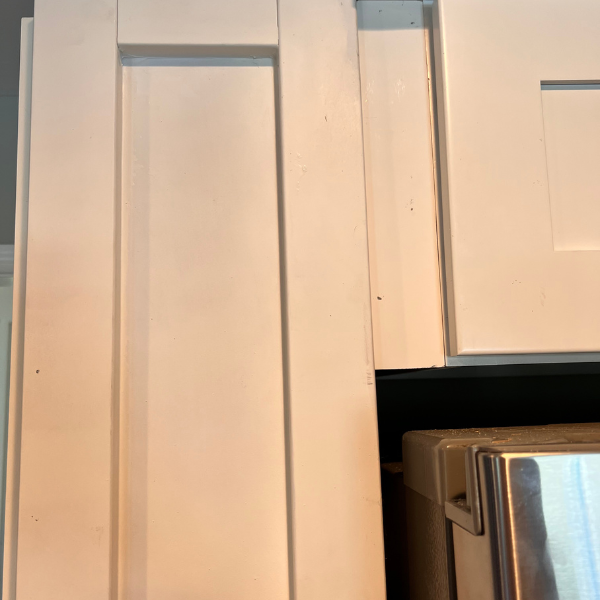
Build an Easy Shaker Cabinet Door
I feel bad calling this a shaker cabinet door because I definitely didn’t build it the “right” way. But, it is shaker style for sure, so I’ll show you how to build it the cheat way too.
Read the full tutorial and breakdown for building an easy shaker door here.
Essentially, I built a frame out of primed 1x4s using pocket holes so assemble the stiles and rails.
Then I glued the frame onto 1/4″ plywood. You could alternatively use hardboard or MDF for this for a smoother texture.
When making ‘real’ shaker cabinets, a groove or channel is cut out of the center of the stiles and rails and the middle slides into that. This creates a more seamless look.
I chose to build these the easy way for 2 reasons. One, my side pieces were almost 8′ tall and it felt unsafe to run that through a table saw the way I needed to to create a groove.
And 2, the thickness of the frame on the door the ‘easy’ way is now the same as the thickness on the trim on the side of the cabinet making the entire thing look uniform.
And, it was easier.
Adding hinges to a DIY cabinet door
Choosing hinges for a cabinet door can be overwhelming, but there are a couple of key things to look for when finding the right ones.
- Does your cabinet have an overlay (face frame)?
- How much swing or distance do you want your door to open to?
In this case, my doors had a 3/4″ overlay and I wanted a 90* open.
Using a hinge template, drill the holes on the inside of the cabinet doors and attach the hinges using provided screws.
Then, hang the door onto the cabinet by attaching the other side of the hinge to the face frame of the cabinet.
Tip: when hanging a door by yourself, prop the door up on the bottom with scrap wood to hold it in place while you attach the hinges to the cabinet.
DIY Command Center Fridge Surround
Once the DIY refrigerator cabinet is built it’s time to install. Do this by using construction screws on the inside of the cabinet into the wall (into a stud). Then use spacer blocks and a spacer board at the front to build the cabinet into the neighboring cabinets.
This can be a piece of scrap wood cut to the correct width and length of the gap in between cabinets.
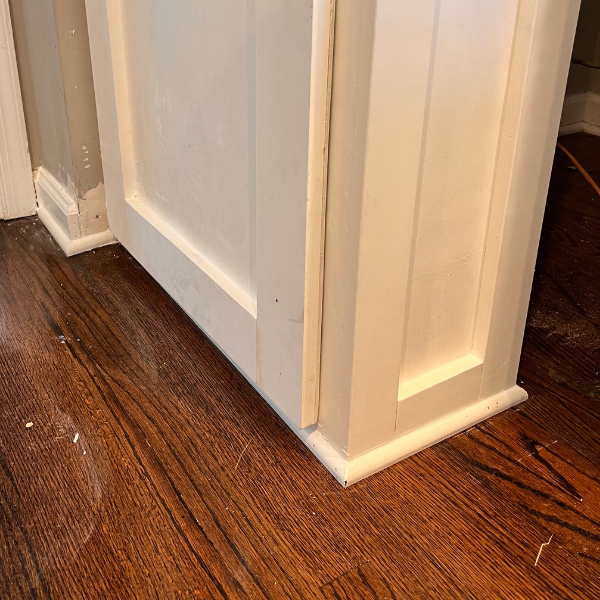
Add trim at the base of the cabinet to match existing trim in the room.

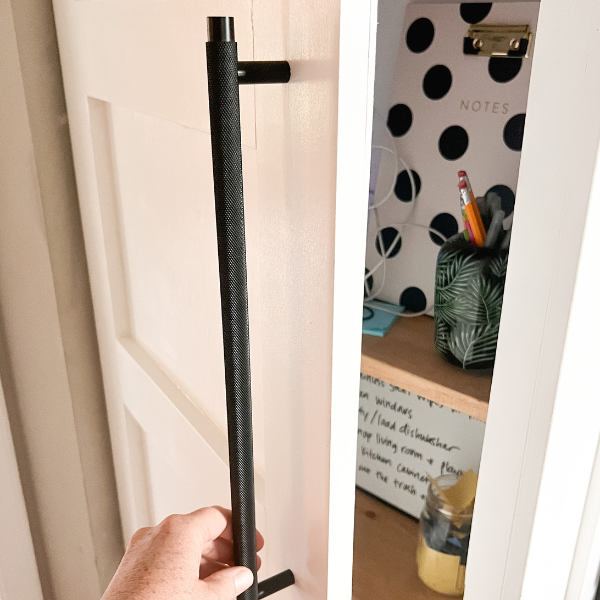
Add hardware to the refrigerator surround
For a tall cabinet like this I like a longer bar handle so that the proportions look accurate.
On this cabinet I used the Kepler Knurled T-Bar Handle from Plank Hardware which has a really nice weight and texture to it.
Additionally, I used their Levi Square Hooks in Brass on the inside of the cabinet.
When adding cabinet hardware, use a piece of painters tape to measure the distance between hardware holes, then place the tape on the door and drill through the holes in the tape.
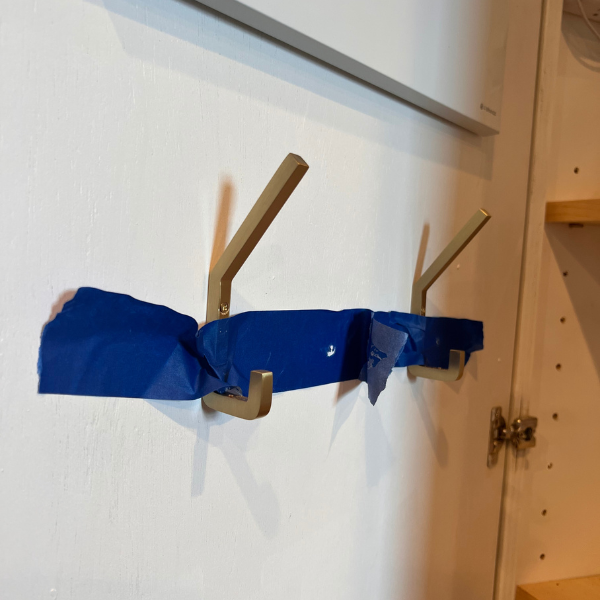
This is a quick and easy way to do this without measuring!
Additionally, when installing something like a hook by yourself, use painters tape to hold the hook in place while drilling pilot holes and attaching the hardware.
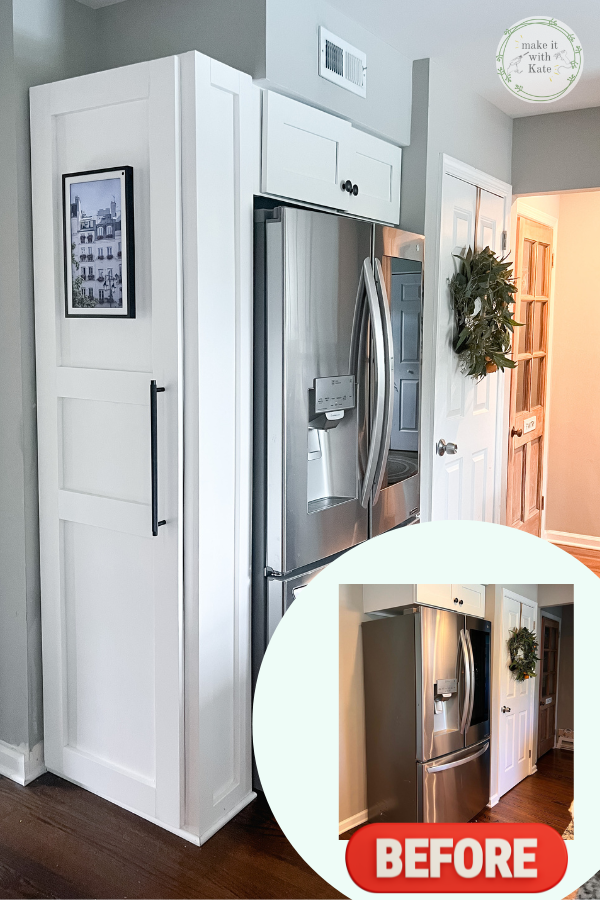
Built in Refrigerator Cabinet plus Command Center
That’s it! Now the refrigerator looks built in with an enclosure, plus this cabinet can serve many purposes. In our family, it’s a command center with cleaning supplies, a chore chart and all charging ports for all the things!
Amazon recommendations for a family command center:
- Echo Show 15 Alexa Device (what I hung on the outside of the door here)
- Multi Ipad Charging Station
- Power Strip with USB slots
- Dry Erase Board
- Corkboard
- Meal Planning Sheets
- Magnetic Strip
If you have any other ideas for this family command center, let me know in the comments!


Leave a Reply