• Skip to primary navigation
  • Skip to main content
  • Skip to primary sidebar
  • Skip to footer
  • Home
  • About
  • Work with Me

Make it with Kate

  • Home
  • DIY Woodworking
    • Building Projects
      • DIY Mudroom Build
      • DIY Corner Coffee Bar Build: Wine Storage, Floating Shelves, Cabinets and more!
      • DIY Living Room Projects: Built-ins, Wall Treatment, Beams, and More!
      • Staircase Makeover: Carpet to Wood Stairs
      • Fall One Room Challenge 2021: Game Room Makeover
  • DIY Home Decor
    • Furniture Flips
    • Dollar Tree Crafts
    • Small Wooden DIYs
      • 3 DIY Farmhouse Trays to Make
    • Wall Decor
  • Fall One Room Challenge
  • Seasonal
  • Holiday
  • Instagram

Convert a Base Cabinet to a Blind Corner Cabinet: DIY Corner Coffee Bar

November 9, 2021Building Projects, DIY Woodworking

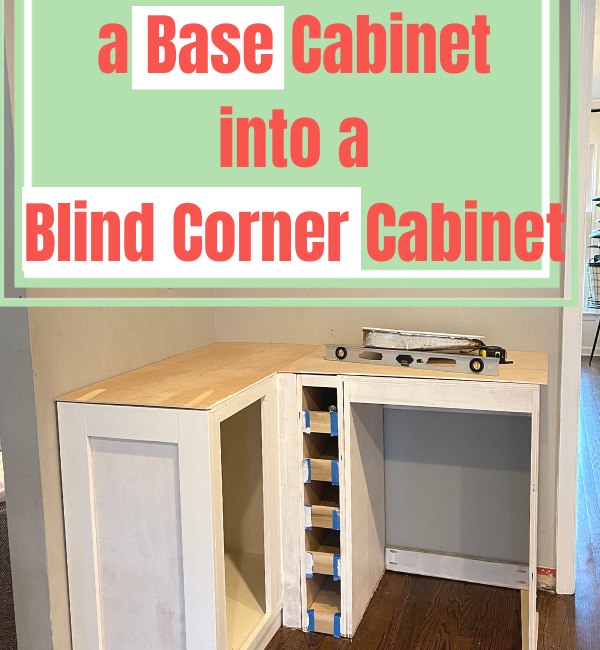
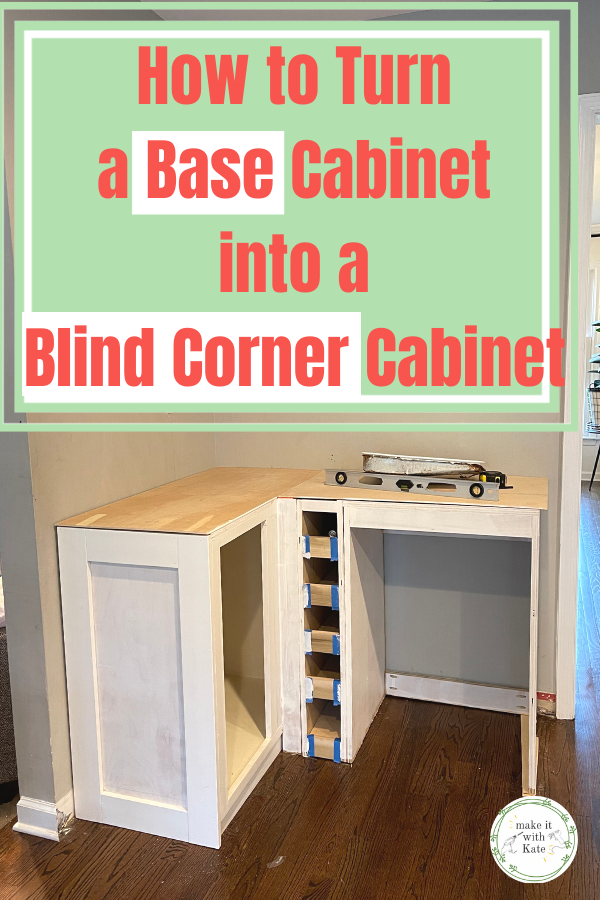
This corner coffee bar build has been my favorite DIY woodworking project to date. It has a corner counter and cabinet area with a built in mini fridge and floating shelves. In this post I’ll show you how to convert a base cabinet to a blind corner cabinet.

This simple tutorial will show you how to convert a base cabinet to a blind corner cabinet. An easy way to save space in a small corner. #diybuilds

Convert a Base Cabinet to a Blind Corner Cabinet

Using stock cabinets is one of my favorite DIY hacks. Adding some trim and hardware is really how to make stock cabinets look custom. And, they cut down on the time of building cabinets from scratch.

For this corner of my kitchen, I knew I wanted a blind corner cabinet, because traditional corner cabinets were too bulky for the limited space I had in this corner.

Empty corner and rough drawing of what I wanted to design

I do have a full blog post on where to buy stock cabinets at big box stores, but, before I head there I like to check on Facebook Marketplace and see if I can get them even cheaper. In this case, I found a base cabinet that fit the dimensions I wanted perfectly, and for only $10. SCORE.

Turning this base cabinet into a blind corner was quite simple, I’ll show you how.

Cabinet before

What you need to make a blind corner cabinet

  • scrap plywood
  • screwdriver/drill
  • base trim
  • brad nailer
  • wood glue

How to convert your base cabinet to a blind corner cabinet

What is a blind corner cabinet?

A blind corner cabinet only has one cabinet door, where the other cabinet door would be is open space. The space is created in the corner is accessible through one cabinet door. Where the other cabinet door would exist to reach that space, another cabinet is mounted there to create a corner.

A traditional corner cabinet would have much more usable space where everything is easily accessible. However, blind corners and great for small spaces, and luckily you can purchase or build organization that allows the space to be easily used.

What is a base cabinet?

A base cabinet is one that sits on the floor rather than hang on the wall. They are deeper than wall cabinets, creating a base for the countertop for sit on. Additionally, they typically have a toe kick at the bottom.

Convert the base cabinet to a blind corner

Alright, now that we know the difference between a base cabinet and a blind corner cabinet, I’ll show you how to easily convert one to the other.

Essentially, removing one cabinet door will turn the base cabinet into a blind corner.

It gets tricky when lining everything up so that the dimensions of your space work with that one cabinet door.

For this project, if I were to simply remove the door and butt that up against the cabinetry on the other side of the corner, the cabinet would not extend out far enough on that wall.

Plus less of my cabinet would have been accessible and the opening of the cabinet door would have been crammed.

The steps I took to help the fit were:

  1. Remove the cabinet door closest to the corner.
  2. Place the cabinet where I wanted it on the wall (there was a gap of about 4 inches off the back wall where I used some 2×4 blocks to keep it in place.
  3. Place the other corner cabinet frame where I wanted it to hit the blind corner.
  4. Cut a piece of 3/4″ scrap plywood to fill in any existing space where the cabinet door was missing and wood glue plus screw in place.
  5. Cut a piece of 3/4″ scrap plywood to create a filler between where the two cabinets meet so that the plywood corner was the same on both sides. I attached this with wood glue and screws.
  6. Use 2×4 blocks behind that scrap piece to attach the two cabinets together at the top behind the spacer.
  7. Attach the cabinets to the wall through the back frame into studs with screws.
  8. Fill in the toe kick with base trim.
You can see here that the space where one cabinet met the other didn’t leave the cabinet door too accessible.
Adding a piece of scrap plywood bumps the other corner cabinet out enough to make both sides more accessible
Here I messed with the layout to make all of the spaces as accessible as possible. You can see in the blind corner that space is usable. Also, painting everything the same color hides what we did in the corner.
Added hardware to the door and placed base trim on the toe kick!

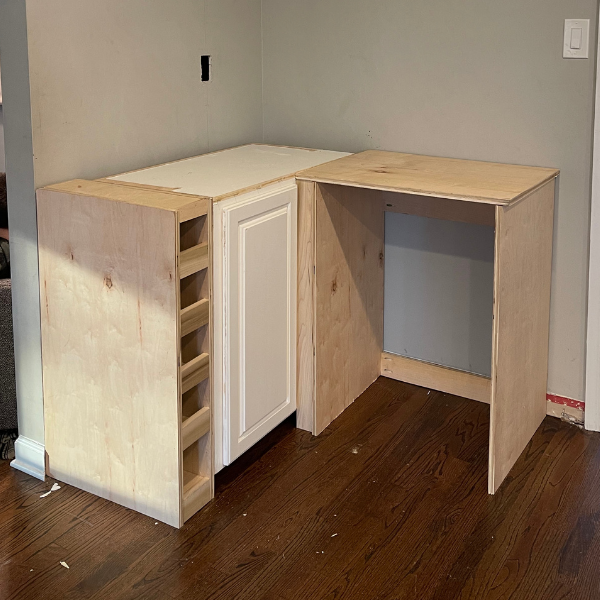
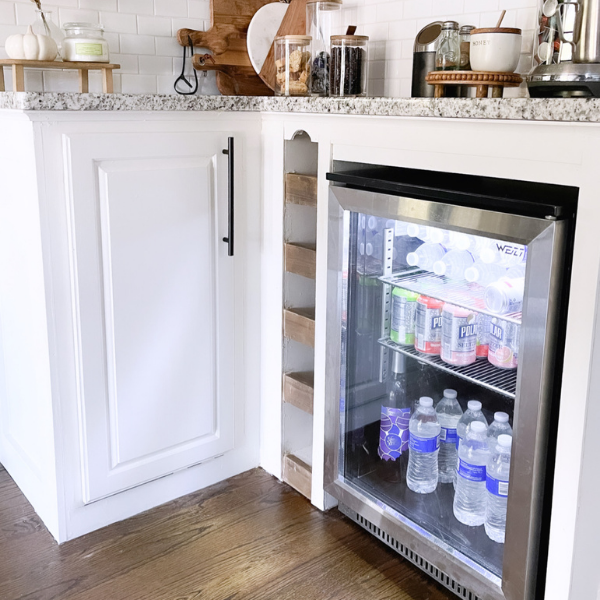
Now, I have a blind corner cabinet with a nice plywood corner of about 3″ to help the corner cabinet doors and wine rack feel accessible and not crammed.

More posts in this DIY Coffee Corner Build

DIY Mini Fridge Cabinet

more coming soon!

Related Posts:

  • How to Build a Refrigerator Surround Cabinet
    How to Build a Refrigerator Surround Cabinet
  • DIY Stair Runner with Corner Turn
    DIY Stair Runner with Corner Turn
  • DIY Coffee Bar Ideas for Home Kitchens
    DIY Coffee Bar Ideas for Home Kitchens
Previous Post: « DIY Neon Sign and Backlit Trim: Week 6 Fall ORC
Next Post: DIY Mini Fridge Cabinet: Corner Coffee and Wine Bar »

Reader Interactions

Comments

  1. visit our website

    January 26, 2022 at 4:28 pm

    “Everything is very open with a clear explanation of the challenges. It was definitely informative. Your website is extremely helpful. Thank you for sharing!}” visit the following site

    Reply
  2. Best Dating Site

    February 2, 2022 at 11:50 pm

    🎁 Congratulations Superlotto in honor of its 25th anniversary gives you free lottery ticket 6/45! Fill out a ticket: https://cutt.us/NBPxO 🎁

    Reply
  3. Best Dating App 2022

    February 4, 2022 at 1:28 am

    ❤️ You have unread messages from Belinda (2)! Click Here: http://inx.lv/Dob1?h=f8270b5f333a48d1be0869df57812891- ❤️

    Reply
  4. Best Dating App 2022

    February 4, 2022 at 1:53 pm

    ❤️ You have unread messages from Susan (2)! Click Here: http://inx.lv/DBbu ❤️

    Reply
  5. Best Dating Site 2022

    February 4, 2022 at 1:53 pm

    ❤️ You have unread messages from Veronica (2)! Click Here: https://clck.ru/asnA8 ❤️

    Reply
  6. Toni Keesling

    February 6, 2022 at 9:08 pm

    Aw, this was an exceptionally nice post. Taking the time and actual effort to create a good article… but what can I say… I hesitate a lot and don’t manage to get anything done.

    Reply

Trackbacks

  1. 10 Easy DIY Corner Cabinet Ideas with Plans says:
    October 21, 2022 at 11:34 pm

    […] Tutorial: makeitwithkate.com […]

    Reply
  2. DIY Coffee Bar Ideas for Home Kitchens - Make it with Kate says:
    February 8, 2023 at 5:44 pm

    […] corner coffee bar was a build from scratch. I built the base corner cabinet and added floating shelves and backsplash. But, there are so many fun ideas for coffee bars in your […]

    Reply

Leave a Reply Cancel reply

Your email address will not be published. Required fields are marked *

Primary Sidebar

Search for what you need

Welcome!

Find inspiration for DIY home projects and crafts on a budget! You can usually find me with either a hot glue gun or a can of spray paint in hand 🙂

Get social:

  • Instagram

Recent Posts

  • Double Picture Frame Moulding DIY
  • 7 Easy DIY Fall Centerpieces
  • Fall House Decoration to Add Warmth
  • DIY Stair Runner with Corner Turn
  • DIY Stair Risers on a Budget

makeitwithkate

🪚 Transforming builder grade into modern colonial
🔨 DIY builds and decor
🪑 Furniture flips

Make it with Kate | DIY Blog
These motorized roller shades from @smartwingshome These motorized roller shades from @smartwingshome are the final missing piece to this living room makeover! I just love how easy they are to use with the remote or as part of my home automation. The color is the perfect neutral and the linen provides great light-filtering. These are the SmartWings Motorized Light Filtering Roller Shades 70% Blackout Linen, color Caramel.
🌟🌟 L I V I N G  R O O M  R E V E A L 🌟🌟 what’s new? Wall treatment, door and window trim, stained beams, updated doors, lighting and paint! DIY is too much fun 🥰 do you have a favorite part? ➡️➡️ swipe to see some progress/before pics! #diyhome #livingroomdecor #moderntraditional #diydecor
🌟The living room I bought versus the one I crea 🌟The living room I bought versus the one I created. 🌟 The number one thing I’ve learned in DIY, is to follow and know the trends, but ultimately find your own style and create what you love, and what you are your family are comfortable in. #diy #diyhome #livingroom #moderntraditional
Here are 5 tips for styling your shelves! 👇

1️⃣ Balance: vary shapes, sizes, and height to create visual interest

2️⃣ Color Coordination: You can group similar colors together or use gradients of a color palette. An easy way to do this is to stick with either warm or cool tones.

3️⃣ Layering: Place larger items at the back and smaller items in front to create depth and visual intrigue, or small items on top of large. 

4️⃣ Negative Space: Leave some empty space to allow the eye to rest and to highlight the items you’ve chosen to display.

5️⃣ Personal Touches: Incorporate items personal to you such as photos, artwork, or keepsakes to make the shelves feel more personal and reflective of your style and interests.
I’m loving how fresh this living room feels now! I’m loving how fresh this living room feels now! #diyhome #moderntraditional #livingroom #diydesign
These doors are DONE! This was a labor of love but These doors are DONE! This was a labor of love but I am happy with how they turned out! The reeded film over the plexiglass keeps the playroom mess out of sight, but the room feels a bit more open this way. More details in highlights! #diyhome I used @retiqueliquidwood to cover the chalk paint without any sanding!
Taking these doors from painted and scratched to w Taking these doors from painted and scratched to wood-grained French doors with @retiqueliquidwood - they are almost done, stay tuned for the end result! I think they will be good! #diydoors
I’m making progress in this living room! Next st I’m making progress in this living room! Next step is to take these beat up, painted doors and make them look like new French doors! I cut large holes in the middle of them and am going to make a plexiglass insert. Here’s hoping!
Let’s take these beams from painted black to a b Let’s take these beams from painted black to a barn wood look. Check out this fun and easy process! What do you think?!
Picture frame moulding in the living room phase 1! Picture frame moulding in the living room phase 1! I updated the door and window trim to a craftsman style, the added double box moulding to the walls, and board and batten to the breakfast bar. Stay tuned to watch this get finished! It’s gonna be good!
I’m switching out the trim work in my living roo I’m switching out the trim work in my living room to add Craftsman moulding to the doorway and window! This is part of a living room refresh, stay tuned for box moulding and updated doors and beams next! #craftsmantrim #craftsmanmoulding #doortrim #diy #doityourself
Sometimes, you just have to go for it. 🔨 🪚🪛
Load More... Follow on Instagram
Copyright © 2025 · Make it with Kate · Hearten Made ⟡
Cleantalk Pixel