
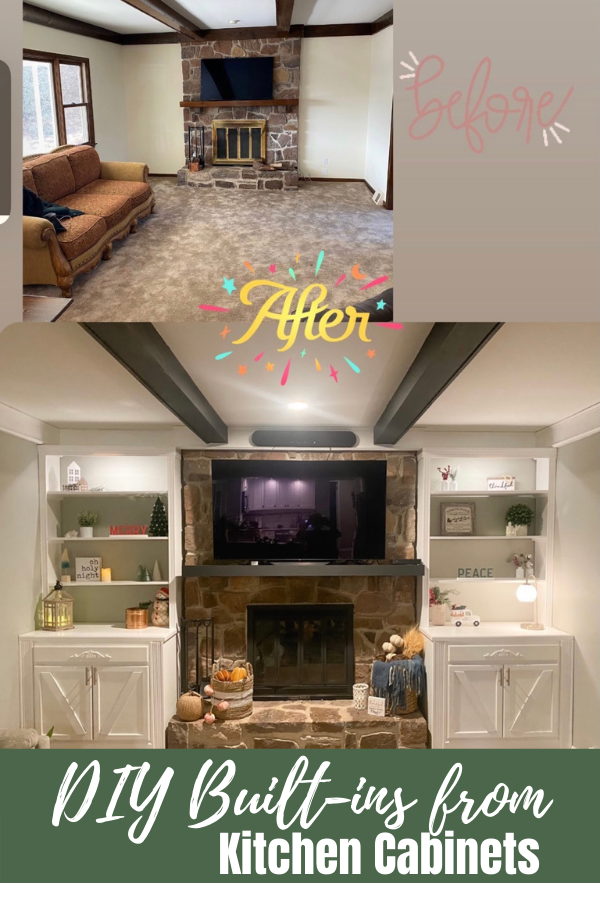
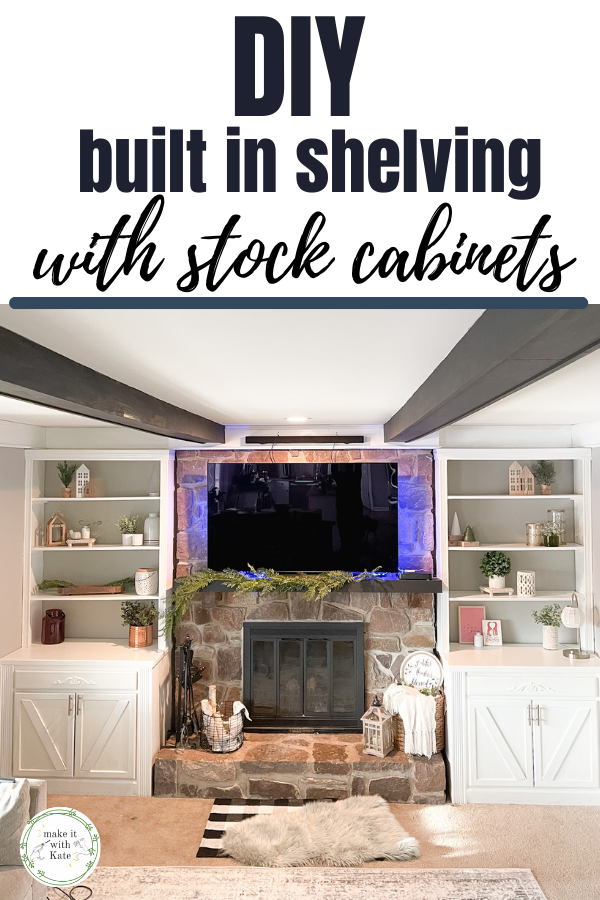
I love the built-in shelving look next to a fireplace in a living room. We had plans to someday hire a contractor for this project, but after further research, I learned that we could make DIY built-ins with stock cabinets. And it was easy!
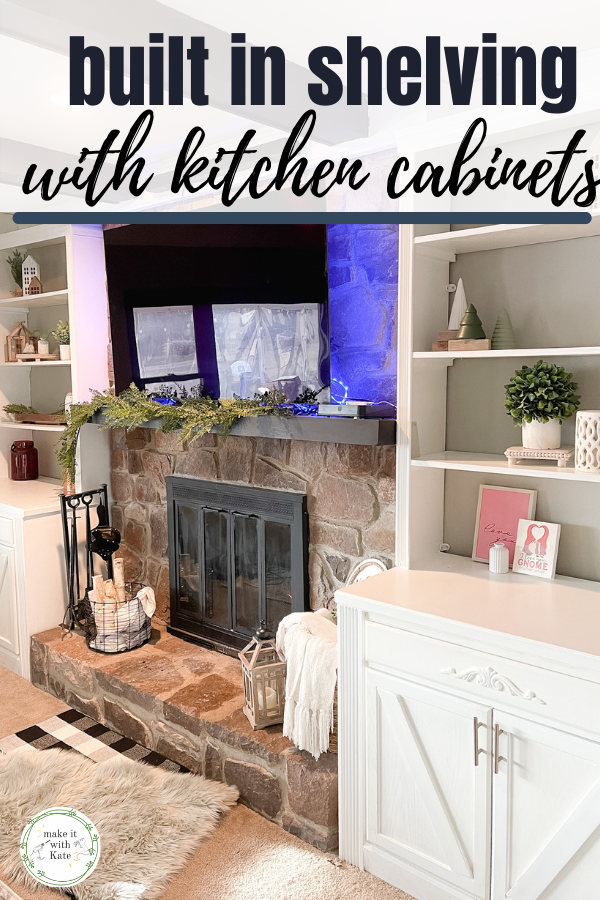
DIY Built-ins with Stock Cabinets
The process for these DIY built-ins is really straightforward. I wish I had taken more process photos but I’ll do my best at explaining each step and how we tackled this.
As a disclaimer, we are not even close to professional (or even intermediate) builders. After figuring out how to create built-in shelving in our playroom and adding some basic closet shelving, we felt confident enough to tackle the DIY built-ins from kitchen cabinets in our living room.
Related: Using Stock Cabinets as Mudroom Locker Tops
Related: Using Stock Cabinets for Built ins
What you need to make the built-ins:
- manufactured stock cabinets to the width of your space minus a few inches on each side
- MDF sheet cut to the size of your space (total width x depth of cabinet)
- 3/4″x12x8 MDF
- moulding (for baseboard, to trim the sides of the built-ins, the front facade of the countertop, and crown moulding)
- 1×1 square dowels
- nail gun
- caulk
- wood filler
- wood glue
- paint
- level
- brackets
I’m not giving you exact measurements of what we purchased here because to get a truly custom build for your space our measurements won’t matter. This tutorial will give you the steps to frame this out and the basic idea of how to go about it.
How to plan out your space
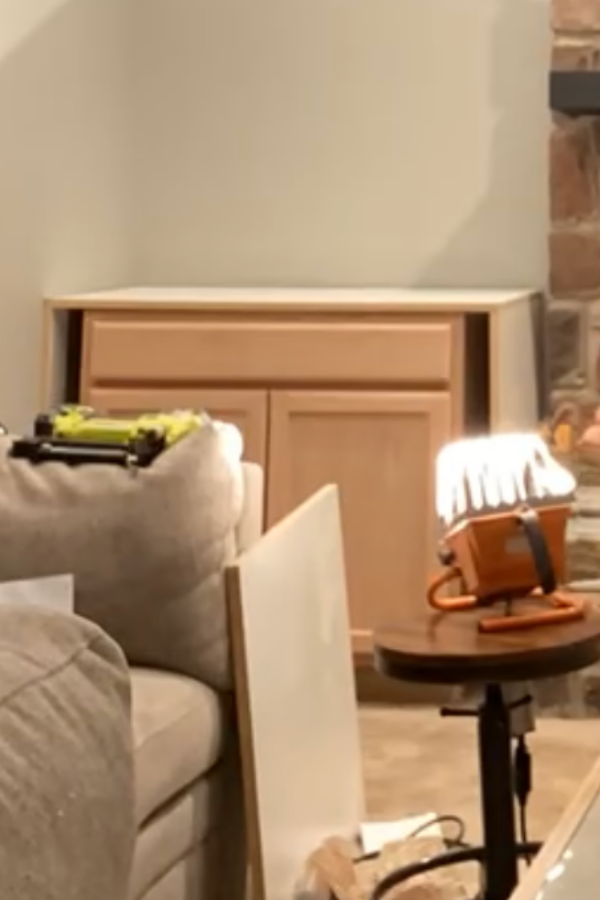
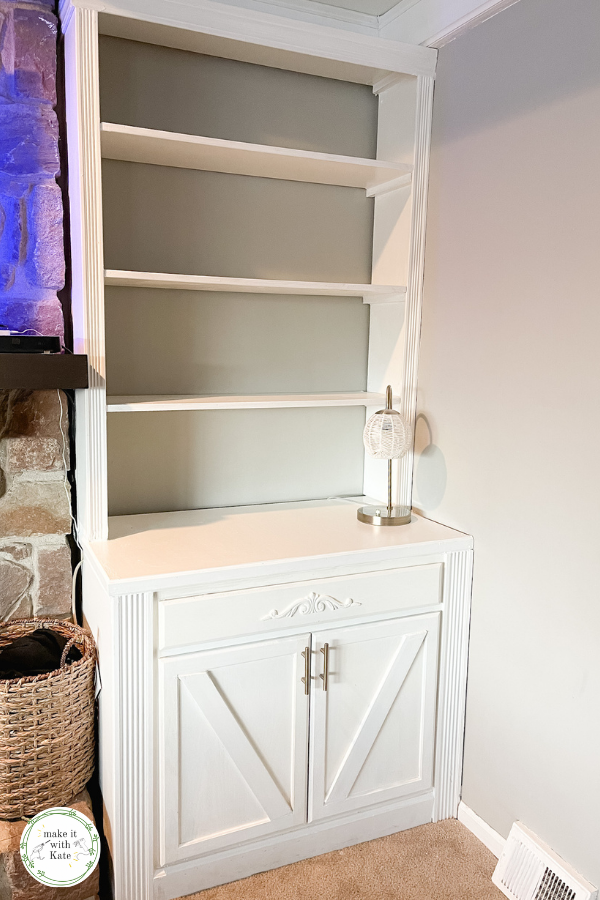
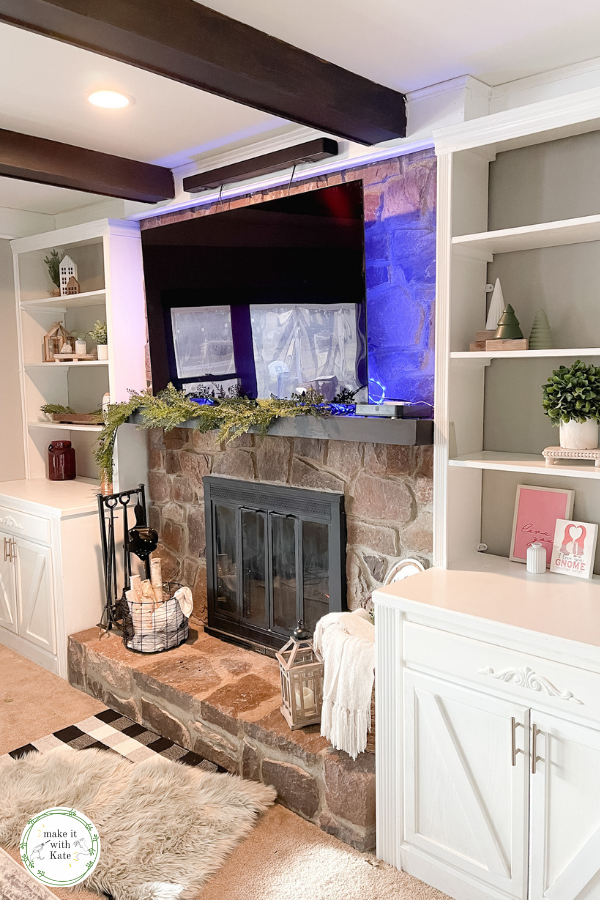
To start measure the width and height of the space you are going to fill. We had roughly 4 feet on either side of the fireplace that we wanted to fill.
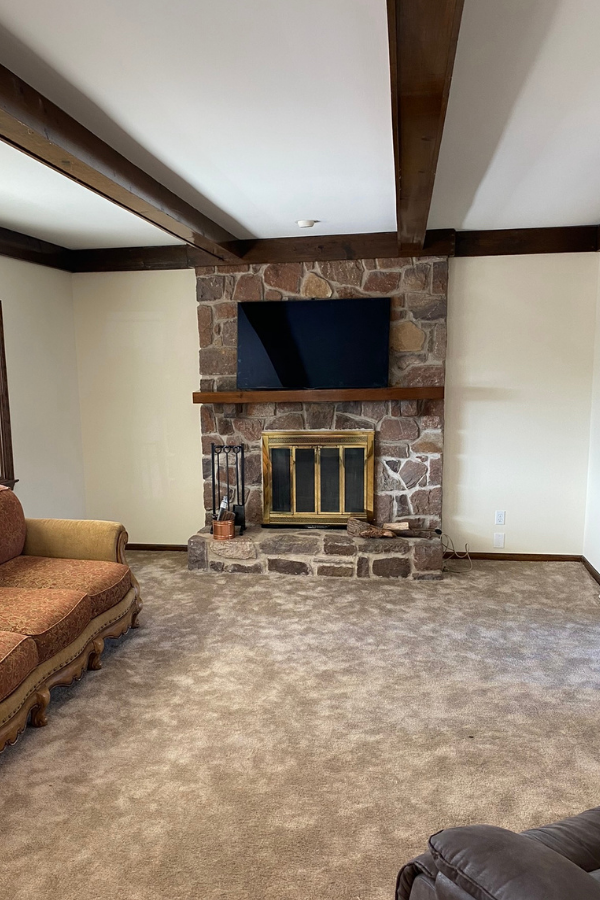
Because the stone on our fireplace comes out deeper on the bottom that it does on the top, I wanted the cabinet base to come out further than the bookshelf top.
Sketch out your space on a piece of paper and start filling in measurements. The cabinet that you choose should be slightly smaller by about 2-4″ on each side than your space. This will allow you to add moulding to the sides of the cabinet, giving you a built-in feel.
Kitchen cabinets can be purchased at Home Depot, Lowe’s or Ikea pretty inexpensively. These are the cabinets that we used from Lowe’s.
In your plan, you should have the width of the cabinet that you need, the width of the total space for the bookcase, and the height of the bookcase.
Start sketching, figuring out how the cabinet will fit, an idea of bookcase size, and an idea of the kind of moulding you are going to want to use.
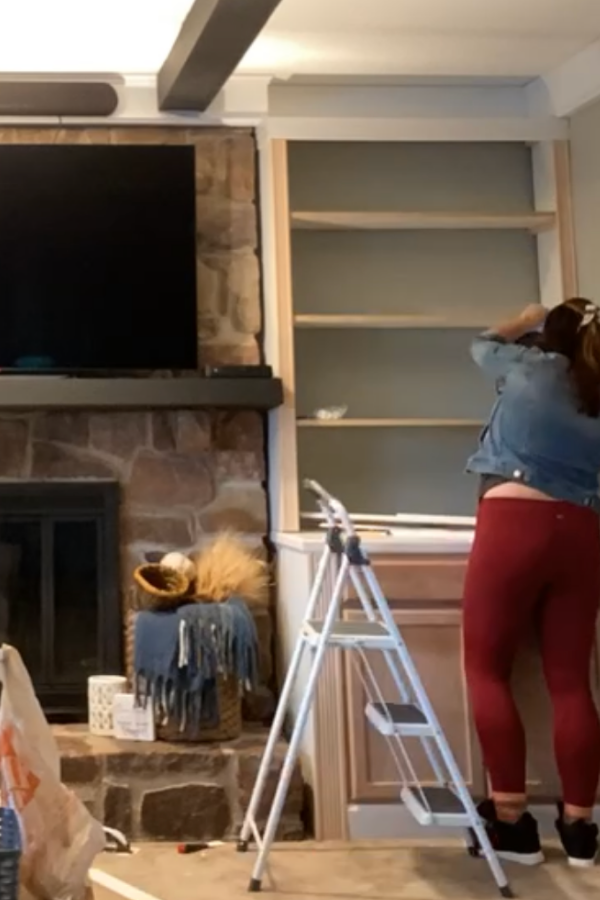
How to begin assembling the built-ins with stock cabinets
*Many of these pictures are screenshots from the video I made – I wish I had taken process images for this post, my apologies!
Place the stock cabinet in the middle of your space. Frame the cabinet by adding a panel of MDF bracketed to the wall on the open side (if you aren’t building wall to wall), a 2×4 on the wall side, and an MDF panel on top of the cabinet to create the countertop.
The countertop will be the same depth as the cabinet, but will be wider to fit the entire width of the space minus the walls on the built-ins.
If you are creating a wall on one side, use brackets to attach the MDF to the back wall, then nail the top of the countertop down into the panel.
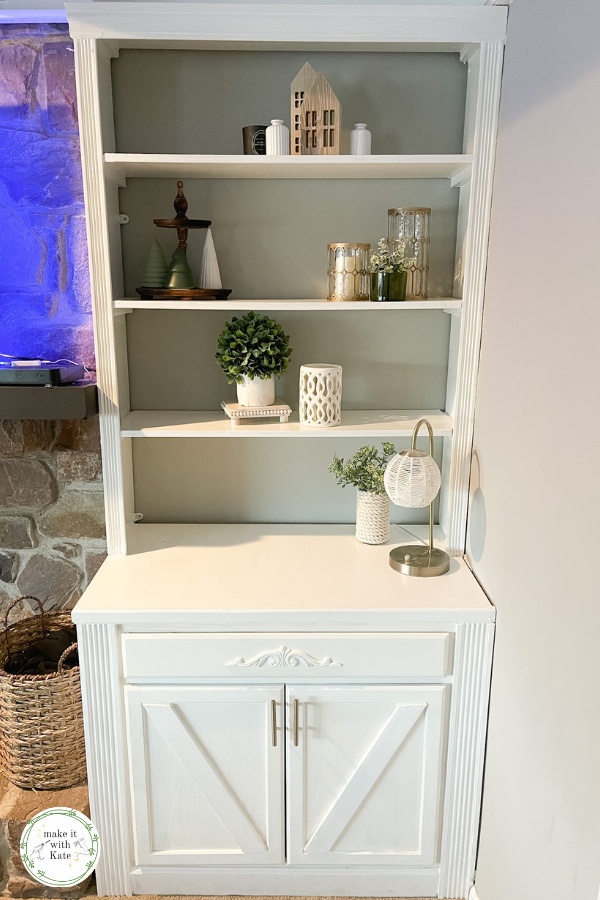
Once the cabinet is framed like this, all of the empty space will be filling in with moulding, making it look seamless and like one large custom piece.
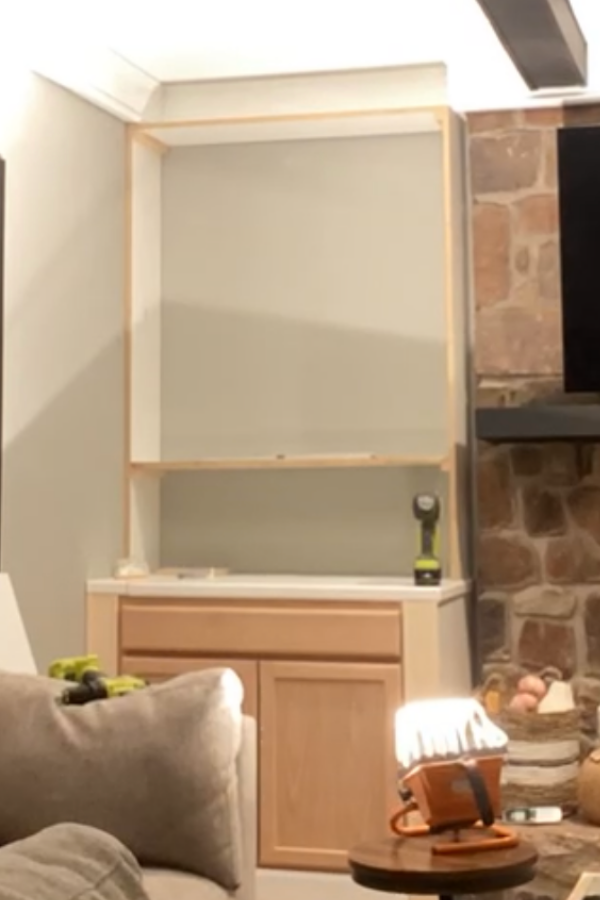
Build the top bookcase
On top of the cabinet base, you will be building a bookcase. In our design we left the back open so that you could see through to the wall. This would be a great place to try some peel and stick wallpaper before building the built-ins!
Start by framing out the bookcase with 3/4″x12″ MDF. Attach one side directly to the wall with the nail gun, and float the other side by adding brackets to the back wall and to the cabinet countertop.
To build the shelving, we took the most basic approach that we had used in the basic closet shelving we made.
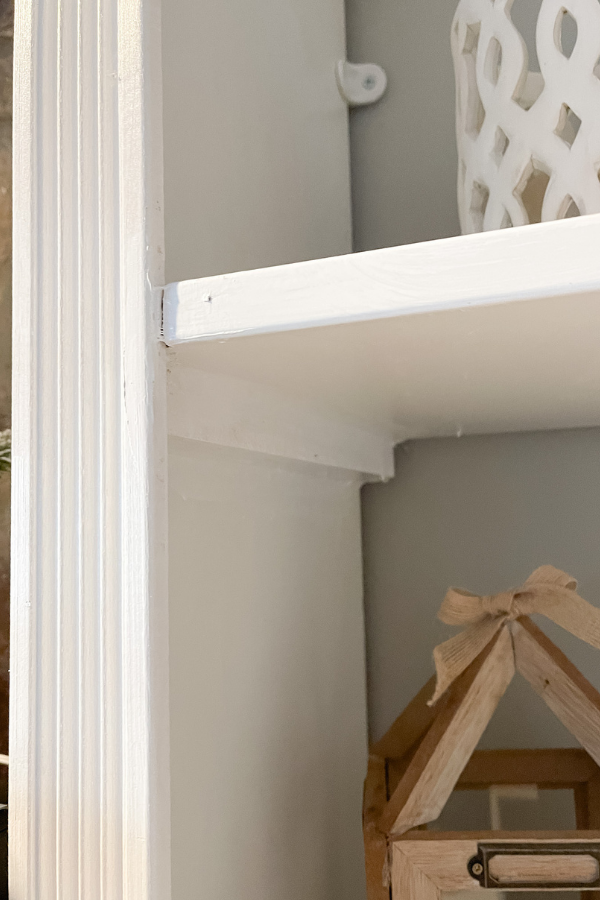
Cut 1″x1″ square dowels into 1′ lengths (or as deep as the walls of your bookcase).
Using your tape measure and level, attach the dowels to the walls of the bookcase where you want each shelf to go. Making sure these are the same height and are level is the trickiest part!
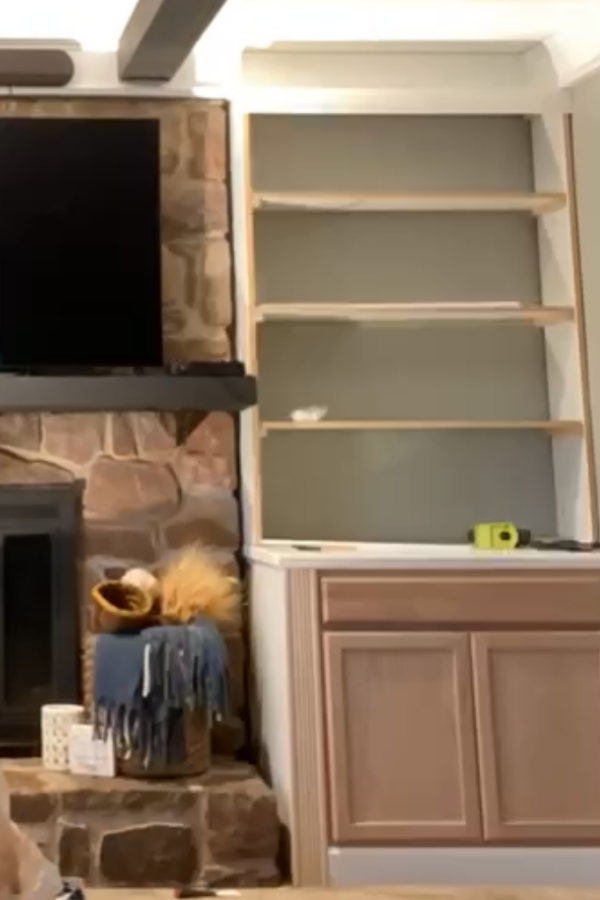
Create your shelving by cutting the 3/4″x12″ MDF board into the width that you need, then simply set them on top of the dowel brackets that you have created.
Continue this process all the way until the top of the bookcase, where you can choose to use dowels or simple nail the top of the bookcase into the sides. (We didn’t go all the way to the ceiling so made a top to the bookcase.)
At this point, the structure is built! Now it’s time to add the finishing touches that really make this look like a true built-in.
Making your built-ins look truly custom
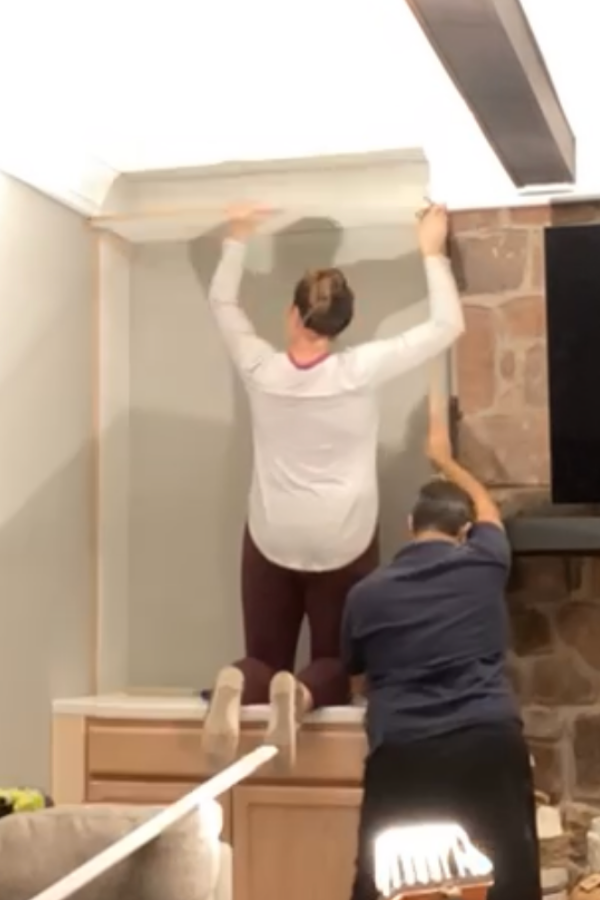
This is my favorite part of the design. All of the trim work that you choose can really make the project look professional and finished. If you are skeptical up until this point, wait until you see what these finishing touches can do!
To finish the project, you are going to need to measure the length and width of all the spaces that require moulding or trim, and then see what style of trim you like for these spaces.
I was limited in the trim I could use around the cabinets, because I had about 4″ on either side of space to cover. I decided on this trim that almost looks like bead board from Home Depot, and then found a thinner version of it that I could use as moulding on the sides of the bookcase above as well.
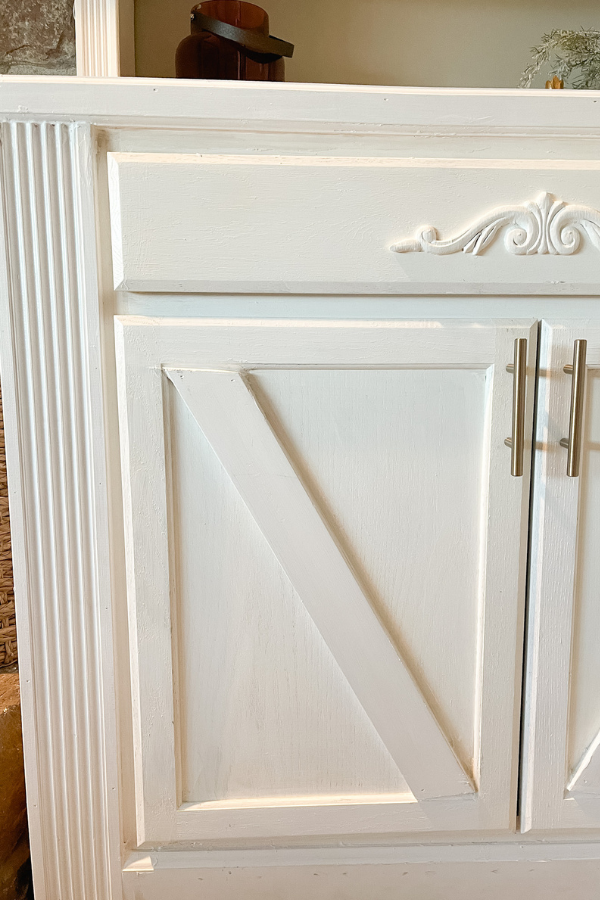
Use wood glue and the nail gun to attach moulding all around the project.
Attaching baseboard to the bottom of the cabinet will go a long way too.
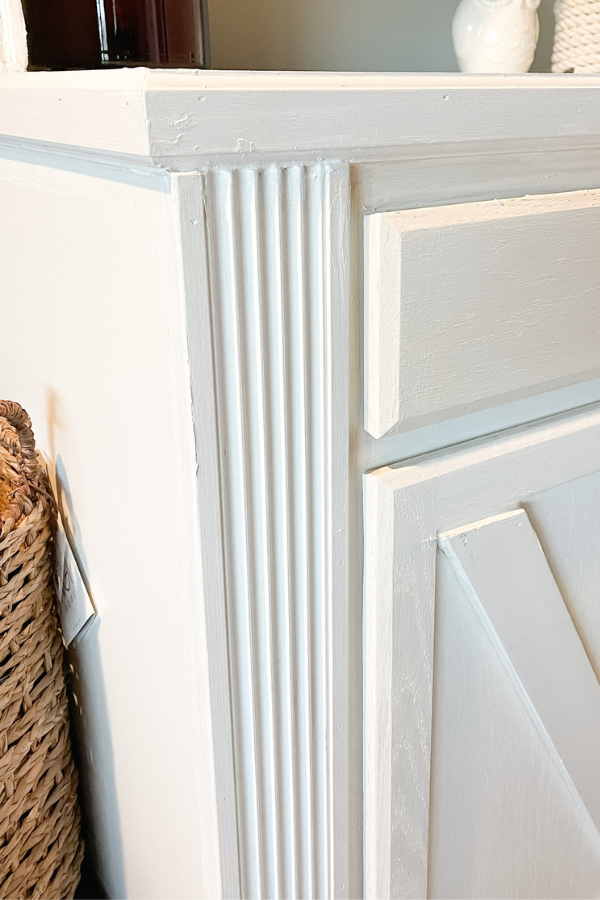
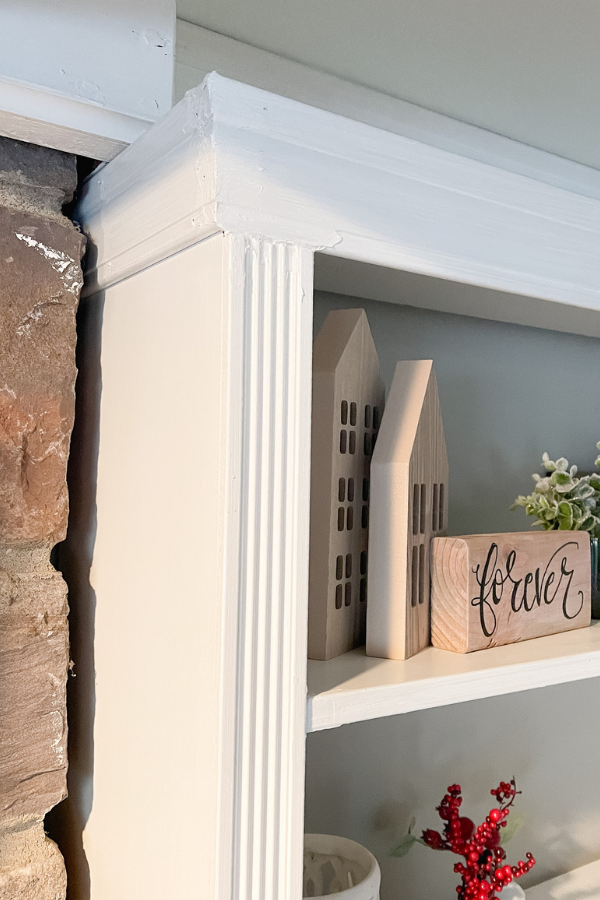
Crown moulding is a great option for the top of the bookcase, especially if you wrap it around the outside of the bookcase top.
And, don’t forget to add small moulding strips to the front of the bookshelves and the countertop as well.
We opted to add an ‘x’ pattern on the front of the cabinet and gold hardware to the doors, I love how this made them look like they were no longer kitchen cabinets.
Tips for some of the small details that matter
Once the structure is built, the moulding and trim is all attached and the project looks ready to be painted – don’t skip this next step first!
Patching up any seams and nail holes is essential to making the finished built-ins look perfect.
Use caulk on any seam where the wood meets the wall. I like to use a caulk gun and just go down each seam making a bead of caulk, and then go over it with a wet finger to smooth it out, wiping the excess off on a paper towel. It might not be the most professional technique but it works.
Any area where you have nail holes or where moulding meets and there is a gap, use plastic wood filler. Once the wood filler is dry, you can sand it down smooth and it will be like there was never a nail or a gap there.
Now- paint!!
Have so much fun making these DIY built-ins from kitchen cabinets.
What I would have done differently!
In hindsight after completing a few other projects, I would have sanded the caulk down better before painting.
Additionally, I would have gotten the Kreg Jig pocket hole tool and used pocket holes for the shelves instead of the dowel system.
From far away, both of these look completely fine, but when I look close up these are the details that bother me.
But, for our first built ins with stock cabinets, I’m really happy with how they turned out! Plus, these are details I can always go back in and fix later.
I do love having them to add seasonal or holiday decor though, they make me so happy.
RELATED: DIY Built in Shelving for Playroom
If you have any questions, leave a comment below or message me on Instagram!


Hi, this is a comment.
To get started with moderating, editing, and deleting comments, please visit the Comments screen in the dashboard.
Commenter avatars come from Gravatar.