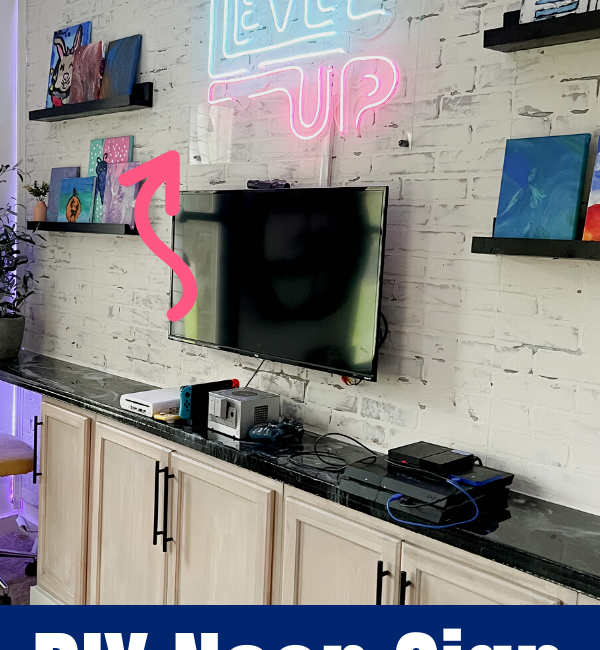
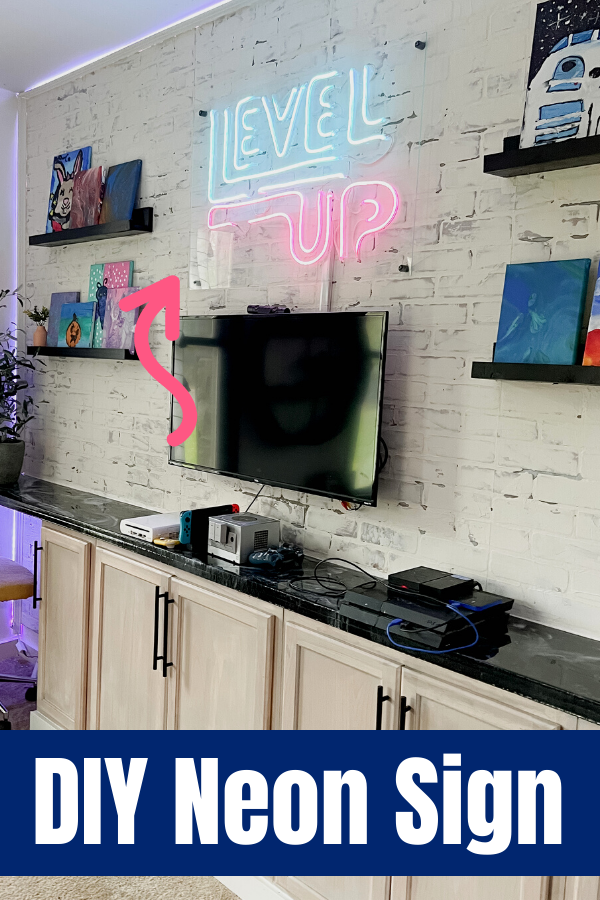
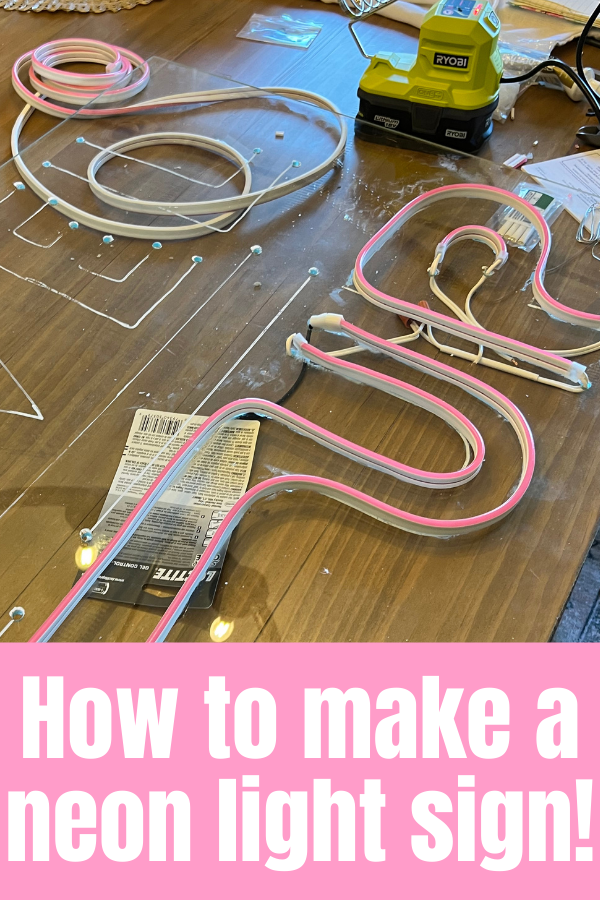
This one room challenge is wrapping up in a couple of weeks, and I’m now in the stretch of finishing touches. This week, I built a DIY neon sign. It’s a tedious but doable process, I promise. It also definitely ‘leveled up’ this game room makeover.
I also created backlit moulding around the faux brick wall with LED light strips, I’ll walk you through that too.
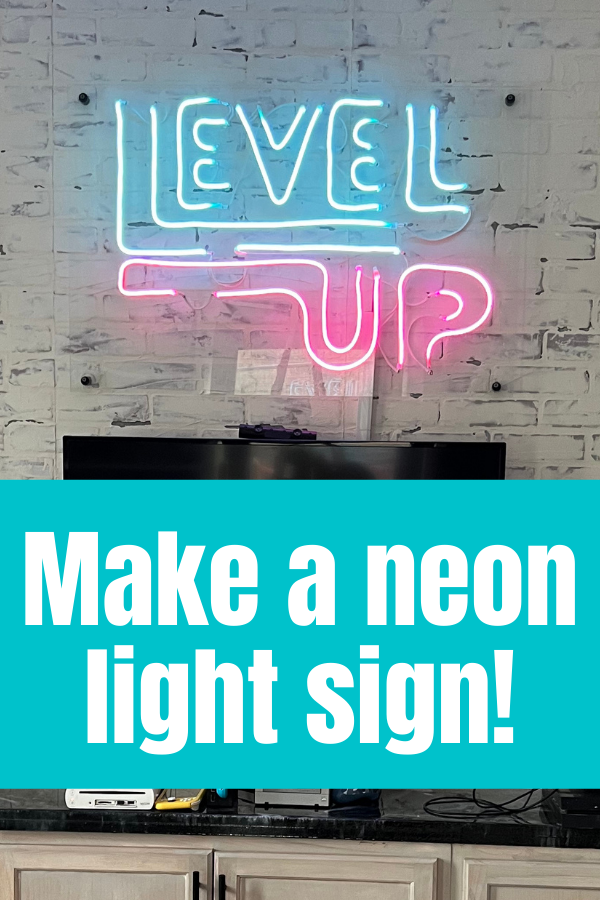
Make a DIY Neon Sign
This was the first time I used a soldering iron and worked with electrical wire. I learned a lot about the process while figuring this out, and it was frustrating at times, but I did it.
I only say that to try to inspire you, if this is a new skill for you, you can do it too!
I’ll try to break the process down but as a disclaimer I’m sure there are more technical terms that I don’t know. So, I’ll do my best to explain in my own terms how I went through the process.
The good news it that’s its a repeatable process that you do over and over to create the sign. So, once you get the process down, it’s smooth sailing.
I use Canva for my design needs. It is great for creating mockups of the spaces I want to renovate or creating digital graphics. In Canva, there is a font called Lovelo Line and it is the block style lettering I like for neon signs.
After creating the design to scale using the size of the plexiglass I was using, I saved it as a PDF, then opened it in Adobe Acrobat and printed it as a poster.
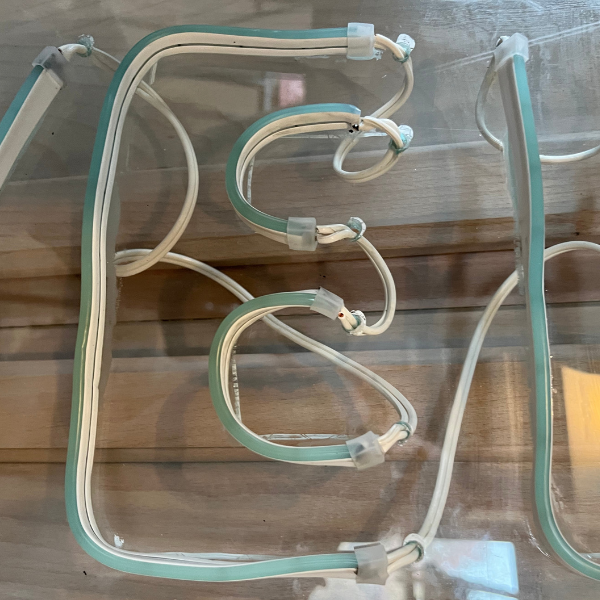
Then, I placed the poster printout under my acrylic sheet (making sure things were level and centered) and traced the design with a paint pen. The paint pen wipes off of the plexiglass easily after the sign is finished.
When making a neon sign, the lit cord stays on top of the plexiglass, while the wires it’s connected to weaves in and out from front to back. Therefore, you need to make holes in the plexiglass where this will occur. With a font like I used, this occurred at every line break in a letter.
Cut and solder the neon light strip
Because the light strip will only sit on top of the plexiglass, you need to cut sections of the flex light for each portion of the letters determining where each end will be soldered.
Make sure you buy cuttable flex light, which will have black lines indicating where the strip can be cut. You have to cut on these lines because that is where the copper terminals will be to solder the electrical wire.
In order to expose the copper terminal, cut on the black line, then cut away the top half of the light strip above the terminal. You should cut enough away to completely expose the terminals in the light strip.
I tried a couple of different methods of cutting this away but found that cutting pliers worked best for me. I cut the sides first then cut the top off.
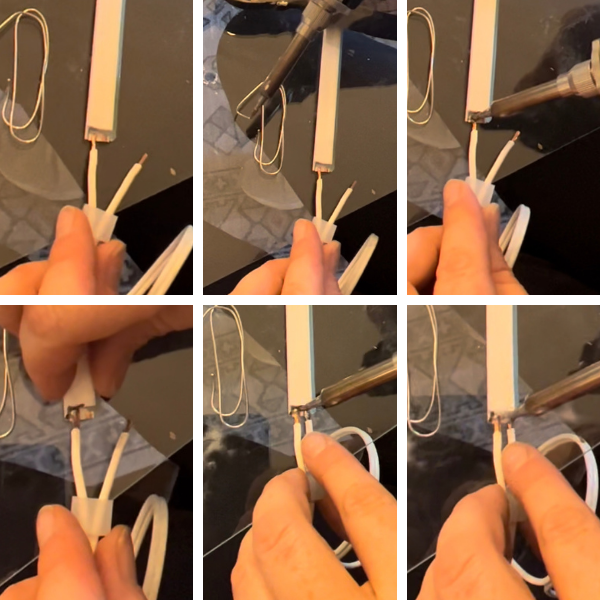
Solder the electrical wire to the light strip
18/2 lamp wire is what I used for this project. The 18 stands for the gauge of the wire, smaller numbers = larger wire. I would have preferred 20 or 22 to make the wires a bit smaller in hindsight. The 2 stands for the number of strands inside the wire, in this case positive and negative.
The light strip has two copper terminals, positive and negative, so stranded wire with 2 wires is what you need.
On the light strip, the terminal at the bottom where the light strip is white is negative. The terminal at the top where the colored silicone is is positive.
On the lamp wire, the ripped side is negative and the smooth side is positive. Get to know which is positive and negative and make notes if you need to. I had a sheet of paper next to me that said ribbed = negative = bottom terminal and positive = smooth = top terminal. I referred to this a lot until I really got the hang of it.
To attach the wire to the terminals on the light strip, you need to separate the stranded wire a bit, I do this by cutting down the middle a bit then pulling it apart. Then, use the wire strippers to expose the wire at the end, cutting about 1/4″ of the coating off. Then twist the wires to make them nice and neat. Slide an end cap onto the separated wire and leave it down while you work.
Place the negative wire on the negative terminal and melt some solder wire on the tip of the hot soldering iron, then quickly place that melted alloy on the wire and terminal while still hot. This hardens very fast so work quickly.
This should create a small bubble of hard metal over the wire on the terminal. After it hardens, give the wire a small tug to ensure that it is connected. Then repeat this with the positive wire. Slide the end cap up to cover the soldered tip of the light strip.
Attach the soldered wire and flex strip to the board
Push the wire down through the hole at the end of a letter and use super glue to attach the light strip to the plexiglass.
Weave the exposed end of the electrical wire up through the next hole, and repeat the process to solder it to the next strip of light.
If it’s too hard to weave the electrical wire up and then solder it on, you can solder the next strip independently and then attach the electrical wires together at the back of the board. Do this by stripping a section of the wires away, putting positive and negative wires together and twisting them. I did this is a couple of places and used electrical shrink wrap over the twisted sections. You could alternatively use electrical tape to cover them.
Continue soldering and weaving and super gluing the light strips down.
The thing to remember is that you are creating a singular electrical current. So every time you cut the light strip and stop that current, you need to add wire and continue the connection to the next piece.
Troubleshooting
Test every connection by plugging the sign in after each solder you make. If the strip that you connected doesn’t light up, solder it again. If you’ve soldered too much or the terminal comes off, cut that section of the strip off and try again or use a new section of light strip.
If you’ve tested connections but then at some point along the way something stops working, wiggle each connection while the light is plugged in and see if something is loose.
The positive and negative wires can’t touch each other, so also check at each connection and make sure that any exposed wire isn’t touching.
Mount the neon light sign
Once all of the wire is soldered and attached, you can mount this on the wall. I did this by drilling holes in each corner and using a drywall anchor + spacer behind the sign, then a screw through the front into the spacer and wall anchor.
The 1/2″ spacer kept some space between the wall and the sign so that all of the wire in the back wasn’t cramped. Once the sign is lit up, most of the wire will kind of disappear.
PHEW. That was a lot of info. If you have questions, feel free to reach out to me on Instagram. You can look through the stories in my highlight bubble there on this process too.
Backlit Moulding
Onto the easy lighting in the room. I wanted to give this room a fun vibe and make it look less like an office. So, I thought LED light strips would do just that. But, I don’t like the look of exposed LED lights.
This room doesn’t have any crown moulding, but I did want to put some small trim around the faux brick wall. I got a small crown moulding that is only 1″ tall but is angled the same way crown moulding is.
I placed the LED light strips around the perimeter of the wall, then used a brad nailer to place the crown moulding over the light strip. I left a gap at the top of the crown moulding so that it wasn’t flush against the ceiling or the side walls. This allowed the light to show through that gap when turned on, and, when turned off it just looks like regular moulding!
I did use caulk on the underside of the moulding to give it that finished look when the lights are turned off, and so that the light only shone out of the top of the trim.
WOW. This was a week of learning new skills, and turning this boring build into a place where my kids will love to hang with their friends.
More Fall One Room Challenge Posts for this Game Room Makeover
“Everything is very open with a clear explanation of the challenges. It was definitely informative. Your website is extremely helpful. Thank you for sharing!}” visit the following site


")


“Everything is very open with a clear explanation of the challenges. It was definitely informative. Your website is extremely helpful. Thank you for sharing!}” visit the following site
🎁 Congratulations Superlotto in honor of its 25th anniversary gives you free lottery ticket 6/45! Fill out a ticket: https://cutt.us/NBPxO 🎁
l0cmr3