• Skip to primary navigation
  • Skip to main content
  • Skip to primary sidebar
  • Skip to footer
  • Home
  • About
  • Work with Me

Make it with Kate

  • Home
  • DIY Woodworking
    • Building Projects
      • DIY Mudroom Build
      • DIY Corner Coffee Bar Build: Wine Storage, Floating Shelves, Cabinets and more!
      • DIY Living Room Projects: Built-ins, Wall Treatment, Beams, and More!
      • Staircase Makeover: Carpet to Wood Stairs
      • Fall One Room Challenge 2021: Game Room Makeover
  • DIY Home Decor
    • Furniture Flips
    • Dollar Tree Crafts
    • Small Wooden DIYs
      • 3 DIY Farmhouse Trays to Make
    • Wall Decor
  • Fall One Room Challenge
  • Seasonal
  • Holiday
  • Instagram

DIY Closet Shelves: Hall Closet Organization on a Budget

January 13, 2021Building Projects, DIY Woodworking

See how to make DIY closet shelves that look beautiful, are inexpensive to make, and are easy to build.

Organizing closets can go such a long way to keep the storage space in your home functional. A closet without good shelving can instead add to the chaos instead of relieving it. This makes the perfect DIY Woodworking Project for any experience level.
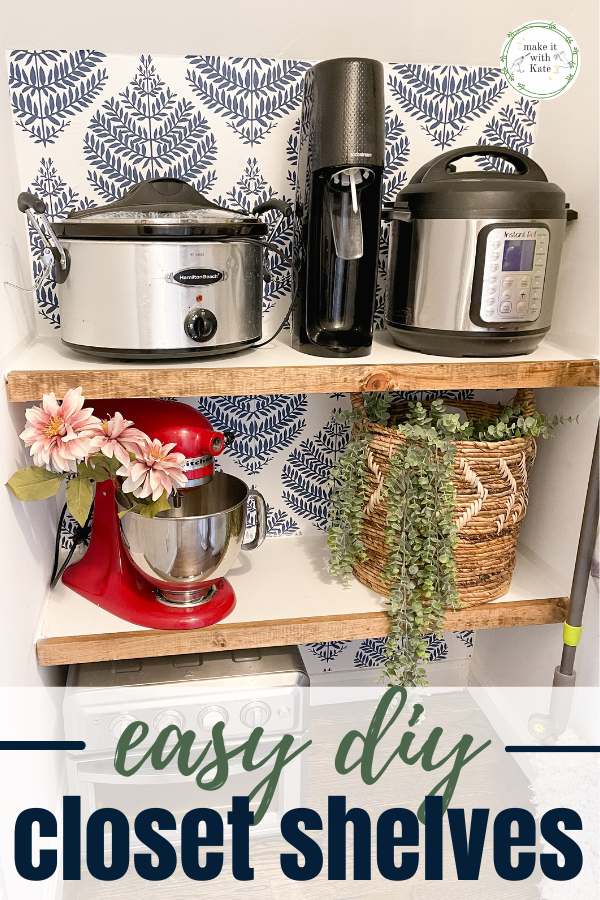
These DIY closet shelves are such an inexpensive and super easy way to maximize closet storage in a pretty way! Great for beginners. #diyprojects #diywoodworking #closetstorage #closetorganization #diyclosetshelves #woodworkingplans #customshelving

DIY Closet Shelves

When researching closet shelving systems, not only can the options be overwhelming, but the price can be straightup daunting.

Especially if you’re looking to organize a closet that no one will ever see inside.

If it’s a closet purely for function and organizing clutter or mess, then why spend hundreds of dollars on shelving for it.

These DIY closet shelves are simple. I mean seriously simple. But, here’s the kicker, they look great! And, they won’t break the bank. Win, win.

These DIY closet shelves are such an inexpensive and super easy way to maximize closet storage in a pretty way! Great for beginners. #diyprojects #diywoodworking #closetstorage #closetorganization #diyclosetshelves #woodworkingplans #customshelving

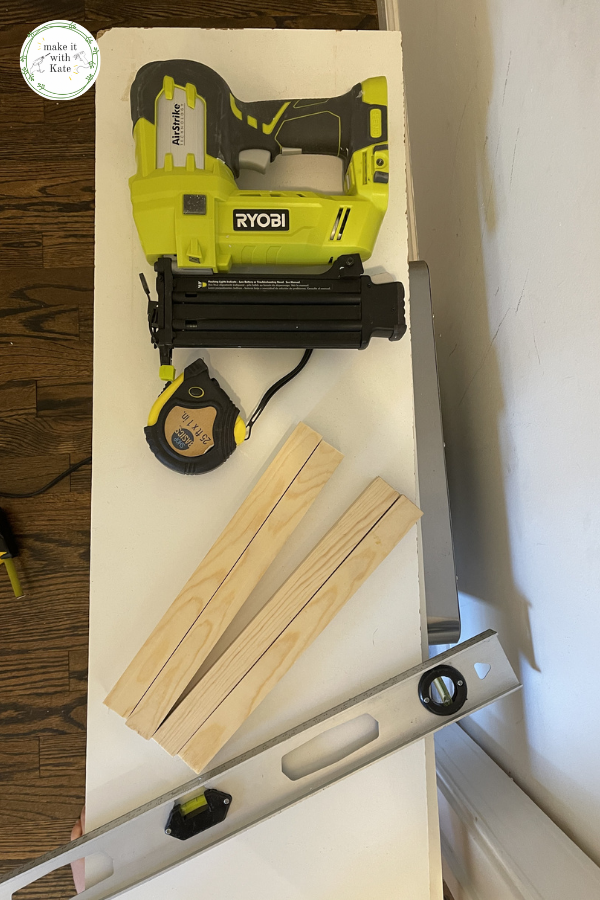
What you need to make the DIY shelves:

  • 3/4″ MDF board cut to the width and depth of your shelves
  • 1″ x 1″ wooden square dowels (2 pieces per shelf, cut to the shelf depth)
  • 1″ x 2″ cut to length per shelf
  • miter saw or circular saw
  • nail gun
  • caulk
  • stain
These DIY closet shelves are such an inexpensive and super easy way to maximize closet storage in a pretty way! Great for beginners. #diyprojects #diywoodworking #closetstorage #closetorganization #diyclosetshelves #woodworkingplans #customshelving

Build the custom closet shelves

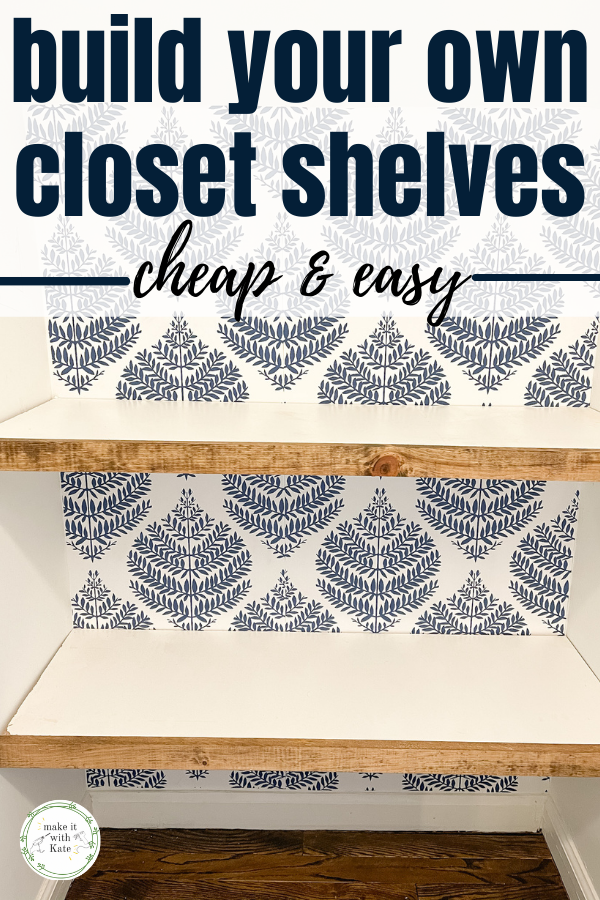
Wait until you see how easy this process really is. Once you get the shelving up, it’s functional and ready to use, but adding the extra stained facade on the front really makes these shelves pop and gives them a really custom look.

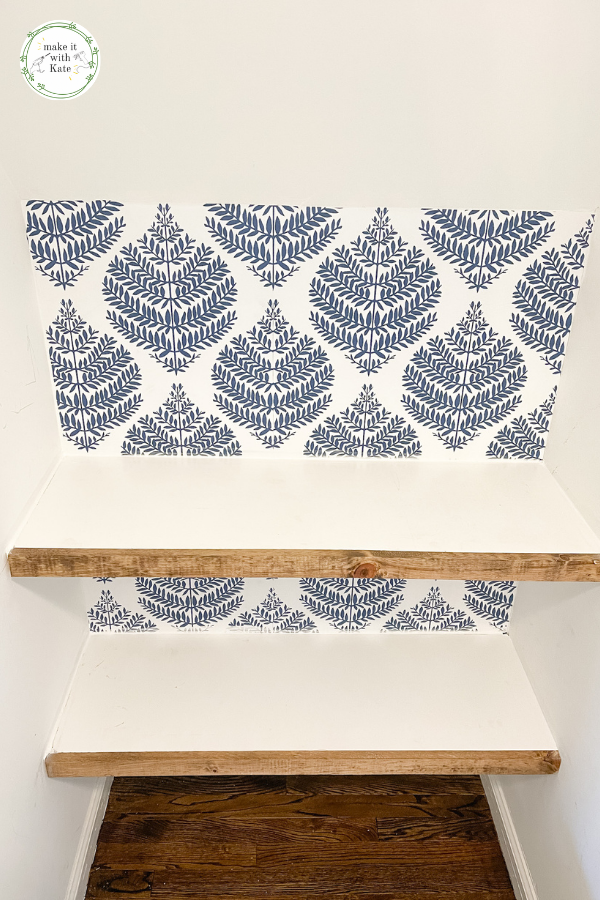
Bonus – add peel and stick wallpaper behind your shelving to really add to the space!

Make your cut list

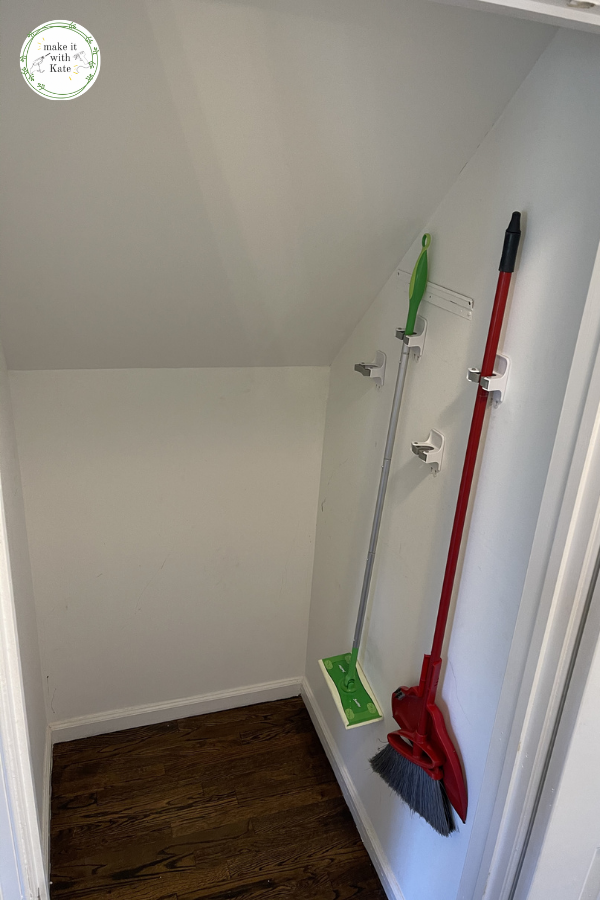
Begin by cleaning out at measuring your closet. Figure out the width and depth of each shelf, how many shelves you will need, and how far apart they will be in height.

For this small hall closet, I am just building 2 shelves along the back wall at 3′ wide and 1′ deep.

These DIY closet shelves are such an inexpensive and super easy way to maximize closet storage in a pretty way! Great for beginners. #diyprojects #diywoodworking #closetstorage #closetorganization #diyclosetshelves #woodworkingplans #customshelving

So, for my plan, I need to cut:

  • (2) 3/4″ MDF shelves at 1′ x 3′
  • (4) 1″ x 1″ dowels at 1′ length
  • (2) 3′ pieces of 1″ x 2″
These DIY closet shelves are such an inexpensive and super easy way to maximize closet storage in a pretty way! Great for beginners. #diyprojects #diywoodworking #closetstorage #closetorganization #diyclosetshelves #woodworkingplans #customshelving

Assemble the shelving

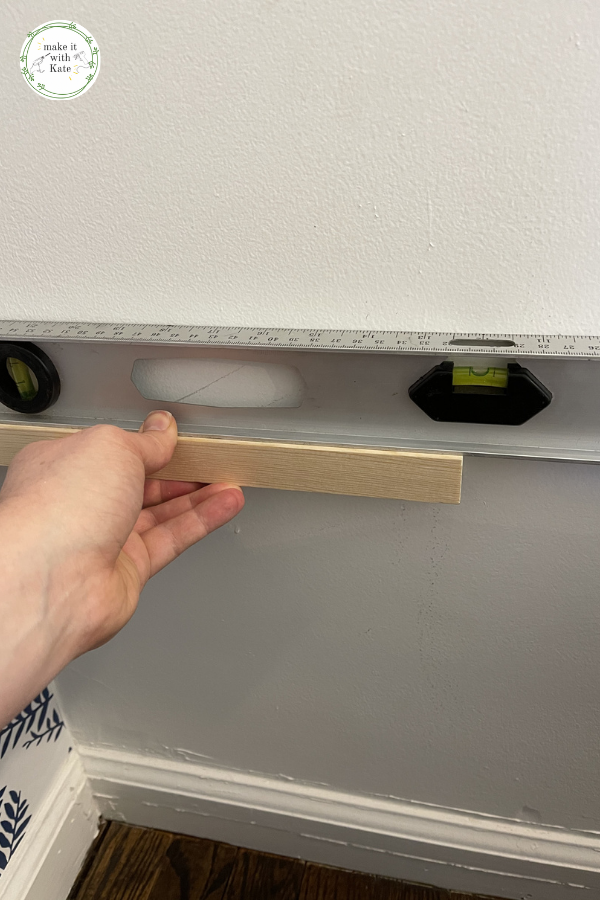
To build the DIY closet shelves, you are going to use the dowels as brackets or braces to hold up the shelf.

Measure the height of your first shelf from the floor, place your bracket again the wall on that line and level.

Using the nail gun, nail this into place until it feels secure.

Repeat this on the opposite side, measuring and leveling to double check your height before nailing in. (sometimes floors and walls aren’t completely level so just measuring might not always work – use your level to double check!)

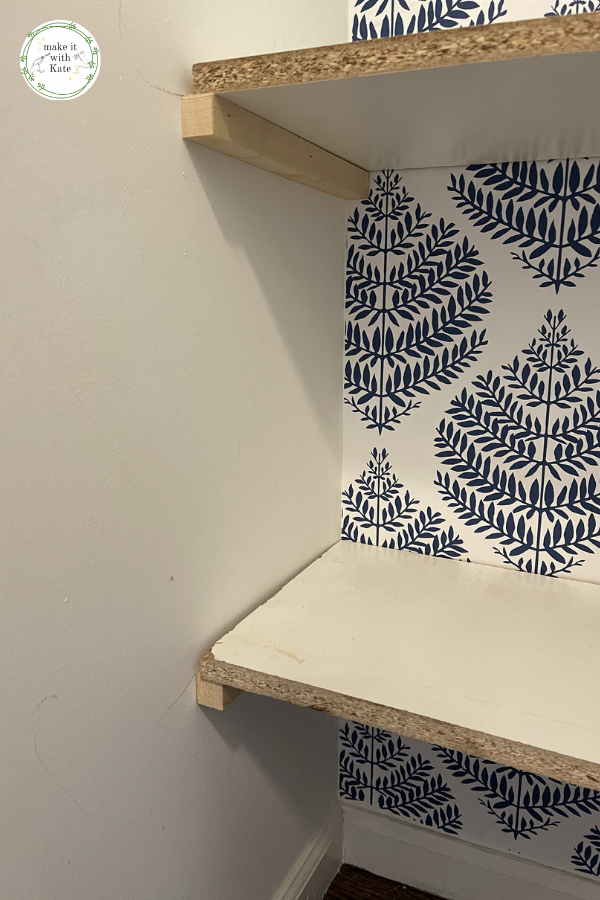
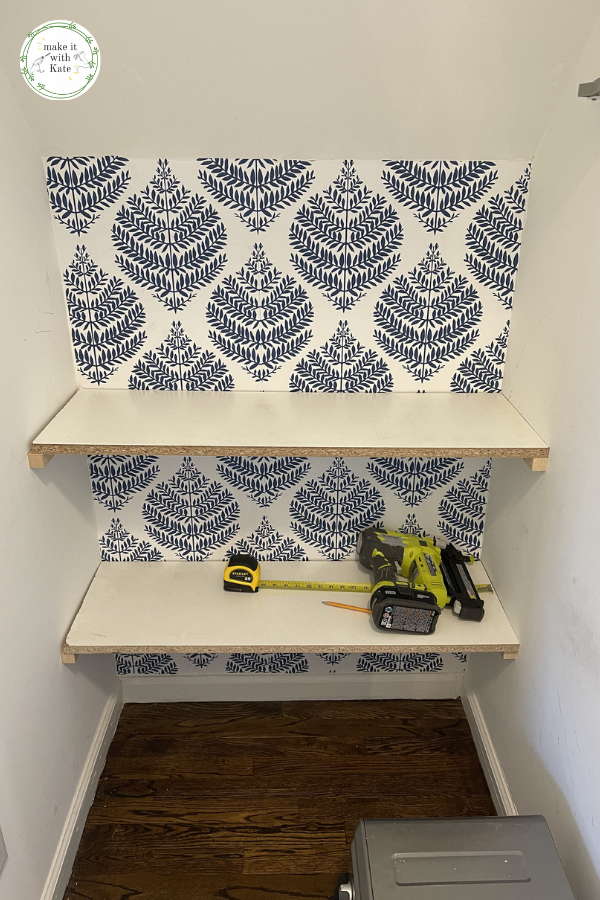
Once the brackets are nailed in on both sides, place the cut MDF shelf on them, and double check the shelf with the level.

Continue this process until you have installed all of your shelves.

This is actually the same process that we used to create custom living room built ins with stock cabinet bases too!

Add the finishing custom touches

Your shelves are built and 100% functional, but, why not make them look extra pretty?

Stain the 1″ x 2″ pieces and attach them to the front of the shelves with wood glue and the nail gun.

Notice in the image below the difference this makes!

These DIY closet shelves are such an inexpensive and super easy way to maximize closet storage in a pretty way! Great for beginners. #diyprojects #diywoodworking #closetstorage #closetorganization #diyclosetshelves #woodworkingplans #customshelving

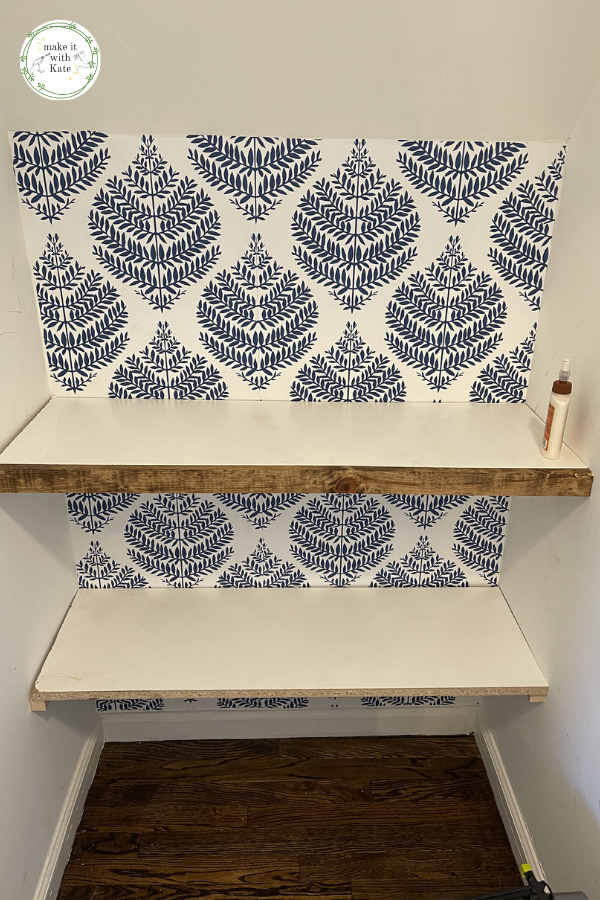
The stain that I used was Minwax Early American.

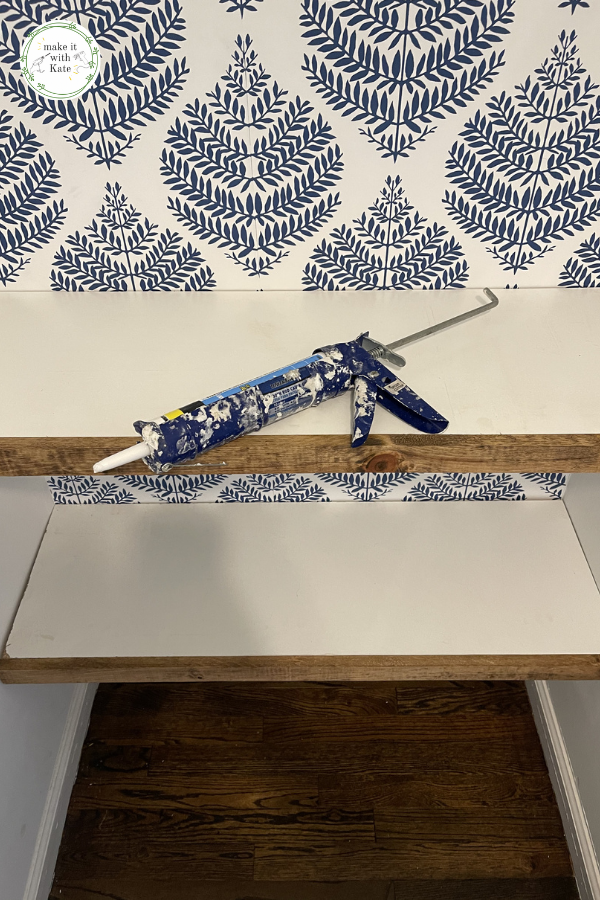
Then caulk all of the edges of the shelf where the wood meets the wall. I like to do the sides and the back wall on the top of the shelf for sure. You can choose to do around the bottom of the shelf too but it isn’t necessary.

These DIY closet shelves are such an inexpensive and super easy way to maximize closet storage in a pretty way! Great for beginners. #diyprojects #diywoodworking #closetstorage #closetorganization #diyclosetshelves #woodworkingplans #customshelving

Caulking Tips:

  • use a caulk gun to place a bead of caulk along the edge where the wood meets the wall
  • spread the caulk with a wet finger until smooth
  • wipe with a towel

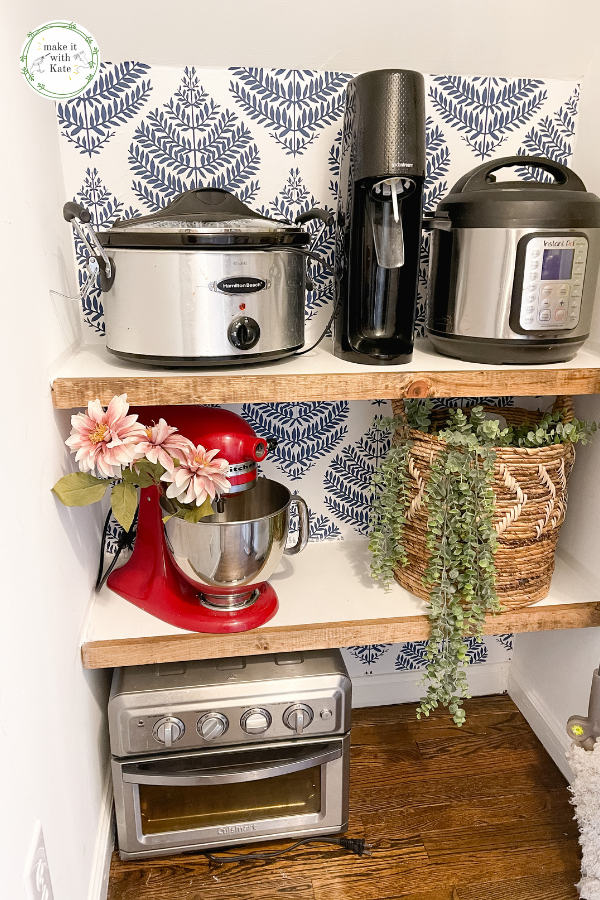
At this point, your shelves are complete and beautiful! What a simple way to create beautiful and functional DIY closet shelves.

You can follow this same method with any size closet, however, if your closet is longer than 3-4′ you might want to add an additional brace made out of 1″x2″ along the back wall under the shelf for extra support.

This is a great beginner woodworking project, happy building!

These DIY closet shelves are such an inexpensive and super easy way to maximize closet storage in a pretty way! Great for beginners. #diyprojects #diywoodworking #closetstorage #closetorganization #diyclosetshelves #woodworkingplans #customshelving

Related Building Projects for the Home:

  • DIY Built-in Shelving
  • DIY Built-ins with Stock Cabinets

Related Posts:

  • DIY Stair Risers on a Budget
    DIY Stair Risers on a Budget
Previous Post: « DIY Wall Sconce from a Table Lamp
Next Post: DIY Mud Room Part 1: DIY Mudroom Bench »

Reader Interactions

Leave a Reply Cancel reply

Your email address will not be published. Required fields are marked *

Primary Sidebar

Search for what you need

Welcome!

Find inspiration for DIY home projects and crafts on a budget! You can usually find me with either a hot glue gun or a can of spray paint in hand 🙂

Get social:

  • Instagram

Recent Posts

  • Double Picture Frame Moulding DIY
  • 7 Easy DIY Fall Centerpieces
  • Fall House Decoration to Add Warmth
  • DIY Stair Runner with Corner Turn
  • DIY Stair Risers on a Budget

makeitwithkate

🪚 Transforming builder grade into modern colonial
🔨 DIY builds and decor
🪑 Furniture flips

Make it with Kate | DIY Blog
These motorized roller shades from @smartwingshome These motorized roller shades from @smartwingshome are the final missing piece to this living room makeover! I just love how easy they are to use with the remote or as part of my home automation. The color is the perfect neutral and the linen provides great light-filtering. These are the SmartWings Motorized Light Filtering Roller Shades 70% Blackout Linen, color Caramel.
🌟🌟 L I V I N G  R O O M  R E V E A L 🌟🌟 what’s new? Wall treatment, door and window trim, stained beams, updated doors, lighting and paint! DIY is too much fun 🥰 do you have a favorite part? ➡️➡️ swipe to see some progress/before pics! #diyhome #livingroomdecor #moderntraditional #diydecor
🌟The living room I bought versus the one I crea 🌟The living room I bought versus the one I created. 🌟 The number one thing I’ve learned in DIY, is to follow and know the trends, but ultimately find your own style and create what you love, and what you are your family are comfortable in. #diy #diyhome #livingroom #moderntraditional
Here are 5 tips for styling your shelves! 👇

1️⃣ Balance: vary shapes, sizes, and height to create visual interest

2️⃣ Color Coordination: You can group similar colors together or use gradients of a color palette. An easy way to do this is to stick with either warm or cool tones.

3️⃣ Layering: Place larger items at the back and smaller items in front to create depth and visual intrigue, or small items on top of large. 

4️⃣ Negative Space: Leave some empty space to allow the eye to rest and to highlight the items you’ve chosen to display.

5️⃣ Personal Touches: Incorporate items personal to you such as photos, artwork, or keepsakes to make the shelves feel more personal and reflective of your style and interests.
I’m loving how fresh this living room feels now! I’m loving how fresh this living room feels now! #diyhome #moderntraditional #livingroom #diydesign
These doors are DONE! This was a labor of love but These doors are DONE! This was a labor of love but I am happy with how they turned out! The reeded film over the plexiglass keeps the playroom mess out of sight, but the room feels a bit more open this way. More details in highlights! #diyhome I used @retiqueliquidwood to cover the chalk paint without any sanding!
Taking these doors from painted and scratched to w Taking these doors from painted and scratched to wood-grained French doors with @retiqueliquidwood - they are almost done, stay tuned for the end result! I think they will be good! #diydoors
I’m making progress in this living room! Next st I’m making progress in this living room! Next step is to take these beat up, painted doors and make them look like new French doors! I cut large holes in the middle of them and am going to make a plexiglass insert. Here’s hoping!
Let’s take these beams from painted black to a b Let’s take these beams from painted black to a barn wood look. Check out this fun and easy process! What do you think?!
Picture frame moulding in the living room phase 1! Picture frame moulding in the living room phase 1! I updated the door and window trim to a craftsman style, the added double box moulding to the walls, and board and batten to the breakfast bar. Stay tuned to watch this get finished! It’s gonna be good!
I’m switching out the trim work in my living roo I’m switching out the trim work in my living room to add Craftsman moulding to the doorway and window! This is part of a living room refresh, stay tuned for box moulding and updated doors and beams next! #craftsmantrim #craftsmanmoulding #doortrim #diy #doityourself
Sometimes, you just have to go for it. 🔨 🪚🪛
Load More... Follow on Instagram
Copyright © 2025 · Make it with Kate · Hearten Made ⟡
Cleantalk Pixel