• Skip to primary navigation
  • Skip to main content
  • Skip to primary sidebar
  • Skip to footer
  • Home
  • About
  • Work with Me

Make it with Kate

  • Home
  • DIY Woodworking
    • Building Projects
      • DIY Mudroom Build
      • DIY Corner Coffee Bar Build: Wine Storage, Floating Shelves, Cabinets and more!
      • DIY Living Room Projects: Built-ins, Wall Treatment, Beams, and More!
      • Staircase Makeover: Carpet to Wood Stairs
      • Fall One Room Challenge 2021: Game Room Makeover
  • DIY Home Decor
    • Furniture Flips
    • Dollar Tree Crafts
    • Small Wooden DIYs
      • 3 DIY Farmhouse Trays to Make
    • Wall Decor
  • Fall One Room Challenge
  • Seasonal
  • Holiday
  • Instagram

DIY Faux Brick Wall from Wall Paneling: Fall One Room Challenge Week 2

October 7, 2021Building Projects, DIY Woodworking, One Room Challenge, Wall Decor

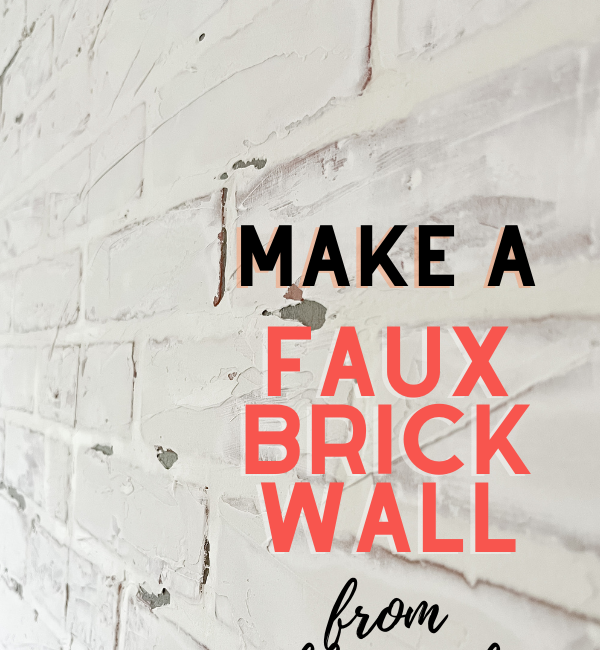
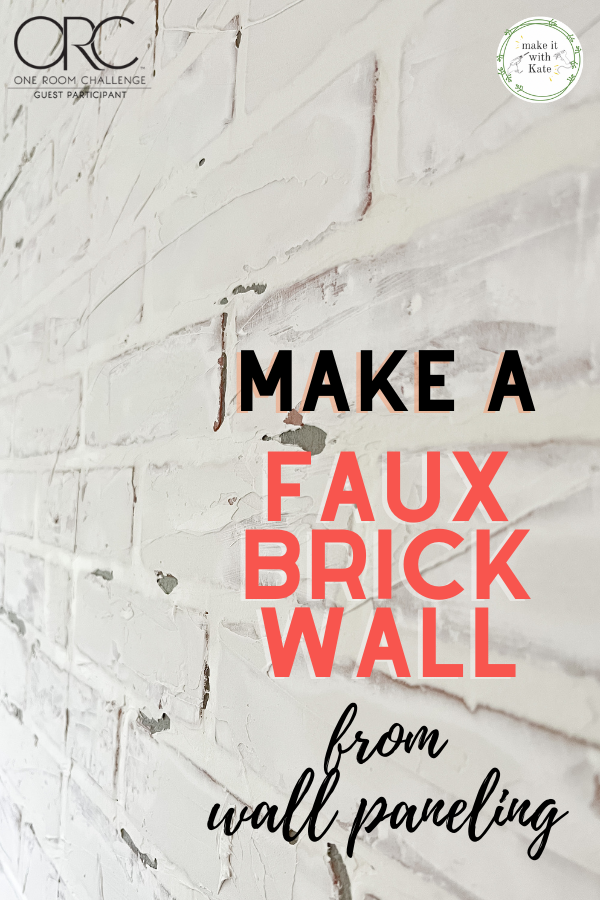
This faux brick wall is made with joint compound and wall paneling, and when you’re done with it, it looks like real german schmear.

If you missed my plan for the One Room Challenge Game Room Makeover, head there to see what this wall is becoming a part of! I’m thrilled with how this faux brick wall turned out, plus, it’s a cost effective stone wall.

This faux brick wall is made with joint compound and wall paneling, and when you're done with it, it looks like real german schmear.

Faux Brick Wall Made from Paneling

When we think of wall paneling, the old dark wood panel walls from the 80’s come to mind. But, wall paneling done right can become beautiful feature walls! Don’t believe me? Check it out.

If you read the post linked above, you know that I’m participating in the Fall One Room Challenge hosted by Better Homes and Gardens. I’m working on building a wall to wall console for video game storage and use, this faux brick wall, and some DIY shelving to make an awesome game room for my kids.

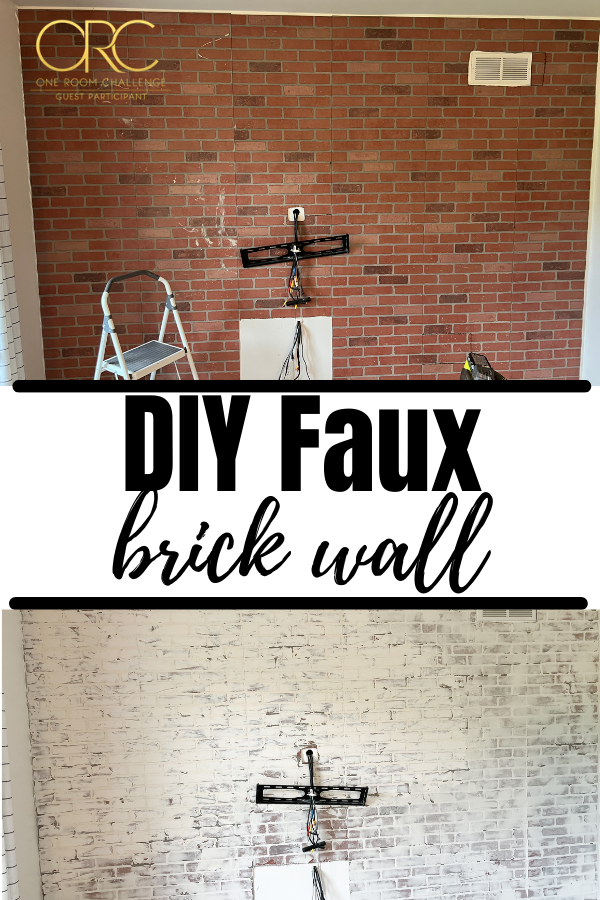
I can’t wait to see it all come together, and this feature wall was the first step! Let me break it down for you so that you can see how a blank white wall can become a white ‘brick’ wall.

This faux brick wall is made with joint compound and wall paneling, and when you're done with it, it looks like real german schmear.

What you need to make the faux brick wall:

  • brick wall panels (they come in 4’x8′ sheets, so get what you need to fit your space)
  • liquid nails or other construction adhesive
  • brad nailer (optional – you could use a hammer and nails but a pneumatic nails sinks the nails in and they become invisible)
  • circular saw or jigsaw to cut the paneling to size or cut out outlet holes etc.
  • joint compound
  • plastic taping knife
  • 120 grit sanding block
  • white paint
  • water
  • foam paint roller

How to make the faux brick wall

A brick wall panel is a chipboard panel with an acrylic coating that looks like real brick. To me, it has the shape of brick but is missing the texture and imperfection of real brick.

So, in this tutorial you will see how to layer joint compound over the brick paneling to get the texture of real brick, and the result is beautiful!

process photo of brick wall paneling installation

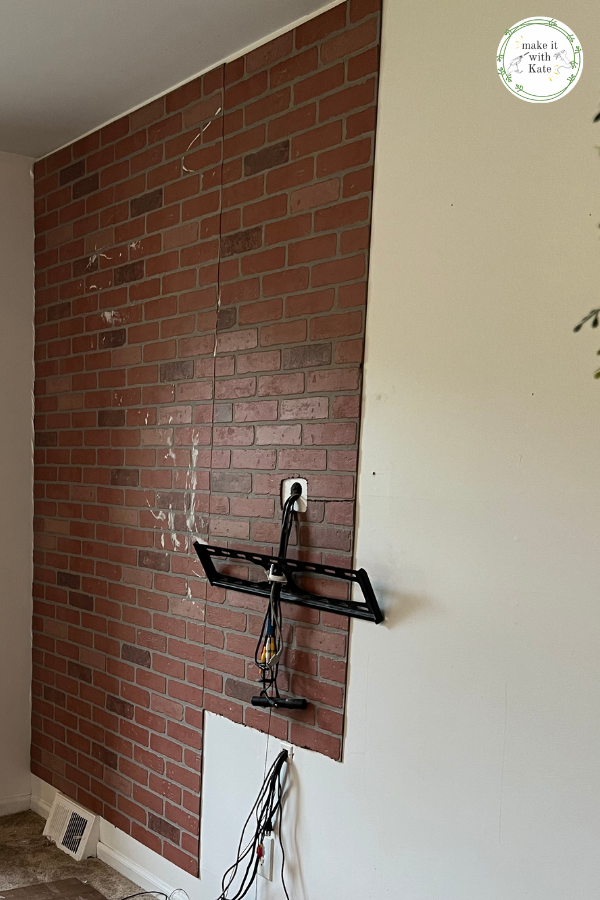
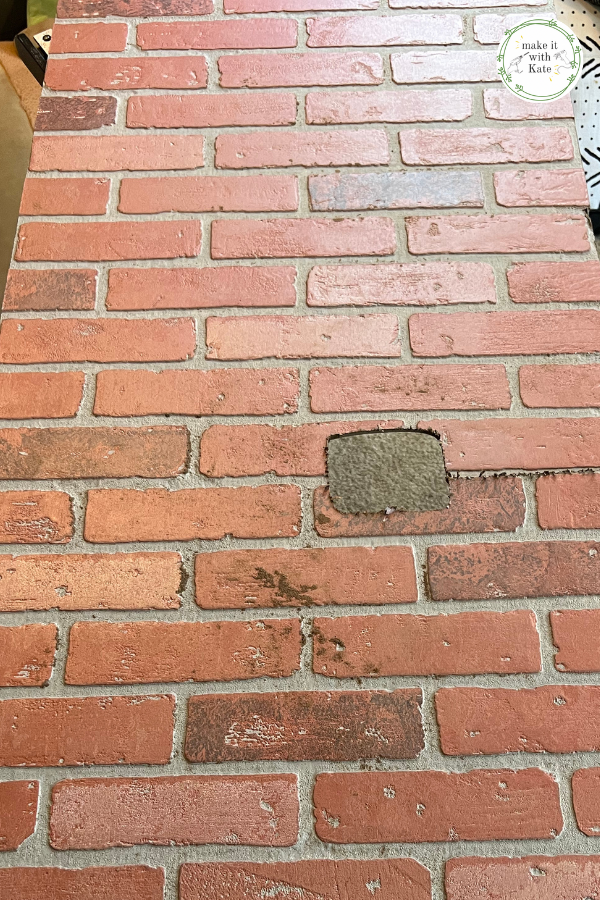
Step 1. Cut the brick panels to size with a circular saw or table saw.

Step 2. Measure and cut out any outlets, wall vents or other holes that you need to access on the wall behind the paneling. Do this by marking the cutout, beginning a jigsaw hole with a drill, and using a jigsaw to cut out the shape needed.

brick wall paneling

Step 3. Attach the brick wall panels to the wall with liquid nails and then secured with nails (a brad nailer makes this super easy).

joint compound and scraper
joint compound on brick wall paneling

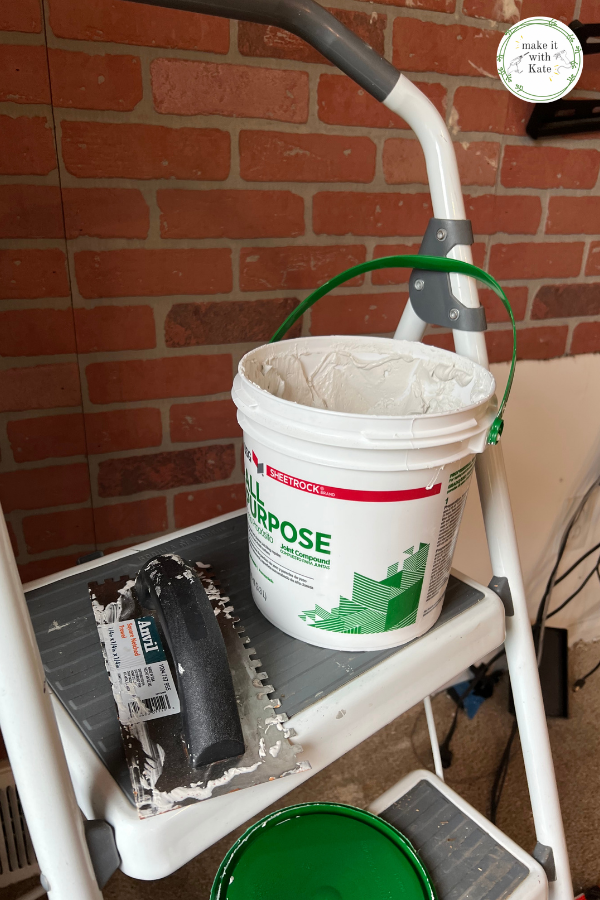
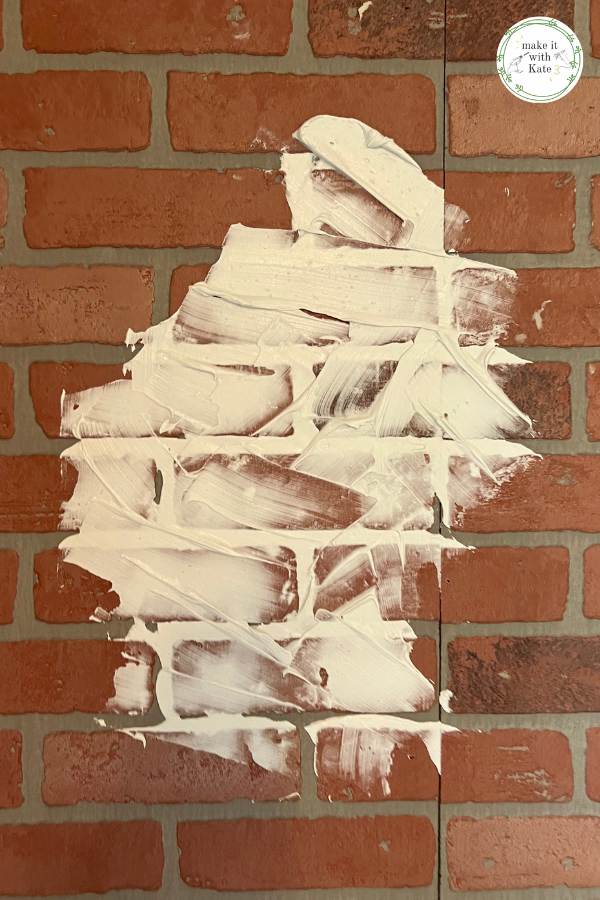
Step 4. Use joint compound and a plastic taping knife to spread joint compound over the brick wall panel.

This is where you get the faux brick look, there isn’t a ‘right’ or ‘perfect’ way to do this, basically just keep spreading until you get the look and texture that you like.

white brick wall

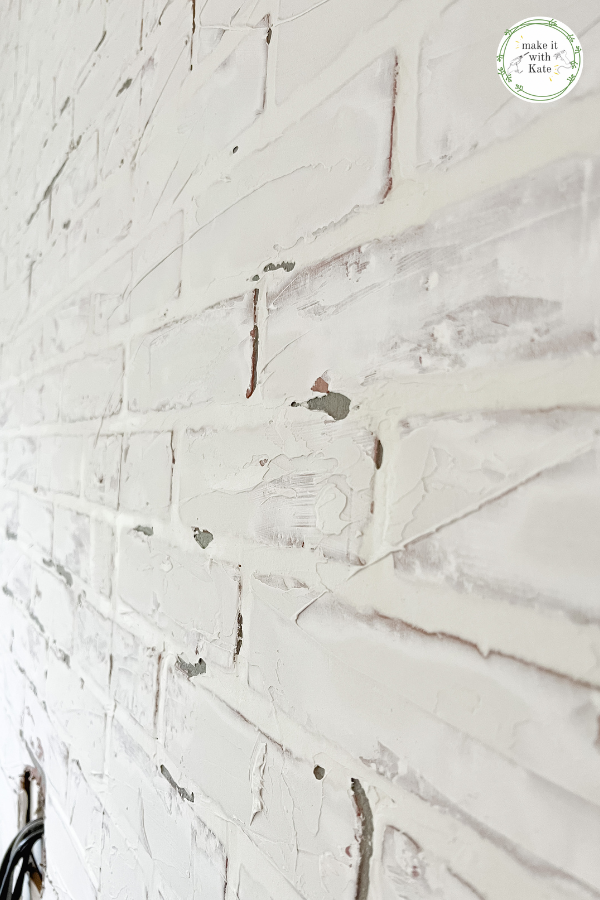
Step 5. Let dry for 24 hours, then sand with a 120 sanding block to take off any rough spots or large bumps.

sanding block over brick wall

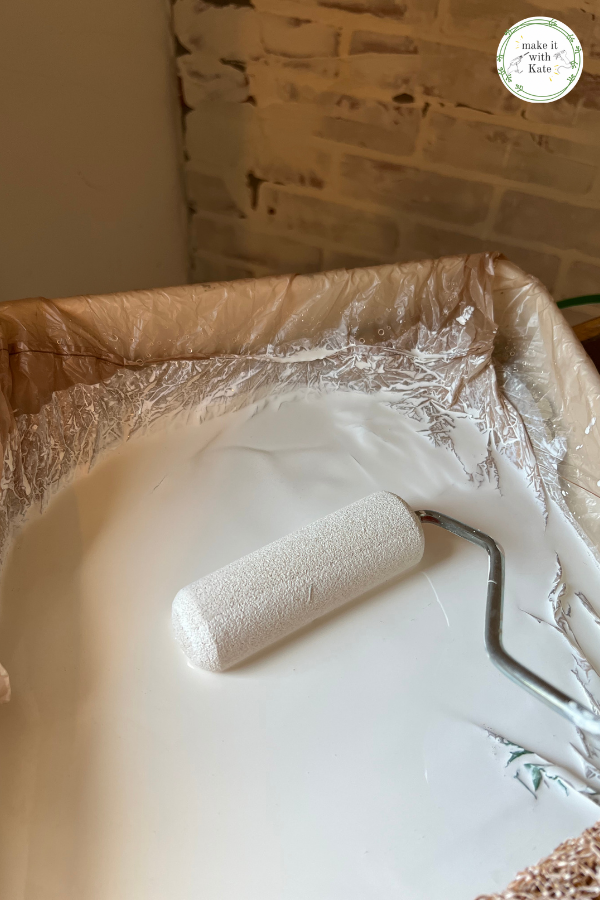
Step 6. Whitewash the brick by making a wash of 1 part white paint and 1 part water and apply with a foam roller.

white wash paint roller over brick wall

That’s it!

Tape a step back and enjoy your faux brick wall! It has the beautiful texture and color of real brick with german schmear, for much cheaper.

How much did this joint compound brick wall cost?

Alright so here is the budget breakdown for this ‘brick wall’.

Before I get to the budget, I’ll give you the dimensions so you can get an idea of how much space this budget covered.

My wall was 138″ wide and 104″ tall. This is roughly 12′ x 8′. Because I’m doing built ins on the bottom half of the wall I didn’t need to add more brick to go all the way to the floor, the 8′ was enough.

Budget breakdown:

  • (3) 4’x 8′ brick wall panels – $120
  • liquid nails – $7
  • joint compound – $16

I had the rest of the materials such as tools and paint on hand so didn’t need to purchase any of that.

Which brings the total for my faux brick wall to $143.

Just for reference, there are some amazing interior brick resources that you can use such as Brick Webb, which are thin pieces of real brick. They run around $11.50 per square foot (not including grout etc.), so for my wall that would have been $1,104 in brick alone (vs. $120).

Now, if I had the budget I would go with the Brick Webb, I’m not at all saying that it isn’t worth it, but for this project and a room that my kids use that I found old pizza crust from who knows when in, the faux brick wall is just fine 🙂

I hope this gives you the courage to try and make a faux brick wall in your home!

This faux brick wall is made with joint compound and wall paneling, and when you're done with it, it looks like real german schmear.

Check out the other posts in this One Room Challenge game room makeover

  • Week 1: Game Room Makeover Plans and Mood Board
  • Week 2: Make a Faux Brick Wall (current post)
  • Week 3: DIY Built in Gaming Console from Stock Cabinets
  • Week 4: DIY Faux Marble Countertop with Epoxy
  • Week 5: DIY Picture Frame Shelves
  • Week 6: DIY Neon LED Sign
  • Week 7: DIY Couch with Stool Seating
  • Week 8: DIY Indoor Climbing Wall
  • Final Game Room Reveal

Follow me on IG for the behind the scenes in stories!

Related Posts:

  • DIY Living Room Projects: Built-ins, Wall Treatment, Beams, and More!
    DIY Living Room Projects: Built-ins, Wall Treatment, Beams,…
  • 7 Easy DIY Fall Centerpieces
    7 Easy DIY Fall Centerpieces
  • Fall House Decoration to Add Warmth
    Fall House Decoration to Add Warmth
Previous Post: « Game Room Makeover: Fall One Room Challenge 2021 (Week 1)
Next Post: Built-in Gaming Console with Stock Cabinets – Fall ORC Week 3 »

Reader Interactions

Comments

  1. Best Dating App 2022

    February 4, 2022 at 1:28 am

    ❤️ Alison want to meet you! Click Here: http://inx.lv/Dob1?h=66bdcd6ceb05796a3e43eed1790d3527- ❤️

    Reply
  2. Best Dating App

    February 4, 2022 at 1:55 pm

    ❤️ You have unread messages from Dawn (2)! Click Here: http://inx.lv/DBbu ❤️

    Reply
  3. Best Dating Site 2022

    February 4, 2022 at 1:56 pm

    ❤️ Jill liked you! Click Here: https://clck.ru/asnA8 ❤️

    Reply
  4. Best Dating Site 2022

    February 4, 2022 at 1:56 pm

    ❤️ Julia liked you! Click Here: https://clck.ru/asnA8 ❤️

    Reply
  5. Best Dating App 2022

    February 4, 2022 at 1:56 pm

    ❤️ Tina is interested in your profile! Click Here: http://inx.lv/DBbu ❤️

    Reply
  6. Best Dating App

    February 4, 2022 at 1:56 pm

    ❤️ Rita is interested in your profile! Click Here: https://clck.ru/asnA8 ❤️

    Reply
  7. Best Dating App 2022

    February 4, 2022 at 1:56 pm

    ❤️ Sue want to meet you! Click Here: https://clck.ru/asnA8 ❤️

    Reply
  8. Best Dating App 2022

    February 4, 2022 at 1:56 pm

    ❤️ Allison want to meet you! Click Here: http://inx.lv/DBbu ❤️

    Reply

Leave a Reply Cancel reply

Your email address will not be published. Required fields are marked *

Primary Sidebar

Search for what you need

Welcome!

Find inspiration for DIY home projects and crafts on a budget! You can usually find me with either a hot glue gun or a can of spray paint in hand 🙂

Get social:

  • Instagram

Recent Posts

  • Double Picture Frame Moulding DIY
  • 7 Easy DIY Fall Centerpieces
  • Fall House Decoration to Add Warmth
  • DIY Stair Runner with Corner Turn
  • DIY Stair Risers on a Budget

makeitwithkate

🪚 Transforming builder grade into modern colonial
🔨 DIY builds and decor
🪑 Furniture flips

Make it with Kate | DIY Blog
These motorized roller shades from @smartwingshome These motorized roller shades from @smartwingshome are the final missing piece to this living room makeover! I just love how easy they are to use with the remote or as part of my home automation. The color is the perfect neutral and the linen provides great light-filtering. These are the SmartWings Motorized Light Filtering Roller Shades 70% Blackout Linen, color Caramel.
🌟🌟 L I V I N G  R O O M  R E V E A L 🌟🌟 what’s new? Wall treatment, door and window trim, stained beams, updated doors, lighting and paint! DIY is too much fun 🥰 do you have a favorite part? ➡️➡️ swipe to see some progress/before pics! #diyhome #livingroomdecor #moderntraditional #diydecor
🌟The living room I bought versus the one I crea 🌟The living room I bought versus the one I created. 🌟 The number one thing I’ve learned in DIY, is to follow and know the trends, but ultimately find your own style and create what you love, and what you are your family are comfortable in. #diy #diyhome #livingroom #moderntraditional
Here are 5 tips for styling your shelves! 👇

1️⃣ Balance: vary shapes, sizes, and height to create visual interest

2️⃣ Color Coordination: You can group similar colors together or use gradients of a color palette. An easy way to do this is to stick with either warm or cool tones.

3️⃣ Layering: Place larger items at the back and smaller items in front to create depth and visual intrigue, or small items on top of large. 

4️⃣ Negative Space: Leave some empty space to allow the eye to rest and to highlight the items you’ve chosen to display.

5️⃣ Personal Touches: Incorporate items personal to you such as photos, artwork, or keepsakes to make the shelves feel more personal and reflective of your style and interests.
I’m loving how fresh this living room feels now! I’m loving how fresh this living room feels now! #diyhome #moderntraditional #livingroom #diydesign
These doors are DONE! This was a labor of love but These doors are DONE! This was a labor of love but I am happy with how they turned out! The reeded film over the plexiglass keeps the playroom mess out of sight, but the room feels a bit more open this way. More details in highlights! #diyhome I used @retiqueliquidwood to cover the chalk paint without any sanding!
Taking these doors from painted and scratched to w Taking these doors from painted and scratched to wood-grained French doors with @retiqueliquidwood - they are almost done, stay tuned for the end result! I think they will be good! #diydoors
I’m making progress in this living room! Next st I’m making progress in this living room! Next step is to take these beat up, painted doors and make them look like new French doors! I cut large holes in the middle of them and am going to make a plexiglass insert. Here’s hoping!
Let’s take these beams from painted black to a b Let’s take these beams from painted black to a barn wood look. Check out this fun and easy process! What do you think?!
Picture frame moulding in the living room phase 1! Picture frame moulding in the living room phase 1! I updated the door and window trim to a craftsman style, the added double box moulding to the walls, and board and batten to the breakfast bar. Stay tuned to watch this get finished! It’s gonna be good!
I’m switching out the trim work in my living roo I’m switching out the trim work in my living room to add Craftsman moulding to the doorway and window! This is part of a living room refresh, stay tuned for box moulding and updated doors and beams next! #craftsmantrim #craftsmanmoulding #doortrim #diy #doityourself
Sometimes, you just have to go for it. 🔨 🪚🪛
Load More... Follow on Instagram
Copyright © 2025 · Make it with Kate · Hearten Made ⟡
Cleantalk Pixel