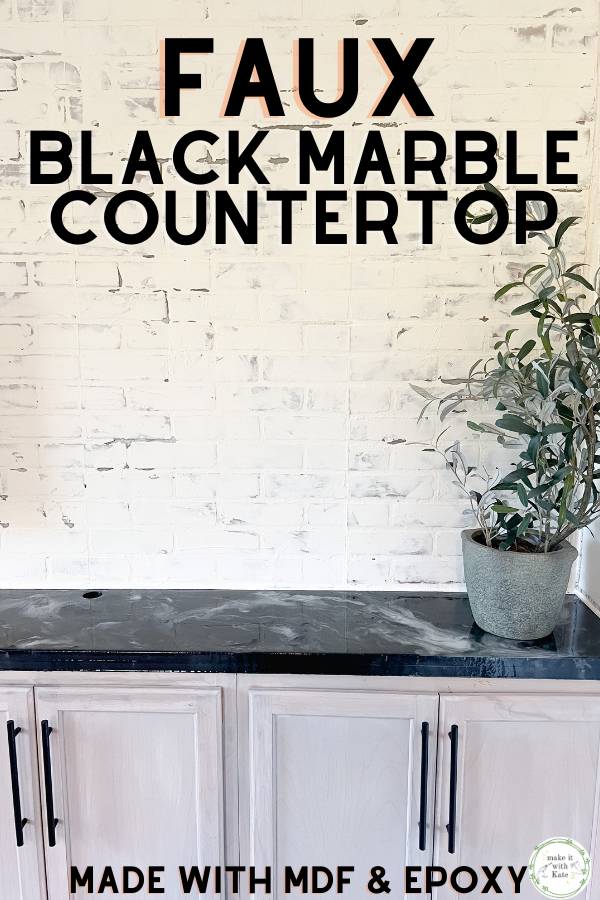
This faux marble countertop is made out of MDF and epoxy, and looks like the real deal. Check out the straightforward and easy process.
It’s Week 4 of the Fall One Room Challenge and we are halfway there! This game room makeover is moving right along, and this week I finished the faux marble countertop made with MDF and epoxy.
I can’t wait for you to see how simple this tutorial is, and how beautiful this countertop turned out. I promise it’s a DIY home decor project that is perfect for beginners.
Make a Faux Marble Countertop
This faux marble countertop looks real. I can’t get over it. It’s a simple process that I’ll walk you through, and I’ll also show you the mistakes I made and what I would do differently.
What you need for the faux marble countertop:
- black marble countertop epoxy kit from Stonecoat Countertops
- 1/8″ trowel
- paint brush (I used the angled Wooster brush)
- Propane torch or heat gun
- rubber gloves
- painters tape
- plastic sheeting
- plastic spreading knife
- disposable containers
- mixing paddle for drill (or stirring stick)

How to make the marble countertop
If you missed the post about building a gaming console out of stock cabinets, go read that to see how we got to the point of having a countertop to makeover.
For the quick version, I built a countertop out of MDF boards to fit the top of my built ins. The exact dimensions will depend on your space.
But, you don’t need to build a countertop to use this epoxy kit and method. It will work over existing countertops! If you are going to build your own, use a non-porous material like MDF instead of plywood.
I’ve seen a few different methods of making a faux marble countertop, many involving painting the countertop to look like marble and then covering with a clear coat of epoxy.
This method works well and has a beautiful look, however, I wanted the black and white marbling to look more incorporated rather than painted separately.

I found this black marble epoxy kit from Stonecoat Countertops and it was PERFECT. You can tint the epoxy black and then add the white epoxy veins to that while wet so that the two become incorporated and marbled giving this a very realistic look.
Stonecoat Countertops has many YouTube videos that I watched to learn how to best apply this, and if you buy the kit you can simply follow their directions. But the general steps are to:
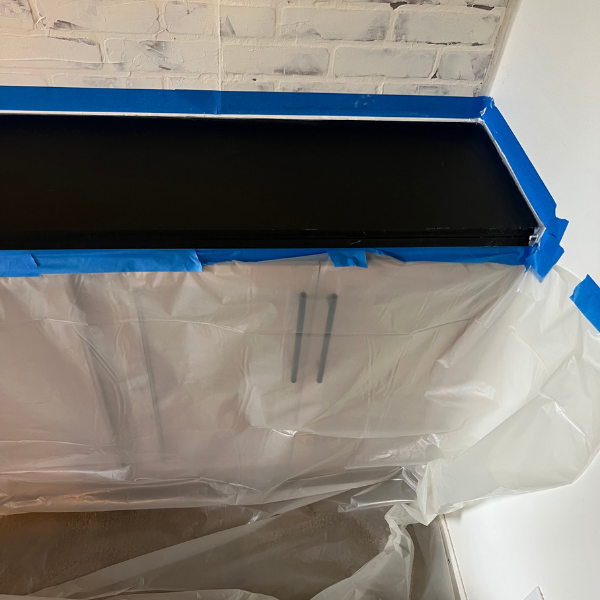
- Prep the space by covering and taping everything surrounding the countertop with plastic sheeting and tape. I made holes in the countertop for cords, so placed a disposable cup underneath these to catch falling epoxy.
- Paint a base of epoxy undercoat, I used a foam roller for this.
- Mix the epoxy according to the package directions tinting most of it black, and tinting some of it white.
- Pour an even line of epoxy down the center of the counter.
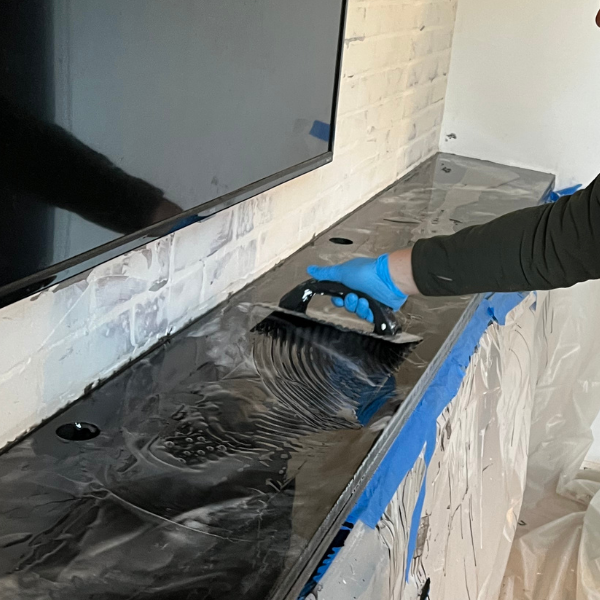
- Spread it with a 1/8″ notched trowel.
- Chop the epoxy with a brush.
- Use a propane torch or heat gun to even out the epoxy and remove air bubbles.
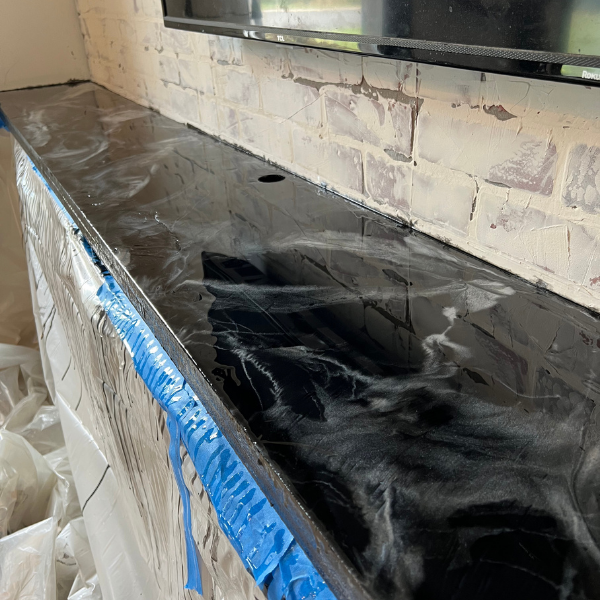
- Pour the white veining in lines through the black epoxy and spread with a plastic spreading knife and a heat gun.
- Let cure overnight.
- Pour a clear topcoat following the same steps.
Here is a sequence of photos for reference.
Mistakes I made with this faux marble countertop
Overall, I love the way this turned out. But, as is the case with most DIY projects, I learned a bit about what I will do differently next time.
Ideally, I would have poured and created this outside then transferred it into the game room. But, because of the length I was nervous to move this throughout my home.
There was a section of the epoxy that didn’t seem to be settling right and was pooling at the edge, I tried to remedy this after it had already slightly cured and I ended up making it lumpy and bubbly.

This was a low point in the project for me, but I got some wet sandpaper and sanded the area (which dulled the sheen) and then repoured another top coat. This mostly fixed the area! It’s still there if you look closely but it doesn’t take away from the whole project.
The edge of my countertop doesn’t look great. When I attached the two MDF boards together I didn’t wood fill or caulk the seam on the edge. If I had, this would have made for a much smoother edge.
Cost Breakdown for the Faux Black Marble Countertop
This is such a cost effective way to get the look of marble in your home at a fraction of the cost.
- Epoxy Kit = $90
- MDF = $45
- Prep materials and tools = $50
The black marble countertop of my dreams
In planning this game room makeover, I couldn’t help but keep coming back to black marble for this countertop. Buying actual black marble was out of the budget but this epoxy version was just right.
I am so happy with how it turned out, and how the whole room is taking shape! I’m halfway through this project and can’t wait to see how it turns out.

Below are the posts leading up to this point, and be sure to check back to see how it all comes together!
Fall One Room Challenge Game Room Makeover
Don’t forget to check out the rest of the posts in this series!
- Week 1: Game Room Makeover Plans and Mood Board
- Week 2: Make a Faux Brick Wall
- Week 3: DIY Built in Gaming Console from Stock Cabinets
- Week 4: DIY Faux Marble Countertop with Epoxy (current post)
- Week 5: DIY Picture Frame Shelves
- Week 6: DIY Neon LED Light Sign
- Week 7: DIY Couch with Stool Seating
- Week 8: DIY Indoor Climbing Wall
- Final Game Room Reveal
