• Skip to primary navigation
  • Skip to main content
  • Skip to primary sidebar
  • Skip to footer
  • Home
  • About
  • Work with Me

Make it with Kate

  • Home
  • DIY Woodworking
    • Building Projects
      • DIY Mudroom Build
      • DIY Corner Coffee Bar Build: Wine Storage, Floating Shelves, Cabinets and more!
      • DIY Living Room Projects: Built-ins, Wall Treatment, Beams, and More!
      • Staircase Makeover: Carpet to Wood Stairs
      • Fall One Room Challenge 2021: Game Room Makeover
  • DIY Home Decor
    • Furniture Flips
    • Dollar Tree Crafts
    • Small Wooden DIYs
      • 3 DIY Farmhouse Trays to Make
    • Wall Decor
  • Fall One Room Challenge
  • Seasonal
  • Holiday
  • Instagram

How to Paint a Brass Fireplace: Quick and Easy

September 23, 2021DIY Home Decor

When we first moved into this house, one of the first DIY home projects that I knew would be quick and easy, but give me a big bang for my buck was painting the outdated, brass fireplace.

Check out how to paint a brass fireplace below, I promise you, it’s super easy. My number one recommendation with this project is to get the right spray paint. You are definitely going to want a high heat tolerant paint if painting a functional fireplace.

This quick and easy DIY tutorial will show you how to paint a brass fireplace. This will update your home immediately! #paintedfireplace #diyhomeprojects #DIYpaintprojects

How to Paint a Brass Fireplace

There are only a few materials for this easy project that you will need, again, pay attention to the type of spray paint you use!

Materials needed:

  • painters tape
  • brown craft paper
  • matte high heat spray paint (I used Rustoleum High Heat Automotive Paint)
  • razor blade (optional)

Grab what you need from Amazon!

What to do:

This quick and easy DIY tutorial will show you how to paint a brass fireplace. This will update your home immediately! #paintedfireplace #diyhomeprojects #DIYpaintprojects

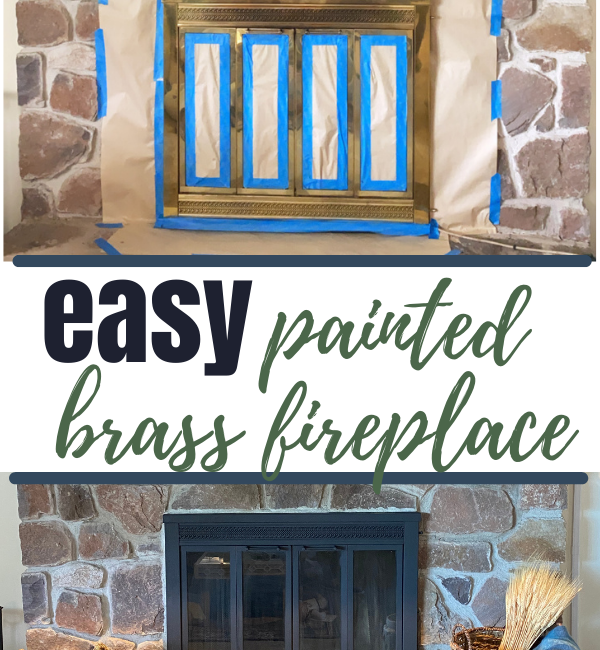
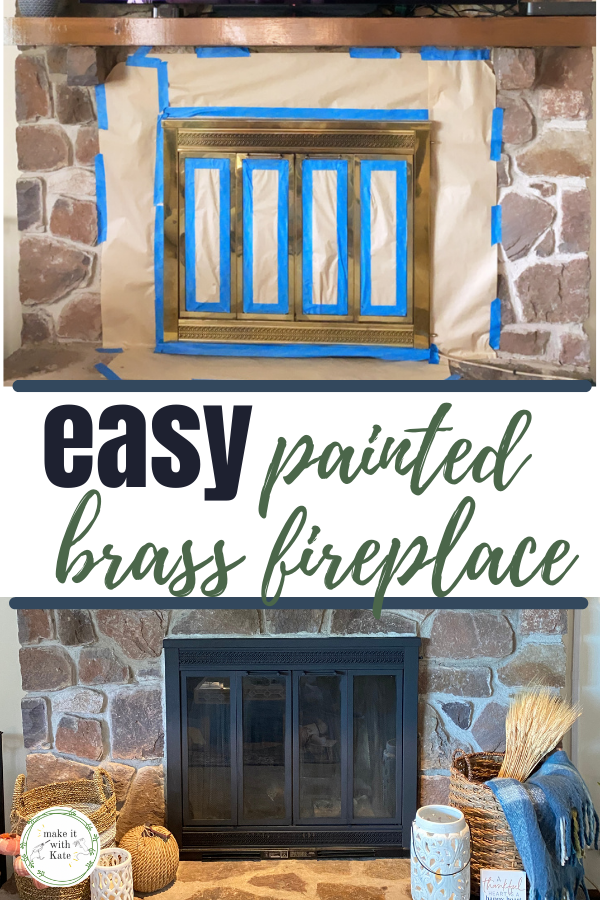
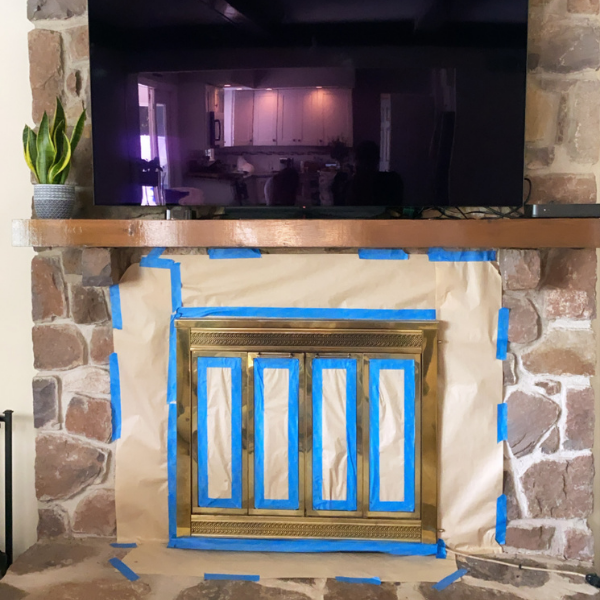
Step 1. Prep the fireplace. I know this seems time consuming but trust me, you are not going to want to get spray paint on your surrounding materials, especially if they are porous like stone or brick. The glass will be more forgiving (see why below).

Thoroughly wash the brass with soap and water to cleanse of any residue and let dry completely.

Prep the space by cutting brown craft paper to size of the glass panels and then large sections to cover the material on the outside of the fireplace.

Tape the paper in place keeping the edge of the tape along the edges of the brass fireplace.

This quick and easy DIY tutorial will show you how to paint a brass fireplace. This will update your home immediately! #paintedfireplace #diyhomeprojects #DIYpaintprojects

Step 2. Use your high heat spray paint to completely cover the brass fireplace.

*Tip: when using spray paint, make short light ‘strokes’ with the sprayer across the surface. This will keep the paint from pooling, resulting in drip marks down your fireplace.

Repeat this process resulting in two coats of the high heat spray paint.

Step 3. Once dry (it will dry quickly) remove all of the tape and the paper from the area. If any spray paint gets on the glass panes, simply take a razor blade and scrape the paint off, it’s like magic!

This quick and easy DIY tutorial will show you how to paint a brass fireplace. This will update your home immediately! #paintedfireplace #diyhomeprojects #DIYpaintprojects

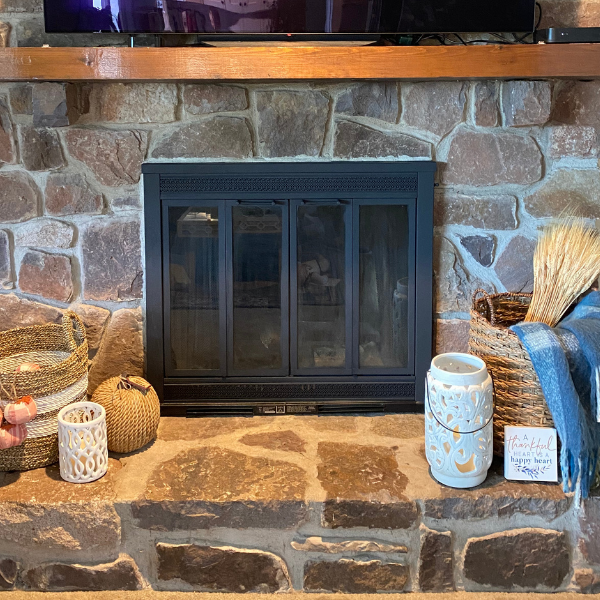
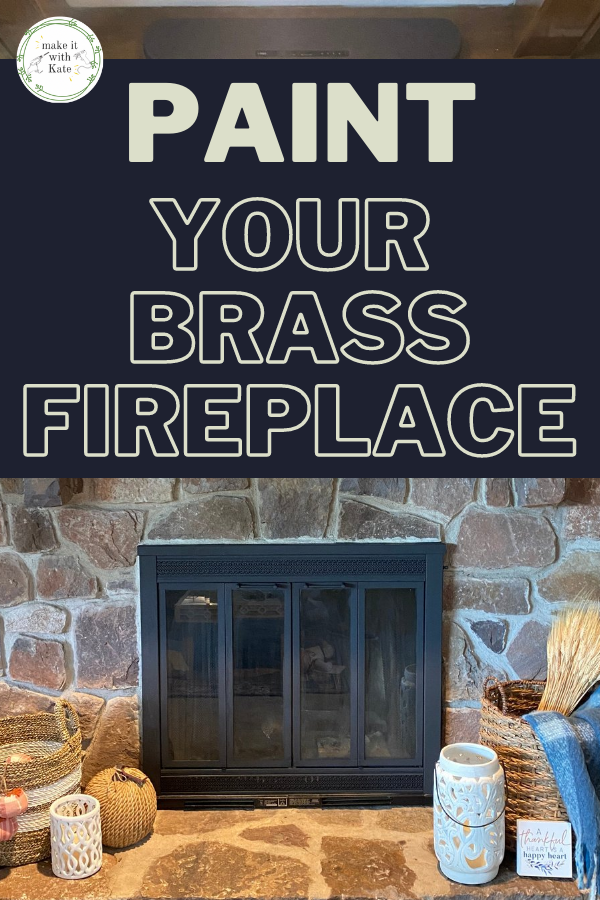
Enjoy your newly painted brass fireplace

You will be amazed at just how much this simple DIY can really modernize and transform your space!

This quick and easy DIY tutorial will show you how to paint a brass fireplace. This will update your home immediately! #paintedfireplace #diyhomeprojects #DIYpaintprojects

Don’t get me wrong, I love a well-placed gold accent in most of my projects, like when I painted this DIY Wall Sconce from a Table Lamp gold, but the brass fireplace is not one of my favorite looks. A classic matte black however looks really updated and sleek. Enjoy your painted fireplace!

More Simple DIYs for your Home:

  • DIY Closet Shelves: Hall Closet Organization on a Budget
  • DIY Tiered Tray for Home Decor
  • Stock Cabinets for Built ins: What they are and where to get them

Related Posts:

  • 7 Easy DIY Fall Centerpieces
    7 Easy DIY Fall Centerpieces
Previous Post: « Bedroom Light Wall with LED Wall Lights
Next Post: Game Room Makeover: Fall One Room Challenge 2021 (Week 1) »

Reader Interactions

Leave a Reply Cancel reply

Your email address will not be published. Required fields are marked *

Primary Sidebar

Search for what you need

Welcome!

Find inspiration for DIY home projects and crafts on a budget! You can usually find me with either a hot glue gun or a can of spray paint in hand 🙂

Get social:

  • Instagram

Recent Posts

  • Double Picture Frame Moulding DIY
  • 7 Easy DIY Fall Centerpieces
  • Fall House Decoration to Add Warmth
  • DIY Stair Runner with Corner Turn
  • DIY Stair Risers on a Budget

makeitwithkate

🪚 Transforming builder grade into modern colonial
🔨 DIY builds and decor
🪑 Furniture flips

Make it with Kate | DIY Blog
These motorized roller shades from @smartwingshome These motorized roller shades from @smartwingshome are the final missing piece to this living room makeover! I just love how easy they are to use with the remote or as part of my home automation. The color is the perfect neutral and the linen provides great light-filtering. These are the SmartWings Motorized Light Filtering Roller Shades 70% Blackout Linen, color Caramel.
🌟🌟 L I V I N G  R O O M  R E V E A L 🌟🌟 what’s new? Wall treatment, door and window trim, stained beams, updated doors, lighting and paint! DIY is too much fun 🥰 do you have a favorite part? ➡️➡️ swipe to see some progress/before pics! #diyhome #livingroomdecor #moderntraditional #diydecor
🌟The living room I bought versus the one I crea 🌟The living room I bought versus the one I created. 🌟 The number one thing I’ve learned in DIY, is to follow and know the trends, but ultimately find your own style and create what you love, and what you are your family are comfortable in. #diy #diyhome #livingroom #moderntraditional
Here are 5 tips for styling your shelves! 👇

1️⃣ Balance: vary shapes, sizes, and height to create visual interest

2️⃣ Color Coordination: You can group similar colors together or use gradients of a color palette. An easy way to do this is to stick with either warm or cool tones.

3️⃣ Layering: Place larger items at the back and smaller items in front to create depth and visual intrigue, or small items on top of large. 

4️⃣ Negative Space: Leave some empty space to allow the eye to rest and to highlight the items you’ve chosen to display.

5️⃣ Personal Touches: Incorporate items personal to you such as photos, artwork, or keepsakes to make the shelves feel more personal and reflective of your style and interests.
I’m loving how fresh this living room feels now! I’m loving how fresh this living room feels now! #diyhome #moderntraditional #livingroom #diydesign
These doors are DONE! This was a labor of love but These doors are DONE! This was a labor of love but I am happy with how they turned out! The reeded film over the plexiglass keeps the playroom mess out of sight, but the room feels a bit more open this way. More details in highlights! #diyhome I used @retiqueliquidwood to cover the chalk paint without any sanding!
Taking these doors from painted and scratched to w Taking these doors from painted and scratched to wood-grained French doors with @retiqueliquidwood - they are almost done, stay tuned for the end result! I think they will be good! #diydoors
I’m making progress in this living room! Next st I’m making progress in this living room! Next step is to take these beat up, painted doors and make them look like new French doors! I cut large holes in the middle of them and am going to make a plexiglass insert. Here’s hoping!
Let’s take these beams from painted black to a b Let’s take these beams from painted black to a barn wood look. Check out this fun and easy process! What do you think?!
Picture frame moulding in the living room phase 1! Picture frame moulding in the living room phase 1! I updated the door and window trim to a craftsman style, the added double box moulding to the walls, and board and batten to the breakfast bar. Stay tuned to watch this get finished! It’s gonna be good!
I’m switching out the trim work in my living roo I’m switching out the trim work in my living room to add Craftsman moulding to the doorway and window! This is part of a living room refresh, stay tuned for box moulding and updated doors and beams next! #craftsmantrim #craftsmanmoulding #doortrim #diy #doityourself
Sometimes, you just have to go for it. 🔨 🪚🪛
Load More... Follow on Instagram
Copyright © 2025 · Make it with Kate · Hearten Made ⟡
Cleantalk Pixel