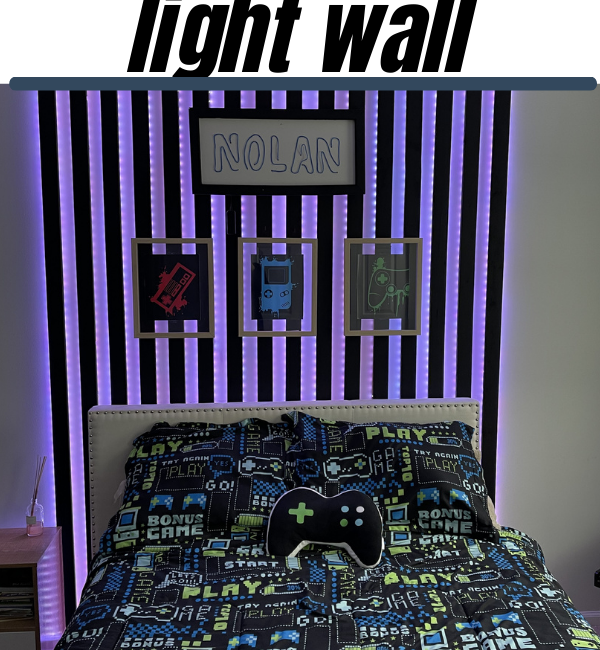
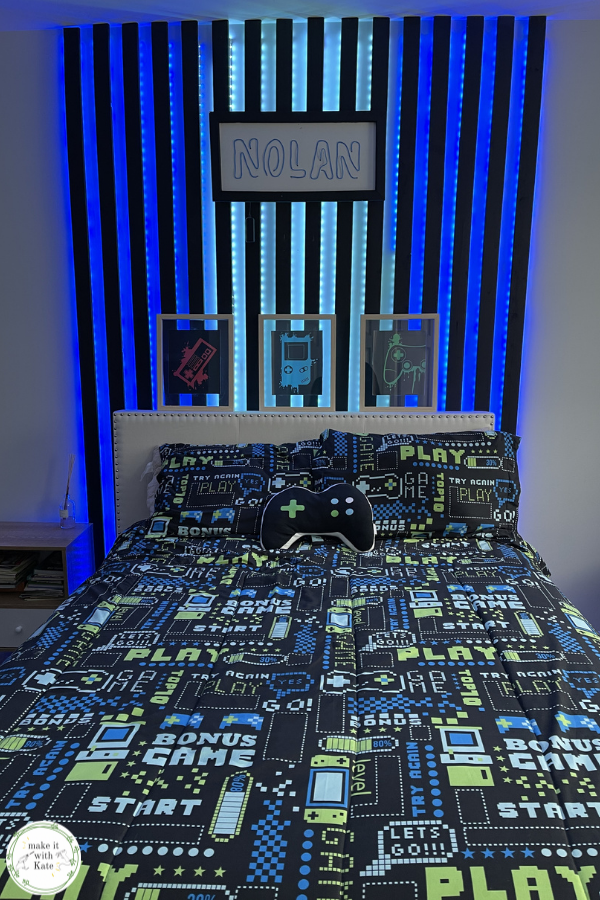
This bedroom light wall uses an accent slat wall wrapped with led lights to create a fun accent wall sure to please anyone.
This bedroom light wall was such a fun accent wall for my son’s bedroom. It’s a fun take on a DIY slat wall, but it’s backlit with LED light strips! Check out how simple this DIY woodworking project is, you could put it anywhere in your home.
Related: DIY Built-in Shelving
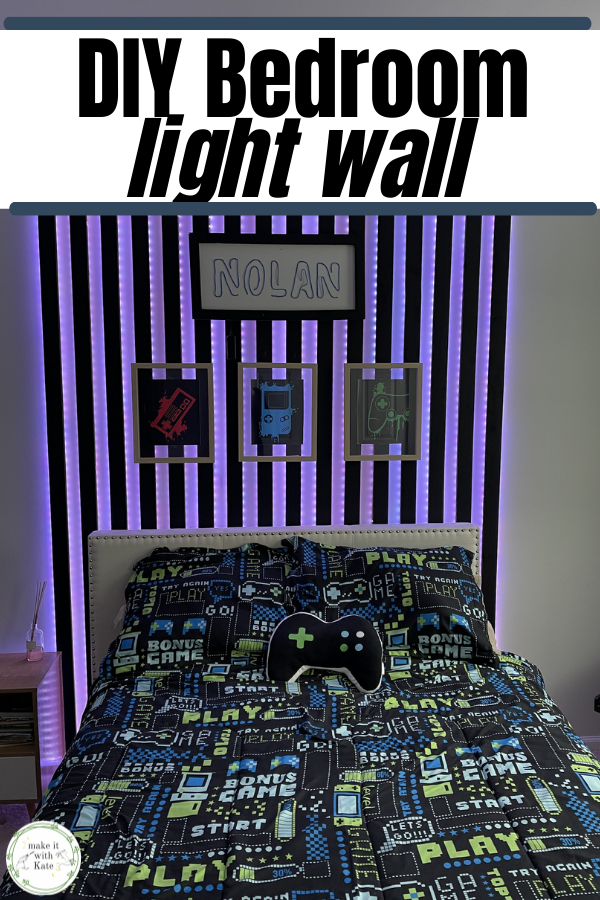
Bedroom Light Wall DIY
LED light strips are all the rage. They are a fun wall to add accent lighting to a room, or behind a TV. My kids love that they are remote control and the options for lighting color and blinking options seem to be endless.
Plus, the strips are adhesive making they a really simple addition to a room.
For this project, I wanted to add an accent wall behind my son’s bed that could act as a light wall as well as a fun non-lit accent wall. I can’t wait to show you how this turned out below.
What you need for the bedroom light wall:
- 1×2 furring strips
- 1×3 furring strips (same amount as the 1x2s)
- black paint
- LED light strips
- nail gun
- level
- tape measure
How to make the LED accent wall
Before I walk you through the entire process, just a couple of quick notes. I won’t add super specific measurements because this is a custom project, and will depend on the size of your wall and the space you want to fill when replicating this process.
For more custom projects, check out the DIY mudroom build with lockers on this site too.
Additionally, I chose to cut on cost by using furring strips instead of common board. This cut down on my total cost significantly (only 1/3 of the cost for furring strips vs. common board), however the boards can be very crooked and warped so choose carefully if going this route!
Step 1.
Plan the space. I like to map out my wall projects with painters tape to better visualize what the design will look like.
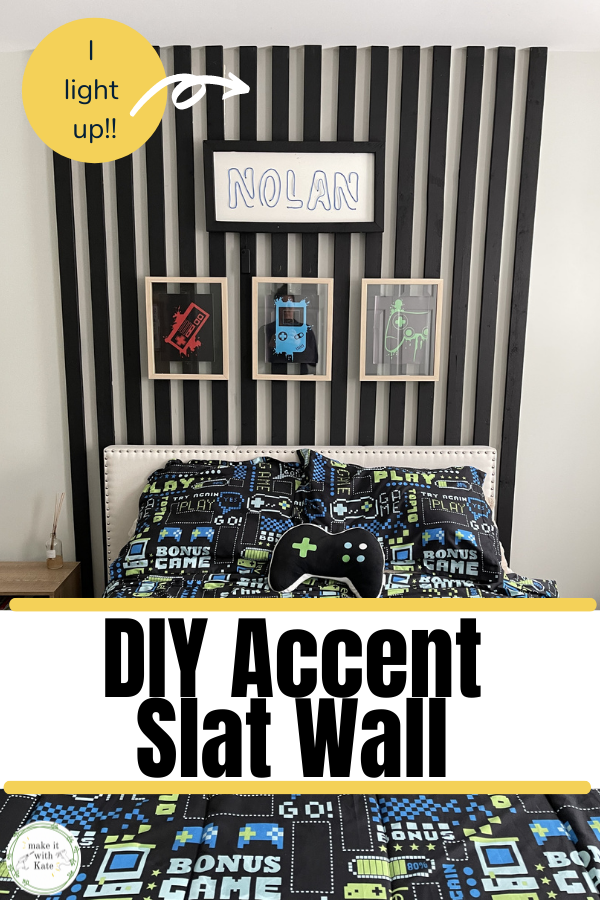
To cut on cost, I chose not to put any wood or lights behind the headboard and instead kind of wrapped the headboard with the backlit slats.

Step 2.
Attach 1×2 furring strips to the wall with a nail gun. Space them evenly by using a spacer cut out of spare wood.
To use the spacer, place a board on the wall ensuring it is perfectly level. I like to work from the middle outward but that is personal preference. Then, decide how far apart you want the boards spaced and cut a scrap piece of wood in that length.
Then, instead of measuring and leveling each slat that will be attached to the wall, you can simply place a spacer next to the already attached board and place your new board on the other side of the spacer.
This is a huge time saver.
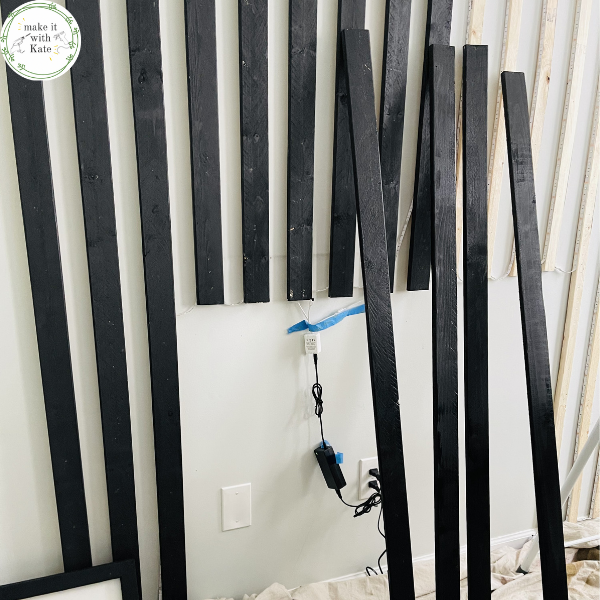
Continue adding the 1x2s to the wall until the entirety of the accent wall is full with 1x2s.
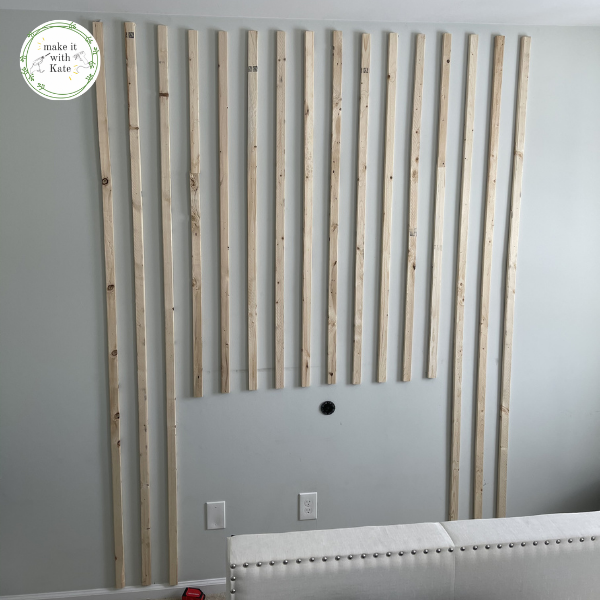
For this project, the 1x2s won’t be seen, these will be where the lights are wrapped behind the 1x3s. But, when measuring the spacing of these keep in mind that they will have a 1×3 on top of them and you will need to account for that when considering the gap between boards that will be visible on the finished accent wall.
Step 3.
Wrap the 1x2s the LED lights. These are adhesive light strips so you can simply weave them up and down the edges of the 1×2 pressing them onto the sides.
When adding the lights, be sure to consider where they will be plugged in and where the remote sensor will be so that isn’t hidden behind furniture.


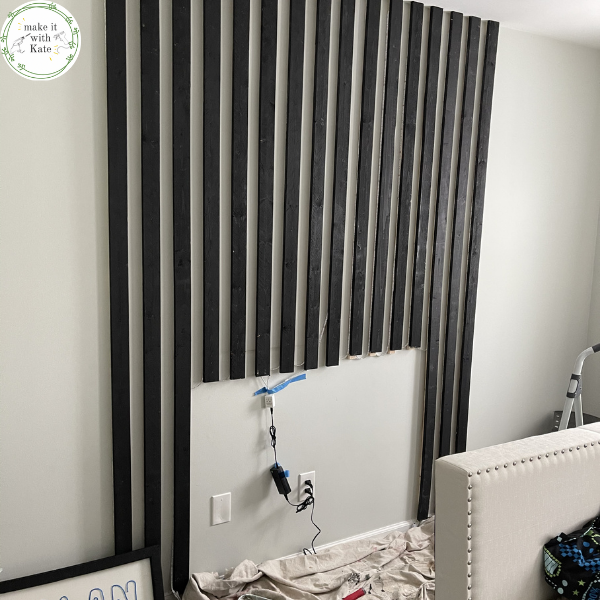
Step 4.
Time to add the visible facade that will appear to be backlit!
Paint the 1x3s with black paint (or whatever color you want for your accent wall). I used Behr limosouine black.
Attach the 1x3s to the front of the 1x2s with a nail gun. I used the same spacer method as I did with the 1x2s. Attach the first 1×3 ensuring that it is level and attached with the 1×2 directly in the middle behind the 1×3, then use the spacer to attach all of the 1x3s to the 1x2s.
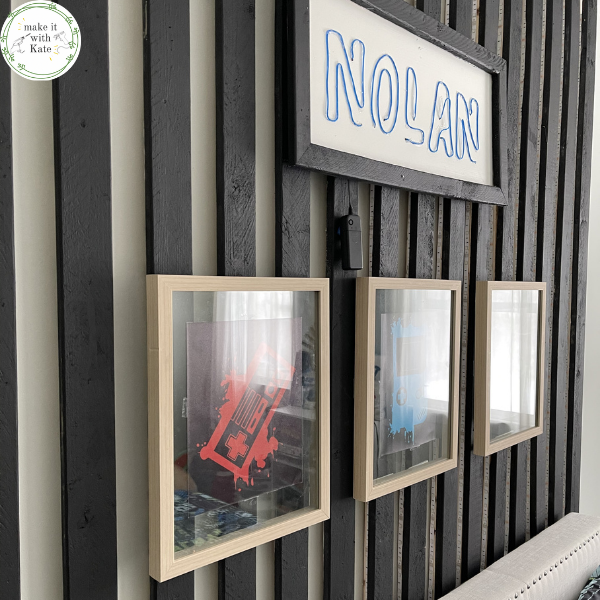
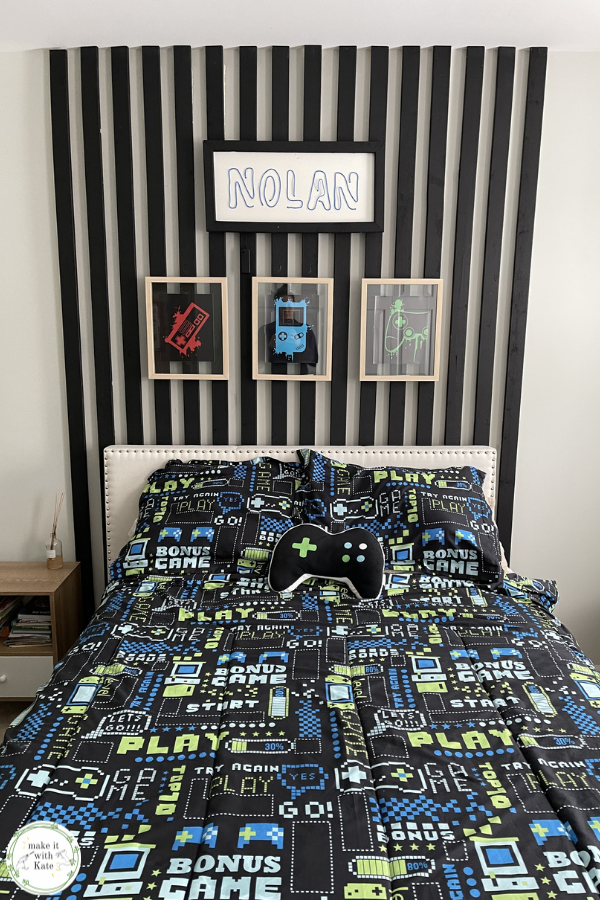
Voila! You have a DIY bedroom light wall sure to please anyone! This method can be used in so many different ways. Imagine how fun this would be in a home theater…
Enjoy making your own bedroom light wall
If you make a DIY light wall in your home, tag me on instagram, I would love to see it! (additionally, you can find a highlight bubble on this whole process over there)


Leave a Reply